I hope you are all well and had or are still having a lovely time with your family and loved ones over the holidays. If this post turns into a rant, I apologise in advance but I feel this just has to be said.
Earlier this week my mum got the January copy of a major German women's magazine in the post and most of the front page was covered with stuff about the new version of the diet they have been pushing on people for as long as I can remember. It doesn't matter which magazine I was holding in my hands because if you go to a news stand at this time of the year you could pick up pretty much any magazine aimed at a female market and there would be yet another new year's diet somewhere in there.
When I see those magazines I can't help but be angry. Not just annoyed, but angry. Angry because everybody keeps blaming fashion magazines and advertising for young women having low self-esteem and body-image issues yet nobody seems to care about the effect these magazines that are marketed as being for 'real women' and we, ourselves, have on each other.
Think about the last time you felt truly fat and ugly. If you have never felt ugly in your life, then I'm incredibly jealous, but for everyone else - I don't know about you, but I don't feel fat or ugly when I look at a fashion magazine in which a 15 year old super-skinni girl is wearing some fabulous dress. I know that a) I'm old and b) even if I stop eating for a year and exercise like crazy I'll never look like that.
And that's ok because a) for me fashion is art, and if the dress looks good on a super-skinny girl, then that's what it should be photographed on, and b) some things look good on some people, some on others. I know that I'll never be able to pull off the whole heroin-chic thing unless I start taking illegal substances, but I also know that I probably look better in a fitted 1950s dress than someone who's a size 0 (or at least that's what I keep telling myself). So while I obviously don't know what looking at a fashion magazine makes you feel like, I don't feel it affects my self esteem.
What does affect how I see myself though are the people around me and the magazines I started off talking about. When I think about the times I have felt miserable in my skin (and yes, just like you, I don't like to really think about those times either) over the last 5 years, I definitely don't think about looking at models.
What I think about are past-boyfriends telling me that I had put on weight (after complaining that the dinner I had just cooked for them didn't have cream or meat in it).
I think about family friends telling me that it's amazing that I had lost so much weight (when all I could think about was that earlier that morning I noticed that I could see my ribs sticking out in a bad way).
I remember so-called friends telling me that I should wear make-up more often because 'it makes [me] look less tired and so much more attractive' (after I had just pulled a 100hr week to finish collecting data for a conference deadline and had spent the whole day trying to not cry because I was so exhausted).
I think of a family member telling me that I looked fat (and yes, that's pretty much a direct quote) in the new cardigan I had just spend a week knitting. - I haven't worn that cardigan since.
But I also remember reading the January issue of said magazine for the last 10 years or so and even though I never left the healthy BMI range, even when I was heavier - until a couple of years ago I would look at the success stories in there and think to myself - they were about my size and lost 15 kilos. Does that mean I have to loose that much weight as well? And does it make me a lazy person if I don't want to loose 15 kilos but just 5? And if they had to loose 15 kilos, does that mean I'm actually fatter than I think I am?
I don't mean to say that dieting is a bad thing per-se, and if you are trying to loose weight then eating less calories than what your body burns is always going to be the only natural way to do that. And I most definitely think that a healthy diet is really important. But what I'm worried about is that every January women go on a diet for the wrong reasons. I hope that I have never been the reason for one of you feeling unhappy in your body and if you have just been reading a womens' magazine, there are things so much more important than how much you weight and how much make-up you are wearing.
If you make one New-Year's resolution this time around, don't make it the usual 'I will go on a diet', decide to be good to yourself by eating healthy and by exercising a bit and to be good to the people around you by telling them how beautiful they are, not because they have lost weight but because of who they are.
Note: Thank you, Anna Blanch for comments on the draft version of this post.
Wednesday, 28 December 2011
Monday, 19 December 2011
Stuffed Shells

I talked to a friend today who told me 'at least [I] do something other than work...like write a blog...' since I don't wan't to seem like a workaholic (I really am NOT a workaholic - if there's a new episode of Pan Am or Hart of Dixie or Once Upon a Time or anything else along those lines I will drop everything to watch said episode, so that is proof enough that there is no workaholicness going on, right? And yes, I know my taste in TV shows is debatable) I am finally getting around to finishing this post.
The lesson we should have learned from this is that the only way I get stuff done is if someone makes me feel like a workaholic...or something along those lines :)
Believe it or not, but this was the first time I made stuffed shells. And I am in love. None of that awkwardness you have when you're stuffing cannelloni or the boringness of lasagne. Don't expect me to make either again anytime soon. I used Heidi Swanson's recipe from a few months ago for quantities and the amount of filling was perfect to make enough shells for a large (32cm) baking dish. For some reason I had a blonde moment when I thew the entire pack of shells into the pot (I ended up using about half of them...oops, but they made a really nice dinner later on).
Anyhow, I was originally planning on giving this recipe a slightly fancier name - I wanted to call them autumnal stuffed shells (because they have butternut squash in them) or something similar but the fact that Christmas is just around the corner and it's definitely not autumn anymore stopped me from going for that option.
Unfortunately that meant I was out of ideas. So we're stuck with the boring name. And a not so exciting photo because I haven't mastered the art of taking nice pictures at night.
So, let's make some stuffed shells to impress someone cute (or very lovely flatmates in my case)!
And if you want some music to listen to while cooking, how about some Foreign Slippers.
And if you want some music to listen to while cooking, how about some Foreign Slippers.
Stuffed Shells
2 large tins Peeled Plum Tomatoes
A generous splash of Olive Oil
Ground Cinnamon
1 Clove Garlic, crushed
Salt & Pepper
250g peeled & roasted Butternut Squash
250g Ricotta Cheese
1 Egg
100g Parmesan Cheese
Zest of 1/2 Lemon
Some Salt, Pepper & Nutmeg
Some Salt, Pepper & Nutmeg
Some dried Pasta Shells (Heidi suggests about 25-30 shells)
If you haven't roasted your butternut squash already, do so now.
Then, make a simple tomato sauce. Pour some olive oil into a pan and add the garlic, then turn on the heat.
Wait until your kitchen smells all garlicky (not burnt!) then add the tomatoes. Simmer at a medium heat while you put a pot with enough water on for the pasta.
Boil the pasta until it's al dente (Heidi says the shells will tear if you overcook them, since I listened to her and had no problems I can't tell you whether they'll tear but they were easy enough to handle so save yourself some time and drain them sooner rather than later).
While the pasta is bubbling away (by the way, don't forget about the tomato sauce, give it a stir every once in a while and season it with some salt, pepper and a teaspoon or so of cinnamon) return to the butternut squash.
Mash the squash - yes, I had to go there - and whisk it together with the ricotta, then add the parmesan cheese and lemon zest. Unless you're into eating raw egg, season the filling now, then whisk in the egg.
Preheat your oven to 180˚C.
Rinse the pasta with some cold water so they're not too hot to handle.
Spread out about 1/3 of the tomato sauce in your baking dish.
Fill the shells with about one tablespoon filling each and set them in the baking dish. Sing along to your music to stop yourself from falling asleep while doing so :)
Once your baking dish is filled or you have run out of shells, spread the remainder of the tomato sauce on top of the shells and bake for about 45 minutes.
I hope you have a fabulous week and are getting as excited about all the food you'll eat over Christmas as I am!
Thursday, 8 December 2011
Baked Apple Pancakes
So how have you been? Has your flat transformed into Santa's Grotto or something along those lines yet?
We decided to embrace the Christmas spirit on sunday and rather than making sweet potato pancakes we made baked apple pancakes. I don't know about you but there is very little that makes me happier on a cold winter evening than baked apples. And these pancakes give you the same warm and fuzzy feeling on the inside that baked apples give you (or is that just me?) without having to wait forever while the apples bake away.
I think you should make these this weekend and while you are in the kitchen, how about you listen to Frankie Sumatra's Christmas Cocktails (anything he touches turns to gold and this is no exception). Oh, and while you are sitting in your hopefully very cosy kitchen, send me some warm thoughts because I will probably be freezing my fingers off in Stubai this weekend.

Baked Apple Pancakes
3 Apples (mine were fairly medium)
2 tbsp Orange Juice
A few drops Almond Extract
2 tbsp Maple Syrup
Cinnamon, Nutmeg, Cloves (and whatever other spices you can think of that you can find that remind you of Christmas)
2 Eggs (lightly beaten)
350 ml Buttermilk
225 g Flour
1 tsp Bicarbonate of Soda
1/2 tsp Salt
50 g Sugar
Zest of 1/2 Lemon
Vegetable Oil or Butter
Peel and grate the apples. If you are like me and can't go near anything resembling a grater without trying to dismember yourself, the trick is to keep grating and finishing the apples before you bleed out.
Then you transfer the grated apples and orange juice into a small saucepan and heat things over a medium heat. While the apples heat up you can go on a hunt for band aids. Give the apples 5 to 10 minutes so they soften but don't turn into applesauce.
Add the maple syrup, some almond extract and some spices (I kept adding stuff so I don't have a clue how much I added in the end). You want the apple mix to taste the way baked apples do so be generous with the spices.
Add the buttermilk and then the eggs.
Mix all the dry ingredients in a large bowl and then fold in the wet mix (don't worry if there's still some lumps left).
Heat a large skillet over a medium heat. This time it is really important that you keep the heat on the low side of medium because the apples will soften even further as the batter heats up and if you bake the pancakes too quickly they will burn on the outside while the inside is nowhere near done.
Heat some butter or oil in the skillet and drop a few spoonful of batter in there for each pancake (I prefer small pancakes because they seem to bake more evenly throughout with the pans I use).
Be patient while the pancakes sit in the pan, I don't think I have ever waited that long for pancakes to be done but it was well worth the wait. They will be softer than plain pancakes because of the apples but if you are worried that they are not quite done but that they are getting starting to look more like charcoal than pancakes, you might want to heat your oven to 100˚C and give them another 10 minutes or so in there while you make the remaining pancakes.
These lovelies love to be drowned in more maple syrup while they are still warm but they also make a perfect monday morning lunchbox addition :)
I hope you have a fantastic weekend!
Saturday, 3 December 2011
Christmas Puke
I don't like Christmas.
Here, I said it, you're more than welcome to start judging me right now. Don't get me wrong, I like coming home for the holidays

spending time with my parents, seeing friends from high-school, quiet advent sundays, making cookies

and all that kinda stuff. Ok, and I really like presents :) it doesn't even matter whether I get them or whether I'm thinking about presents for other people - it's presents that's all I care about.

© Kathleen Dowling

© Kathleen Dowling
But I hate that it's cold all the time, that it's dark all the time, that I seem to have a cold for 3 months, that people get really stressed out and the thing that gets me the most is all the decoration (don't get me started on the climbing Santas that seem to pop up everywhere) and Christmas markets.
The problem is that my friend Kathleen loves everything Christmas - even the stupid Santas.
So when I moved to Berlin last weekend (yes, I have finally moved) the first thing I did after dropping off my stuff at the flat was go to a Christmas market with Kathleen. Below, you can find some fine specimens of what Kathleen and I call 'Christmas Puke' i.e. everything she loves taking pictures of and I refuse to acknowledge when we go to a Christmas market :) (oh, and if you're wondering they're not all from the same market - no, we do the Kathleen-loving-all-things-Christmas-and-me-complaining-about-the-decoration thing every year...sometimes even multiple times)


Ok...even I kinda like the last one.
The reason I am telling you all of this is because I have another confession to make - after spending my life not really liking Christmas, I went to KaDeWe today to look at the Christmas decoration (in my defence, the only other thing I could think of was doing some work).
Kathleen, what have you done to me?!?!?
Anyhow, I hope you have a lovely second advent weekend with lots of cookies or perhaps some nice tea cake. I decided to give the whole cooking/baking thing another go this afternoon and made the Monastery of Angels Pumpkin Bread Louisa wrote about last week and if you had slight addiction problems with the peanut butter & coconut quick bread this summer the way I did, give this one a try, it's going to be a good wintery alternative I think (especially if you use about twice as much cinnamon as the recipe suggests).
So when I moved to Berlin last weekend (yes, I have finally moved) the first thing I did after dropping off my stuff at the flat was go to a Christmas market with Kathleen. Below, you can find some fine specimens of what Kathleen and I call 'Christmas Puke' i.e. everything she loves taking pictures of and I refuse to acknowledge when we go to a Christmas market :) (oh, and if you're wondering they're not all from the same market - no, we do the Kathleen-loving-all-things-Christmas-and-me-complaining-about-the-decoration thing every year...sometimes even multiple times)

© Kathleen Dowling

© Kathleen Dowling

© Kathleen Dowling

© Kathleen Dowling
Ok...even I kinda like the last one.
The reason I am telling you all of this is because I have another confession to make - after spending my life not really liking Christmas, I went to KaDeWe today to look at the Christmas decoration (in my defence, the only other thing I could think of was doing some work).
Kathleen, what have you done to me?!?!?
Anyhow, I hope you have a lovely second advent weekend with lots of cookies or perhaps some nice tea cake. I decided to give the whole cooking/baking thing another go this afternoon and made the Monastery of Angels Pumpkin Bread Louisa wrote about last week and if you had slight addiction problems with the peanut butter & coconut quick bread this summer the way I did, give this one a try, it's going to be a good wintery alternative I think (especially if you use about twice as much cinnamon as the recipe suggests).
Wednesday, 16 November 2011
Things I love these days
So since I'm not really cooking these days and since I have been mainly walking through poster sessions for the last week, how about we talk about some of the things I have been obsessing about lately :) perhaps you'll like some of them as much as I do.
1. I have had this song on repeat lately. There was a slightly embarrassing 24 hours when I rediscovered Nick Lachey in my iTunes library but we're gonna keep that our little secret, right? :)
2. I had a prosciutto sandwich the other day and it had strawberry jam on - and it was amazing! If you try one new flavour combination this year, make it this one!

3. Alex and Patton at East Coast Kitchens have started doing Thanksgiving posts. I can't wait to see what they'll do over the next two weeks.
4. I read Heidi Swanson's recipe for lemony olive oil banana bread earlier this month and mentally earmarked it. That has kinda turned into an obsession - I want to know how it tastes so badly I'm starting to feel like a kid at Christmas. Has anyone tried the cake yet? I think this is going to be the first thing I make once I have settled in in Berlin. And now I'm gonna spend the day thinking about banana bread....
Ok, that turned into a rather short list. I hope you have a fab rest of your week. I might have some exciting photos soon - I'm going to a wedding in West Virginia this weekend and I have heard great things about the countryside there.
Friday, 11 November 2011
It's been a while
Hello there, it's been a while, hasn't it?
I know...I could have written about comfort food etc, but if you want the slightly embarrassing truth - I haven't cooked a single meal since my last post.
First I was hiding away from the world writing like a crazy person, then I moved the last 7 years of my life back home, just to hide away from the world a bit more do continue writing - I was at home for 4 weeks and I pretty much only left my room to eat and the house to go running (don't tell anyone, I'm slightly horrified by that part) and now I have been travelling for the last two weeks.
So, you see - no time to cook.
But I thought I could share some photos of the last two weeks with you.
We went on a road-trip through coastal Georgia and Florida because I didn't really see the sun this summer (in case you haven't heard me complain about my summer - I didn't have one - wherever I went it was raining and cold). So where do you go in November to find some sun?
 The last time I drove past this sign it was raining like crazy and hadn't really stopped in 3 days. So this was obviously a good sign.
We stopped at The Lady & Sons (I really couldn't not go since I am slightly obsessed by that video of Paula Deen making deep-fried cheesecake)

We went over a gazillion bridges (have I ever mentioned that I love driving over bridges?) and every time I saw one coming up my mum had to get out her camera to take a picture...

We saw 4 lighthouses (and didn't go up a single one)

We went to an orange grove (I love going to orange groves and picking out my own oranges)


My mum had her very first breakfast burrito (that one took some convincing)

We went shelling

And then my mum took embarrassing photos of me in my bikini which you're not gonna see because before anyone ever sees me again in a bikini I'm gonna go on a diet or something...anyhow...lots of fun, lots of writing, and when I get back home in two weeks my suitcase and I are moving to Berlin, but that's a different story...
I know...I could have written about comfort food etc, but if you want the slightly embarrassing truth - I haven't cooked a single meal since my last post.
First I was hiding away from the world writing like a crazy person, then I moved the last 7 years of my life back home, just to hide away from the world a bit more do continue writing - I was at home for 4 weeks and I pretty much only left my room to eat and the house to go running (don't tell anyone, I'm slightly horrified by that part) and now I have been travelling for the last two weeks.
So, you see - no time to cook.
But I thought I could share some photos of the last two weeks with you.
We went on a road-trip through coastal Georgia and Florida because I didn't really see the sun this summer (in case you haven't heard me complain about my summer - I didn't have one - wherever I went it was raining and cold). So where do you go in November to find some sun?

We stopped at The Lady & Sons (I really couldn't not go since I am slightly obsessed by that video of Paula Deen making deep-fried cheesecake)

We went over a gazillion bridges (have I ever mentioned that I love driving over bridges?) and every time I saw one coming up my mum had to get out her camera to take a picture...

We saw 4 lighthouses (and didn't go up a single one)

We went to an orange grove (I love going to orange groves and picking out my own oranges)


My mum had her very first breakfast burrito (that one took some convincing)

We went shelling

And then my mum took embarrassing photos of me in my bikini which you're not gonna see because before anyone ever sees me again in a bikini I'm gonna go on a diet or something...anyhow...lots of fun, lots of writing, and when I get back home in two weeks my suitcase and I are moving to Berlin, but that's a different story...
Wednesday, 14 September 2011
Zucchini and Pea Soup

I know...it's been forever and I don't know when I'll write again (I already feel bad starting a post this way) but it's crunch-time and I must admit that my ready-meal consumption has skyrocketed and even I am happy to admit that I am operating on waay to little sleep these days. If you feel like coming for a visit and cooking us some homemade meals Ashley and I will love you forever :)
Anyhow, a while back I actually cooked something that involved more than just a pan and some eggs, and since it was really nice I thought I could share this summery soup with you. It's perfect at the end of a long, end-of-summer day and if you (like me) live in a place where you can only imagine what summer is like (and you are worried that you might start glowing in the dark some time very soon) this soup does a really good job at making you feel like it's summer.
I got the idea for this soup in a copy of Für Sie magazine that I found in the waiting room while I was waiting for the doctor back home to fix my wrist (and guess what - I walked out after 10 minutes and it hasn't hurt since). Anyhow, so I saw this recipe and had obviously left my phone at home and who brings paper and a pen to the doctor's (if you can read all the trashy magazines on the planet while you wait), so I was sitting there trying to memorise the recipe and I have the slight suspicion that I looked really stupid sitting there staring at one single page for nearly 10 minutes.
But, I still remembered the recipe two weeks later, and then I changed all the quantities and decided that I could turn a slightly unhealthy soup into something that I believe is actually good for you.
So after all of this, if you haven't died from boredom, here is the recipe :)
Zucchini and Pea Soup
500g Zucchini
300g Peas (I used frozen ones)
½ Onion
1 Garlic Clove
Some Olive Oil
800 ml Vegetable Stock
300-500g Low Fat Yoghurt (you can go for the full fat version, I'm sure it'll taste nice, but the low fat one works beautifully and why eat calories that feel slightly wasted if you can just enjoy some chocolate after having the soup instead :) )
Salt, Pepper, Nutmeg
A few fresh Mint Leaves
Wash the zucchini and cut it into slices (try to get them to about the same thickness so they'll all be done at the same time, but don't worry too much about it, nobody is going to see them later anyway)
Dice the onion and mince the garlic. Heat some olive oil in the stockpot you will use for the soup and sauté the onion, once the pieces are see through (I just had to stop myself from writing translucent, this whole writing-up thing is getting to me, I'm starting to use weird words...), then add the garlic and wait until your kitchen smells all lovely and garlicky.
Add the zucchini and give it a couple of minutes of love and affection by stirring every once in a while while you sauté it before you add the peas.
Give things a quick stir before you add the stock.
Simmer until the zucchini is tender (i.e. not mushy) and the peas are soft as well.
Add some mint, then take the pot of the heat and puree everything until you are looking a nice and smooth green soup.
Stir in the yoghurt - I like to have soup with my yoghurt so I tend to use the full 500g, if you're not that keen or just not sure, start with about 300g, then add more if you think it could do with some more.
Season with some salt, pepper and nutmeg if you don't feel the stock isn't already enough.
Enjoy with some bread or before said chocolate :)
All right, I hope you are having a lovely time and I'll try to write again some time soon, but I can't really promise anything until I submit (hopefully really soon).
Wednesday, 17 August 2011
The internet and me
Hello lovelies, you might have noticed over the last few days that I am missing some photos in some of the posts. Blogspot seems to have deleted the majority of my uploaded photos so I am really sorry if you can't look at pictures for the recipes.
I am trying to fix this but this is a rather slow process (i.e. I am re-uploading 2 years of photos) so bear with me while I try to get the blog back to being a colourful collection of photos.
Update: So it seems that rather than just deleting my photos it's now also deleting old posts when I try to upload the photos again.
I guess I'll be making the move to another platform sooner rather than later. I'll keep you posted about what is happening but it's probably gonna have to wait until the weekend because I've got more pressing things (i.e. this current chapter) to do beforehand.
Saturday, 13 August 2011
Polenta Pancakes

Not sure what to have for breakfast tomorrow? Well I have an idea for you.
I don't know about you but I love most things to do with corn - popcorn, cake with polenta, polenta by itself, cornmeal in muffins, grits, corn on the cob, cornbread (especially cornbread)...I can't really think of anything else right now but you get the point :)
So in the quest for the perfect pancakes I decided that since corn makes most things better that should transfer to pancakes as well.
And guess what, I was right :)
I called this recipe polenta pancakes but I actually used a mixture of cornmeals rather than 'proper' polenta but we can probably agree that mixed cornmeal pancakes sounds kinda stupid. I hope you like them anyway!
Polenta Pancakes
Cornmeal:
85 g Cornmeal (I use 1/2 super fine polenta and 1/2 medium maize meal (so that's slightly finer than grits))
A pinch of Salt
375 ml Milk
Dry Mix:
190 g Flour
1 tsp Baking Powder
1/2 tbsp Sugar
Wet Mix:
1 tsp Vanilla Extract
325 ml Milk
2 Eggs
Butter
Make some cornmeal by whisking the cornmeal and salt into the milk and heating it over a medium heat (while stirring) until the milk is all absorbed (i.e. if this were porridge it would be waaay too thick). Allow the cornmeal to cool before you continue with the next few steps.
Mix the dry ingredients and set them aside.
Whisk the wet ingredients together and then mix them in with the cooled cornmeal.
Add the dry mix and stir things until everything is combined, but make sure you don't overwork the batter.
Heat some butter in a heavy bottomed pan and make some glorious pancakes.
These pancakes are lovely on their own but shine with some golden syrup and some fresh berries.
Oh, and since the recipe makes quite a lot of them, they are really nice the next day as well.
Wednesday, 10 August 2011
Zucchini and Tomato Bake

My friend Kathleen introduced me to this bake. We made the precursor to this recipe and it was based on a sauce we made from one of those semi-ready-meal pouches (which shall remain nameless) and I was horrified to discover that it was a) super yummy and b) actually a really good idea (I am normally slightly disturbed by the things you are supposed to be able to make with them).
Anyhow, so I am slightly embarrassed to admit that I went to my local supermarket and actually looked for that stuff, but I couldn't find it.
So today we will be making a home-made, non-MSG-filled, still-super-addictive version of the packet-amazingness.
Zucchini (Courgette) and Tomato Bake (per person)
1 medium Zucchini (about 200 g)
1 Tomato
Olive Oil
1 tbsp Cream Cheese
1 tbsp Nutritional Yeast
1 tsp Oregano (and other herbs you like)
1 tbsp Tomato Puree (optional)
200 ml Stock (or water and about half a stock-cube) - if you are making this for more than 1 person, reduce the liquid to possibly close to 100 ml per person (I will tell you where to check how much you need in the recipe)
Salt and Pepper
Preheat your oven to 190˚C
Cut the zucchini into rounds about 0.5cm thick. Slice the Tomato (those slices will probably be a bit thicker, but try to stay well below 1cm).
Heat some olive oil in a pan and sauté the zucchini slices until they are slightly browned. All we are aiming for with this is some brown spots on the zucchini, nothing more really.
Mix some of the stock with the cream cheese, nutritional yeast, and tomato puree (if using) until you have a semi-smooth mixture and pour it over the zucchini. If there is pretty much no liquid around the zucchini, add some more now, but they don't need to be covered. Add the tomato slices and some herbs. I like oregano with this dish but the options are endless here, so experiment a bit! Add some salt and pepper if you feel the sauce needs it. Let the sauce simmer for a couple of minutes.
Pour everything into an ovenproof dish (if it looks like the vegetables are drowning in the liquid, don't use all of it) and bake it for 15-20 minutes.
I tend to have this on its own but it's really nice with some bread or pasta as well.
Saturday, 6 August 2011
Summer Fruit Tartlets

I had a rather fabulous dinner with Anna and Preston the other day. We started off with some mussels followed by some really nice salmon with a pistachio crust (you'll get that recipe at some point, I promise!) and then ended it with some fruit tartlets.
Anna and I have made those tartlets on several occasions now and I am in love with them because they are so easy to make, look super pretty and are the perfect end to any meal (yes, the last leftover one was a very lovely end to my breakfast of cinnamon toast crunch yesterday).
I used blackberries and peaches this time, but they are really nice just with blackberries, or apple slices, or cherries, pretty much whatever fruit you have sitting around in your kitchen.
Summer Fruit Tartlets
For the pastry:
90g Wholegrain Spelt Flour
40g Buckwheat Flour
40g Fine Cornmeal (not cornflour, but more like super fine polenta)
50g Butter (refrigerated)
30g Coconut Oil (refrigerated)
1/2 tsp Sugar
A Pinch of Salt
Some Ice Water
For the filling:
Enough fruit to fill 12 mini-tartlets i.e.
24 Blackberries
or 12 Blackberries and 1 Peach
or 1 large Cooking Apple
Some more coconut oil to grease a 12 cup muffin tin.
We are going to make a pastry dough using a method called fraisage (if you're completely lost, have a look at the explanation at Have Kinves, Will Cook). So all you need to do is, mix the flours, sugar and salt, cut in the fats into hazelnut-sized pieces and then rub them into the four mixture until you have pea-sized pieces. You'll want to do this very quickly because otherwise the fat will melt (and the fat is what makes the dough flaky). Bind the dough with some ice water (one or two tablespoons should be enough for this dough) and scrape it together into a shaggy lump.
Now, take a piece of dough and smear it over a floured work-surface. Stare at the lovely thin layer of butter that is now embedded in the flour for a second before you repeat the process with the rest of the dough. Then you shape into a rectangular lump (it doesn't have to be perfect but i find having something to work with makes rolling out the dough a lot easier later) and refrigerate the pastry for at least an hour.
Preheat your oven to 220˚C.
Get the fruit ready - wash whatever needs to be washed, if I'm using peaches, I peel them (stick them into boiling water for 5 minutes, then into an ice-bath, and the skin should easily come off) and then I normally simmer them in a syrup (two parts sugar, one part water) for a couple of minutes. If I use berries, I sometimes only sprinkle them with sugar.
Grease a 12 cup muffin tin.
Take the pastry out of the fridge and roll it out thinly - think 3 mm max. Then cut out 12 round pieces - I use a 6cm cookie cutter, but a glass will work just as fine.
Line each cup with a piece of pastry. You will want to push them in so they are at the bottom of the cup but don't push them in too much or they won't want to come out in one piece.
Fill each pastry with some fruit, sprinkle with some sugar or spices if you feel like it and then bake them for about 20 minutes. I tend to check every couple of minutes towards the end, depending on how much fruit is in the tartlets they will look nice and crisp and fully baked a few minutes sooner or later, so keep checking.

Allow the tartlets to cool slightly on a wire rack and enjoy them with some coffee or ice-cream and a really good conversation :)
Monday, 1 August 2011
Dessert-Amazingness
I made something incredibly amazing for a party my mum had this weekend


It's called Zuccotto and I've decided that this is the dessert you want to make when you're trying to impress your guests. It will take you the better part of a day to make (most of it is waiting for things to cool down or to set though) but all you have to do in the evening is take it out of the fridge, flip it onto a pretty plate and then cover it with cocoa powder - that part sounds like the perfect end to a hectic dinner-party, right?

Oh, and sorry about the not so fabulous photos...I had spent the evening discovering my love for Lillet on ice while doing the dishes and listening to trashy dance music on the radio (cos I'm that cool, you know...).
The only problem right now is that the recipe I made said it was for 12 people. I think whoever wrote the recipe doesn't know how much 12 people will eat. Yes, it will feed 12 if they are your local scout unit or a high-school football team. Otherwise it will not only feed 12 but probably another 12 as well :)
So I've got this great idea - I'll make another one that will be enough for 6 'normal' people. You should probably start stepping up your workout this week anyway, just to be sure...I'll join you on your next run :)


It's called Zuccotto and I've decided that this is the dessert you want to make when you're trying to impress your guests. It will take you the better part of a day to make (most of it is waiting for things to cool down or to set though) but all you have to do in the evening is take it out of the fridge, flip it onto a pretty plate and then cover it with cocoa powder - that part sounds like the perfect end to a hectic dinner-party, right?

The only problem right now is that the recipe I made said it was for 12 people. I think whoever wrote the recipe doesn't know how much 12 people will eat. Yes, it will feed 12 if they are your local scout unit or a high-school football team. Otherwise it will not only feed 12 but probably another 12 as well :)
So I've got this great idea - I'll make another one that will be enough for 6 'normal' people. You should probably start stepping up your workout this week anyway, just to be sure...I'll join you on your next run :)
Friday, 29 July 2011
Does expensive food make you happier?
You were supposed to get a recipe for a raw tomato sauce today but then Patton posted a really nice one at East Coast Kitchens earlier this week so it felt somewhat boring giving you yet another one.
I had a Kobe Beef burger last night though and that got me thinking.

Franzi, Holly, Nora and moi went to the Tübinger Sommerinsel and enjoyed some of the food there. I ended up getting said Kobe Beef burger mainly because I was craving a proper burger (it's been a while).
What can I say, it was a lovely burger but Holly really summed things up - what's wrong with a simple, non-fancy burger that has been made from good quality 'normal' beef?
I was reminded of this TASTE3 talk by Benjamin Wallace (you can watch it at TED) where he discusses whether expensive things actually make us happier. And of an older The Times Magazine (from 28/05/2011, which I can't find online...sorry) where they talked about the 30 things or so you had to eat before you died. Most of them seemed to be rather far away from the UK so yes, you might be able to get the best burger on this planet at Shake Shack but if I have to get on a plane first that turns into one very expensive burger.
Now, the thing I've been wondering about since the Kobe Beef burger is - would I enjoy my Shake Shack burger more just because I had to get on a plane first?
Or, am I enjoying my Tesco's Finest butter more not, because it actually tastes better than a normal organic one but because I pay 10p or so more?
I'm definitely not saying 'let's slum it and start buying the cheapest food we can find' if it's all about how much you pay for it (I could come up with a pretend story about the cheap food, I could also go on a 10 day hike before buying the stuff, that would make for quite a story around it) - I truly believe in fair prices for farmers and even more so in eating good quality food; but how much of my enjoyment of the food comes out of how much I paid for it, or whether a Tibetan monk chanted for 10 days while he made the smelly yak butter I am using for a dish (I don't actually know whether Tibetan monks make yak butter and if they do, whether you can even buy it)?
How important is all of this for my overall enjoyment of the food I eat?
Don't get me wrong, I am that person who buys the hawaiian salt just because it's a really cool story (and it came in a pretty glass jar) or who might have been trying to get hold of real straw straws for the last 3 years just because she can't get the story the people at Manufaktum had in their catalogue about 10 years ago out of her mind (yes, there is a reason why I can't remember anyone's birthdays, it's because my brain prefers to remember useless stuff like this...).
What do you think? In how far is the story around food more important than the actual food?
Note (01/08/11): It's only 30 things you should eat before you die, not 50, but now that I am sitting next to the magazine, let me tell you about the other amazing things as well:
1. Pasta at Da Vittorio, Sicily
2. Curry at Monsoon Forrest, Bandhavgarh, India
3. Oysters at Moran's Oyster Cottage, Ireland
4. Hamburgers at Shake Shack
5. Bouillabaisse at Bacon, Cap d'Antibes
Should I continue?
I had a Kobe Beef burger last night though and that got me thinking.

What can I say, it was a lovely burger but Holly really summed things up - what's wrong with a simple, non-fancy burger that has been made from good quality 'normal' beef?
I was reminded of this TASTE3 talk by Benjamin Wallace (you can watch it at TED) where he discusses whether expensive things actually make us happier. And of an older The Times Magazine (from 28/05/2011, which I can't find online...sorry) where they talked about the 30 things or so you had to eat before you died. Most of them seemed to be rather far away from the UK so yes, you might be able to get the best burger on this planet at Shake Shack but if I have to get on a plane first that turns into one very expensive burger.
Now, the thing I've been wondering about since the Kobe Beef burger is - would I enjoy my Shake Shack burger more just because I had to get on a plane first?
Or, am I enjoying my Tesco's Finest butter more not, because it actually tastes better than a normal organic one but because I pay 10p or so more?
I'm definitely not saying 'let's slum it and start buying the cheapest food we can find' if it's all about how much you pay for it (I could come up with a pretend story about the cheap food, I could also go on a 10 day hike before buying the stuff, that would make for quite a story around it) - I truly believe in fair prices for farmers and even more so in eating good quality food; but how much of my enjoyment of the food comes out of how much I paid for it, or whether a Tibetan monk chanted for 10 days while he made the smelly yak butter I am using for a dish (I don't actually know whether Tibetan monks make yak butter and if they do, whether you can even buy it)?
How important is all of this for my overall enjoyment of the food I eat?
Don't get me wrong, I am that person who buys the hawaiian salt just because it's a really cool story (and it came in a pretty glass jar) or who might have been trying to get hold of real straw straws for the last 3 years just because she can't get the story the people at Manufaktum had in their catalogue about 10 years ago out of her mind (yes, there is a reason why I can't remember anyone's birthdays, it's because my brain prefers to remember useless stuff like this...).
What do you think? In how far is the story around food more important than the actual food?
Note (01/08/11): It's only 30 things you should eat before you die, not 50, but now that I am sitting next to the magazine, let me tell you about the other amazing things as well:
1. Pasta at Da Vittorio, Sicily
2. Curry at Monsoon Forrest, Bandhavgarh, India
3. Oysters at Moran's Oyster Cottage, Ireland
4. Hamburgers at Shake Shack
5. Bouillabaisse at Bacon, Cap d'Antibes
Should I continue?
Tuesday, 26 July 2011
Cranberry, Walnut, Oatmeal & White Chocolate Cookies

I know I've been a bit absent lately, but to be perfectly honest I haven't been cooking a great deal - I mean I could tell you about pasta with humous and tomato puree or how I believe that sometimes eating cinnamon toast crunch 5 times a day is what gets me through the day, but then again let's face it I might as well not write at all, so while I'm hoping that things will get less hectic and that I'll cook more sensible things, you might not hear that much from me for the next month or so.
That said, I do actually have a recipe for you today.
A couple of weeks ago Katie got a parcel full of cookies in the mail and when I tried one I was blown away. They were incredibly moorish oatmeal cookies, filled to the brim with dried cherries, roasted pecans and white chocolate chips. The kind of cookies that make you eat not one or two but more like your own weight in cookies. So I made some last week but since I couldn't find dried cherries they got swapped for cranberries and then I started doubting my sanity when I went to the supermarket with one item on my shopping list - pecans - only I came back with a bag of cashews. While I'm still wondering what went on there, the cranberry and cashew version worked out beautifully as well.
The version I'm using in the recipe today is yet another one which I made this weekend. I think I've found my favourite combination and I hope you like it just as much as I do. Otherwise, try the other combinations because they're lovely as well.
Oh, and you can easily make a double recipe of these, they'll keep just fine and chances are they won't last that long anyway :)
Cranberry, Walnut, Oatmeal & White Chocolate Cookies (about 15)
150g Walnuts
150g Cranberries
125g Butter (at room temperature)
100g Light Brown Sugar
100g Caster Sugar
1 Egg (at room temperature)
1 tsp Vanilla Extract
100g Plain Flour
½ tsp Baking Powder
½ tsp Salt
½ tsp Cinnamon
135g Porridge Oats (I like using the jumbo ones for these cookies, but normal ones (non-instant) work just fine)
100g White Chocolate Chips
Preheat your oven to 175˚C.
Toast the walnuts on a baking sheet for about 5 minutes until they go brown and the smell of roasting nuts fills your kitchen. Take the walnuts out of the oven and let them cool.
In a medium bowl mix the flour, baking powder, salt, and cinnamon and set aside.
In a large bowl cream the butter for a couple of minutes, then add the sugar and cream everything together for anther 3-5 minutes until the mix goes slightly fluffy. Then add the egg and whisk until everything is well combined.
Take the cooled nuts and chop them into fairly large pieces.
Now add the vanilla extract to the butter mixture and then start adding the dry mix in 3 parts.
Once you have a smooth batter, stir in the oats, the cranberries, walnuts and chocolate chips. I tend to have issues stirring everything together using a spoon (probably partly because I tend to make a double recipe and partly because my fine-motor skills are pretty much non-existent (have you seen my handwriting???)) so I inevitably end up mixing things together with my hands.
Spoon 2 tablespoon-sized bits of dough onto a lined baking tay and flatten them slightly.
Bake for 15 minutes or until the outside edges are a lovely golden colour.
These cookies are amazing on their own, but with a cup of coffee they make even the most annoying day slightly less so.
What's your favourite cookie recipe?
Sunday, 17 July 2011
Taste of Edinburgh
A few weeks back Anna and I got some super cheap tickets for Taste of Edinburgh and I thought I could share some of the photos we took with you. We had an absolute blast, starting our outing with some homemade meatball sandwiches on the train (that recipe will pop up at some point but needs some more tweaking beforehand) and then basically ate our way through the Meadows in Edinburgh.

Oh, and I obviously had to get my photo taken next to the awesome magenta fork :)
I must admit I was a bit disappointed with the cooking 'shows' they put on and the interviews with some of the professionals they had there. And I might have raised my voice a bit too much when I realised the cupcake papers everyone was fawning over were more expensive at the show than when I bought the same ones in New York in May (I think the thing that got me was that it was a British company) - oops. Anyhow, I got to spend the evening with Anna and eat some amazing food. Here are some of my favourite impressions
We got some cannoli from Silver and Green


Then we had a kebab thing and a mushroom risotto that blew my mind


I want my own prosecco truck (I don't even like prosecco, but I think the truck was awesome!)


©Anna Blanch
Oh, and I obviously had to get my photo taken next to the awesome magenta fork :)
I must admit I was a bit disappointed with the cooking 'shows' they put on and the interviews with some of the professionals they had there. And I might have raised my voice a bit too much when I realised the cupcake papers everyone was fawning over were more expensive at the show than when I bought the same ones in New York in May (I think the thing that got me was that it was a British company) - oops. Anyhow, I got to spend the evening with Anna and eat some amazing food. Here are some of my favourite impressions
We got some cannoli from Silver and Green


Then we had a kebab thing and a mushroom risotto that blew my mind


I want my own prosecco truck (I don't even like prosecco, but I think the truck was awesome!)

Have you been to a food fair recently and if so, what were your impressions?
Note: Thank you Alex for finding the typo - I should stop writing things at night....
Friday, 15 July 2011
Salty Caramel Popcorn

In case you haven't noticed in the past, I'm one of those people who can't get from one meal to the next without a snack in between (I don't mean mindless munching away on sweets, though). I guess you could also think of it as having 5 meals a day :)
While I normally have some fruit or some nuts or perhaps some leftover cake from the day before, I've recently become obsessed with popcorn. I mean I have never hated popcorn but I always got sick of the sugar or salt not sticking to it the way it does when you go to the cinema so I never really got into making my own.
Until I read a post on Chameleon Girls on Cinnamon Sugar Popcorn and realised how easy it was to make caramel popcorn (I got sidetracked by their post on stenciled walls and by looking at all the pretty stencils you can buy on the internet before getting around to actually making the popcorn). I guess I never really thought of how you would make it and had just assumed that it would take forever and involved like a gazillion steps. Isn't that the case for everything you don't know much about?
Anyhow, I've been relishing in the amazingness that is salty caramel popcorn for the last week now and while I know that I'll have to stop at some point because you know...you can't go and replace your mid-afternoon snack and dinner with popcorn every other night...or at least that's what the sensible part of my brain keeps saying (the other part is normally too excited by the sugar high to respond).
Salty Caramel Popcorn
50g Butter
1 tbsp Groundnut Oil
4 tbsp Sugar
90g Popcorn Kernels
3/4 tsp Salt
1/2 tsp Cinnamon
In a heavy bottomed pot heat the butter and oil. Once the butter has melted, add the sugar and (while you're stirring) allow the sugar to turn a light golden colour. If you're using unrefined sugar like I tend to, wait until it's turned a slightly darker golden colour, you definitely don't want it to turn into caramel before you add the kernels.
Add the kernels, stir and then cover the pan. Cook until the popcorn is nearly all popped (there will be 2 or 3 seconds between the individual pops) but make sure you shake the pot regularly so the caramel gets a) mixed in with the popcorn and b) doesn't burn at the bottom of the pan.
Once the popcorn is done, transfer it into a bowl and sprinkle with the salt and cinnamon and then stuff your face with popcorn instead of having a sensible dinner :)
What is your favourite snack these days?
Wednesday, 13 July 2011
Summer Pasta
I hope you're having an equally lovely day as I am having today (is that actually a proper sentence?).
I just gave my friend Louise a chapter to read (yes, the one I haven't managed to get into proper draft form for like 3 weeks now...), the sun is shining through my window and it's a balmy 16 degrees outside.
If I was allowed to exercise these days (long story involving a wasp, my arm and a couple of visits to the minor injuries unit at 3am last week, but for once I'm listening to my mum - dear mum, I hope you notice how much effort this takes to not go and enjoy the sun on a run!) I would sooo go out and enjoy the weather some more - perhaps I'll go for a gentle stroll later this afternoon.
Anyhow, as I am re-learning how to eat when I'm not exercising I am rediscovering the wonders of summery pasta dishes. I can't seem to get enough of the many possibilities these days.
Yesterday I was inspired by Alex's mum's pasta recipe, but I thought I could share two of my favourite combinations with you today. They both follow the same principle and the quantities for the veg are based on a 40-50g portion of pasta - i.e. if you are a fan of larger pasta portions, use some more but at the same time I probably wouldn't treble the amounts if you want to have 150g pasta.
So what I normally do is stick some thin pasta (the type I use is called spaghettini but then again they seem to have a different name depending on the brand and the country, I am talking about the kind that takes 5 minutes to cook, and no, not the quick-cook kind) into some boiling salt water and then get on with sorting out the veg/fruit.

Courgette Pasta
150g Courgette (that is 2 small (12-15cm) courgettes), washed and the ends cut off
15-20g Parmesan, grated
Salt, Pepper
Some nice Olive Oil
Using a vegetable peeler, 'peel' the courgette into thin strips and set aside, then you grate the parmesan cheese. Wait until the pasta is nearly done (i.e. you feel like it's going to need another minute), then add the courgette and, after that additional minute, drain the pasta. Put the pasta into a bowl, drizzle with some olive oil, season with some salt and pepper and sprinkle with the parmesan.
See, that didn't take that long...

Pear and Gorgonzola Pasta
1 Pear
30g Gorgonzola
While the pasta cooks, wash the pear, core, and cut it into thin slices.
Cut the gorgonzola into smaller pieces and put the pieces into the bowl you'll eat the pasta from. Once the pasta is done, drain it but don't worry about all the water draining off. Mix the pasta with the cheese (the remainder of the cooking water that didn't drain off should turn some of the cheese into a creamy sauce that will stick to the pasta), then add the pear slices and smile while you enjoy this super quick lunch.
Monday, 11 July 2011
Weekend of Pizza Part IV

With the weekend pretty much over (if I close my eyes and pretend it's still the weekend, right?), we're on the last instalment of our pizza trilogy of four :)
Today we're using up some of the leftovers of Saturday's pizza on another sweetish topping.
Apple, Bacon & Stilton Pizza
1/2 recipe of Pizza Dough
1 cup Milk mixed with
1/2 tsp Salt
11/2 tbsp Flour
2 tbsp Butter, unsalted
Salt, Pepper & Nutmeg
1 Apple (e.g. Pink Lady)
3/4 cup Stilton, cut into small pieces (that is about how much we had left after making 1 1/2 Tunisian Pizzas)
2 Rashers Bacon, grilled or fried so they are slightly crispy (don't go for super crispy otherwise they'll dry out when you bake them with the pizza later), cut into little pieces
Preheat your oven to 230˚C.
Roll out the pizza dough and transfer it onto a floured baking tray.
Make a white sauce as follows:
In a small saucepan heat the milk and 1/2 tsp salt - I tend to heat it over a low heat and get on with the next couple of steps while it heats up. In the end you want the milk to be scalding hot but not boiling.
Heat the butter in a saucepan. Once the butter has melted stir in the flour and 'cook' the flour for a few minutes, stirring more or less continuously with a wooden spoon. You want the roux to be slightly golden but not properly browned. Take the pot off the heat and once the roux stops bubbling whisk in the now scalding hot milk. If the milk was hot enough you should end up with a lump-free white sauce (if you have lumps, strain it through a fine sieve). Allow the sauce to thicken for a minute or two and season it with some more salt, pepper and some nutmeg.
Cut your apple into slices that are approximately the same thickness as a £1 coin.
Spread the white sauce over the pizza base.
Top with the apple slices and bacon pieces, then cover everything with the cheese.
Bake the pizza for 8-12 minutes and enjoy it once it's cooled down slightly (I mean it's lovely super hot, but my second slice was definitely more exciting on the flavour-front).
Sunday, 10 July 2011
Weekend of Pizza Part III

Today's topping is very different from yesterday's one.
My friend Katie is completely addicted to Thai chicken pizza and when we had our board-game night that ended up involving no board-games at all Katie showed me how she makes it.
Oh, and now I'm craving Thai chicken pizza all the time.
Again, the quantities are approximations (I mean they are the amounts we used but you could easily use more or less)
Thai Chicken Pizza
1/2 a recipe of Pizza Dough
1/2 sachet Satay Sauce
1 Carrot, grated
1/2 Chicken Breast, cut into strips
Some Olive Oil
1 ball Mozzarella, cut into small pieces
A handfull fresh Coriander, cut into large pieces
Preheat your oven to around 230˚C.
Heat some olive oil in a pan and fry the chicken breast strips until they are cooked through and start to brown. Take the pan of the heat and transfer the meat onto a plate lined with a couple of pieces of paper towel.
Roll out the pizza dough and transfer it onto a floured baking tray.
Spread the satay sauce over the pizza base, then top with the carrot, chicken breast and come coriander.
Cover everything with a generous layer of mozzarella cheese and bake for 8-12 minutes.
This pizza is lovely hot but it's also super nice once it's cooled down a bit.
Saturday, 9 July 2011
Weekend of Pizza Part II

Today's topping was originally inspired by a meal I had back in November when I drove down Highway 1 from San Francisco all the way to San Diego in 4 days (I know...you don't have to tell me that you really need more time for that trip, but that was all I had so in my book that's still better than never going) anyhow, I got to relax for a bit and I stopped at Crystal Cove Beach where I had what they called a 'Tunisian Pizza' which was made with a grilled flatbread and a very intriguing mix of dates, blue cheese, roasted tomatoes and bacon.
To me it was one of those meals you have and then can't get out of your head for the next 10 years. Do you get that? You have a meal and then you can't forget it because it pretty much blew your mind away?
Anyhow, I'm digressing, I've been thinking of making this pizza for a while now and when we decided to have another boardgame evening I finally got a chance.
Oh, and I don't know about you but I don't measure things when I'm making pizza so here's a list of the ingredients with rough estimates of amounts.
Tunisian Pizza
A handfull of Dates
3 or 4 rashers of Bacon
Some Slow-Roasted Tomatoes (if you don't have any, sundried ones would probably work as well, if you don't know how to make your own, have a look at the Smitten Kitchen one or the two peas and their pod one, they're both super easy and pretty much what I do when I make them)
Some Blue Cheese (such as Stilton)
1/2 a recipe of Pizza Dough
Turn on the grill in your oven and heat it until it's nice and hot (mine has a temperature gauge and I tend to turn it to 250˚C).
Lay out the bacon on a piece of tinfoil and grill it in the oven for a few minutes (you want it to cook but make sure it doesn't go too crispy, it will go on the pizza and we don't want to end up with bacon-charcoal).
Once the bacon is done, switch your oven onto it's normal setting and let it get to around 230˚C (if you have two separate compartments you can do this before you deal with the bacon).
Roll out the pizza dough until it's about the size of you baking tray. Sprinkle some flour onto your baking tray and then transfer the dough onto the tray.
Mince the dates (i.e. play the game of 'how small can I cut the dates'), you want to end up with something that is starting to resemble a paste.
Spread the dates over your pizza (I've made this recipe twice now and the first time the dates were fairly dry so all I could manage was sprinkle them on top of the dough, the second time they were super fresh and I actually managed to spread them out like some slightly unruly butter).
Cut the bacon into little pieces (I don't like the fat so I cut that off beforehand, if you like it obviously leave it on) and spread them out on top of the dates.
Crumble some blue cheese on top of that and then add some of the tomatoes. If you have fairly large chunks you might want to cut them into smaller pieces.
Stick your pizza into the oven and bake for 8-12 minutes until the crust is golden (or until you're starting to get worried that the tomatoes or the bacon are turning into charcoal, whichever happens first).
Hmmmm....pizzapizzapizza :)
Friday, 8 July 2011
Weekend of Pizza Part I

I thought we could have a weekend of pizza recipes for a change - I've been writing about too much sweet stuff lately.
This series of posts was inspired by yet another evening of boardgames and pizza (though this time we ended up chatting all evening and forgot to play Risk).
Before we get to the toppings though, I thought I could talk about pizza bases for a bit. Making a pizza base is super easy (yes, there's yeast involved but we can do this together, I promise :) ).
There is only one thing that you really need - time. If you expect your pizza dough to be done in 30 minutes, go and get some take-out because it's not gonna happen. If you know you won't have much time you could easily make the dough ahead of time, put it into the fridge and then give it half an hour or so to get to room temperature just as you're getting the toppings ready.
Easy-Peasy Pizza Base (makes about 2 pizzas the size of your baking tray)
600g Strong Breadflour
21g (i.e. half a cube) Fresh Yeast
Lukewarm Water
11/2 tbsp Salt
1 tbsp Olive Oil
Put the flour into a large bowl, using your finger, make a well in the middle and crumble the yeast into it. Add a few tablespoons of water to the yeast and combine the two. It's ok if you stir in some of the flour as well but what you are aiming for is a fairly liquid mix - think chocolate malt milkshake.
Give the yeast about 20 minutes or so before you incorporate it into the rest of the flour. Now you can add the salt and more water (you need less than you might think so add some water, knead the dough, and if it still looks like it needs more water then you can add some more. You don't want your dough to go all sticky but at the same time you don't want it to fall apart because it's too dry.
My mum always told me that the dough should be the same texture as the flabby bit of your armpit. I guess that works for us humans, if you are blessed with a body that has no excess flab can you tell me more about your workout, please? ;)
In that case you could ask someone else (I mean, please don't start going round groping strangers...).
Anyhow, knead the dough until the gluten bonds have properly developed. If you are kneading by hand this could easily take 15 minutes (just think of it as a short 15 minute workout). You will know the dough is ready when it starts feeling slightly velvety and develops a slight sheen. I know this sounds weird but it will make sense when the dough gets to this stage.
Stick the dough back into the bowl, cover the bowl with a damp tea towel and allow it to proof until it's doubled in size. Since you're not using crazy amounts of yeast this could easily take 4 hours or so. Knock back the dough and allow it to proof for another hour or two. The thing about the timing here is that I don't think you can give the dough too much time (ok, I wouldn't leave it for 3 days or so), you could start knead the dough in the evening, then leave the dough in the fridge overnight (the cold will slow down the activity of the yeast but it won't stop it completely, i.e. things are just going to take a lot longer), then if you want the pizza for lunch take the dough out around 10ish, allow it to come back to room temperature for an hour or so before you knock it back and give it another hour or two at room temperature before you make your pizzas.
To make the pizza, preheat your oven until it's really hot (230˚C works fine in my oven, but if yours is slightly sluggish you might want to go for the highest temperature it can handle).
Roll out 1/2 or 1/3 of the dough depending on how thin you want the pizza to be, flour your baking tray and transfer the dough onto the tray. Cover the base with your choice of toppings and then bake your pizza for 8-12 minutes or until the toppings are heated through and the outer edges of the base look nicely done and crusty.
Enjoy with a salad and in the company of some lovely friends.
Wednesday, 6 July 2011
Chunky Chocolate Chip Cookies

Ok, before we go any further, these are hands down the best chocolate chip cookies I've ever made.
I don't think I was made for cookie baking - I don't tend to want to have 3 dozen cookies sitting around in my kitchen (I won't eat them and, unlike what some people have been suspecting, I don't want to make everyone around me obese) and I seem to go for a hit-and-miss approach when I'm making cookies.
Unlike cake when I can just try a new recipe and will change quantities that sound slightly off, I can try two cookie recipes that appear both sensible and end up with an amazing one and another one that makes me want to throw them out the second they have cooled down.
But these cookies didn't just look the way I want cookies to look, they also tasted like I had died and gone to cookie heaven. So you might wonder what I did different this time - at least I hope you are because I'll tell you anyway.
I went back to basics and adapted Ree's chocolate chip cookie recipe (have you ever had a recipe on PW not work out? I haven't) and I started wondering why I hadn't done so years ago. I think this will turn into one of my standard recipes because it was super quick and the cookies are just plain amazing.
Anyhow, enough talking...let's make some cookies!
Chunky Chocolate Chip Cookies (makes 12)
100g Butter, at room temperature
100g Sugar
1 Egg
1 tsp Vanilla Extract
65g Plain Flour
35g Buckwheat Flour
1/2 tsp Instant Coffee
1/4 tsp Bicarbonate of Soda (slightly) heaped
1/2 tsp Salt
2 tbsp Flaxseed, ground
100g Chocolate (I used 75% cocoa), broken into pieces
Preheat your oven to 190˚C
Cream the butter and the sugar, then add the vanilla extract and egg and keep mixing until they are well combined. In a separate bowl, mix the flours, salt, instant coffee and bicarb. Add the dry mix to the wet mix in 3 parts, stirring after each addition, then add the flaxseed (do not over-beat but make sure the ingredients are well-combined). Finally add the chocolate chunks and stir until they are relatively evenly distributed across the batter.
Using a spoon put little lumps (about the size of 2tbsp measuring spoons) of batter onto a lined baking tray leaving enough space between the lumps so the cookies can spread out.
Bake the cookies for 11-13 minutes, allow them to cool slightly before transferring them onto a wire-rack and eating them either still warm or cold, but always with a big glass of milk.
Sunday, 3 July 2011
Orangey Oat Scones

This is not the recipe I have been going on about for ages now (no, that one is still not quite there) but I made these today instead and they were absolutely lovely with some butter and jam.
If you don't have oat flour, do what I did and take some porridge oats and whizz them in your food processor until you are left with something that resembles breadcrumbs.
Orangey Oat Scones (makes 6)
150g Oat Flour
125g Plain Flour
50g Butter, cold
1 tsp Bicarb
2 tsp Cream of Tartar
50g Sugar
A pinch of Salt
50g Yoghurt
100ml Orange Juice
Preheat your oven to 220˚C.
Mix the flour, sugar, salt, bicarb and cream of tartar. Then cut the butter into cubes the size of hazelnuts and rub the cubes into the flour mixture until the mix resembles breadcrumbs.
Then add the yoghurt and the orange juice and mix it in using a spoon or a knife (try to do this as quickly as you can), transfer everything onto a floured surface and pat the dough until it's about 2 - 2.5 cm thick. Cut into rounds using a 6cm round cookie cutter, transfer onto a lined baking sheet and brush with some milk if you feel like it.
Bake the scones for 10-12 minutes, then allow them to cool on a wire-rack.
Enjoy your scones with some butter or clotted cream and jam and some tea while you sit back and relax with your friends :)
Oh, and once I get the oatmeal scones to cooperate I'll share that recipe with you as well :)
Friday, 1 July 2011
Experimenting
I've done a lot of experimenting with my recipes lately. There is this recipe for boozy chocolate-chip cookies, which is getting there but I am still trying to coerce more rum into the little buggers while still having them resemble a chocolate-chip cookie.
I think I might succeed with the current plan of using ground flaxseed and rum rather than eggs, but I'll have to try that this weekend.
Then there's the scones-saga that I've been whining about on twitter...I had this amazing oatmeal scone at lab-coffee a while back and you know, scones should be easy enough to make, right? Well I am on batch number 9 or so and while I'm getting close there were some interesting versions, we had one that was more closely related to a hockey puck than to a scone, then came the one that tasted of bicarb and not much else, a few batches later I got the flavour just right but they looked like they had cellulite or something

I mean I don't want ugly scones, so I am still trying and once I get it right I promise I will share the recipe with you :)
Oh, and then there's the pancake thing...my lovely friend Katharina I had these heavenly airy ricotta pancakes at Five Leaves and after the first recipe I tried was quite boring flavour-wise I have been making a batch every weekend since


(I am starting to worry about my waistline with the amount of scones and pancakes I'm eating these days) and while I feel like I'm honing in on a winner they're not quite there either.
Same goes for my peach cobbler recipe. I had always assumed that a cobbler was basically a crumble but instead of the crumble topping you had a biscuit topping (correct me if I'm wrong). But then I watched Paula Deen make peach cobbler which was something completely different. No, before you ask, there was no deep-frying involved :) but it reminded me of a clafoutis without the eggs.
And....it was lovely, but I used white self-raising flour and I think the cobbler could be just that bit nicer with some nice wholegrain flour. I just haven't decided which one to try first - the bag of Kamut is whispering to me telling me that the flavour would be perfect but I'm hesitant because I'm not convinced the texture will be right, next to it the bag of rye flour is making a more convincing argument flavour-wise but again, what should I mix it with to get it to look nice?
Buuut, the recipe is on the way so all you lovely people in places where it's peach season right now can make yourself some lovely peach cobbler (oh, and don't you worry, I've already reduced the sugar and the butter, you won't die from a heart attack when you read at the recipe :) ).
Anyhow, let's see which one of these makes it into a post first.
I think I might succeed with the current plan of using ground flaxseed and rum rather than eggs, but I'll have to try that this weekend.
Then there's the scones-saga that I've been whining about on twitter...I had this amazing oatmeal scone at lab-coffee a while back and you know, scones should be easy enough to make, right? Well I am on batch number 9 or so and while I'm getting close there were some interesting versions, we had one that was more closely related to a hockey puck than to a scone, then came the one that tasted of bicarb and not much else, a few batches later I got the flavour just right but they looked like they had cellulite or something

Oh, and then there's the pancake thing...my lovely friend Katharina I had these heavenly airy ricotta pancakes at Five Leaves and after the first recipe I tried was quite boring flavour-wise I have been making a batch every weekend since


(I am starting to worry about my waistline with the amount of scones and pancakes I'm eating these days) and while I feel like I'm honing in on a winner they're not quite there either.
Same goes for my peach cobbler recipe. I had always assumed that a cobbler was basically a crumble but instead of the crumble topping you had a biscuit topping (correct me if I'm wrong). But then I watched Paula Deen make peach cobbler which was something completely different. No, before you ask, there was no deep-frying involved :) but it reminded me of a clafoutis without the eggs.
And....it was lovely, but I used white self-raising flour and I think the cobbler could be just that bit nicer with some nice wholegrain flour. I just haven't decided which one to try first - the bag of Kamut is whispering to me telling me that the flavour would be perfect but I'm hesitant because I'm not convinced the texture will be right, next to it the bag of rye flour is making a more convincing argument flavour-wise but again, what should I mix it with to get it to look nice?
Buuut, the recipe is on the way so all you lovely people in places where it's peach season right now can make yourself some lovely peach cobbler (oh, and don't you worry, I've already reduced the sugar and the butter, you won't die from a heart attack when you read at the recipe :) ).
Anyhow, let's see which one of these makes it into a post first.
Wednesday, 29 June 2011
Horchata
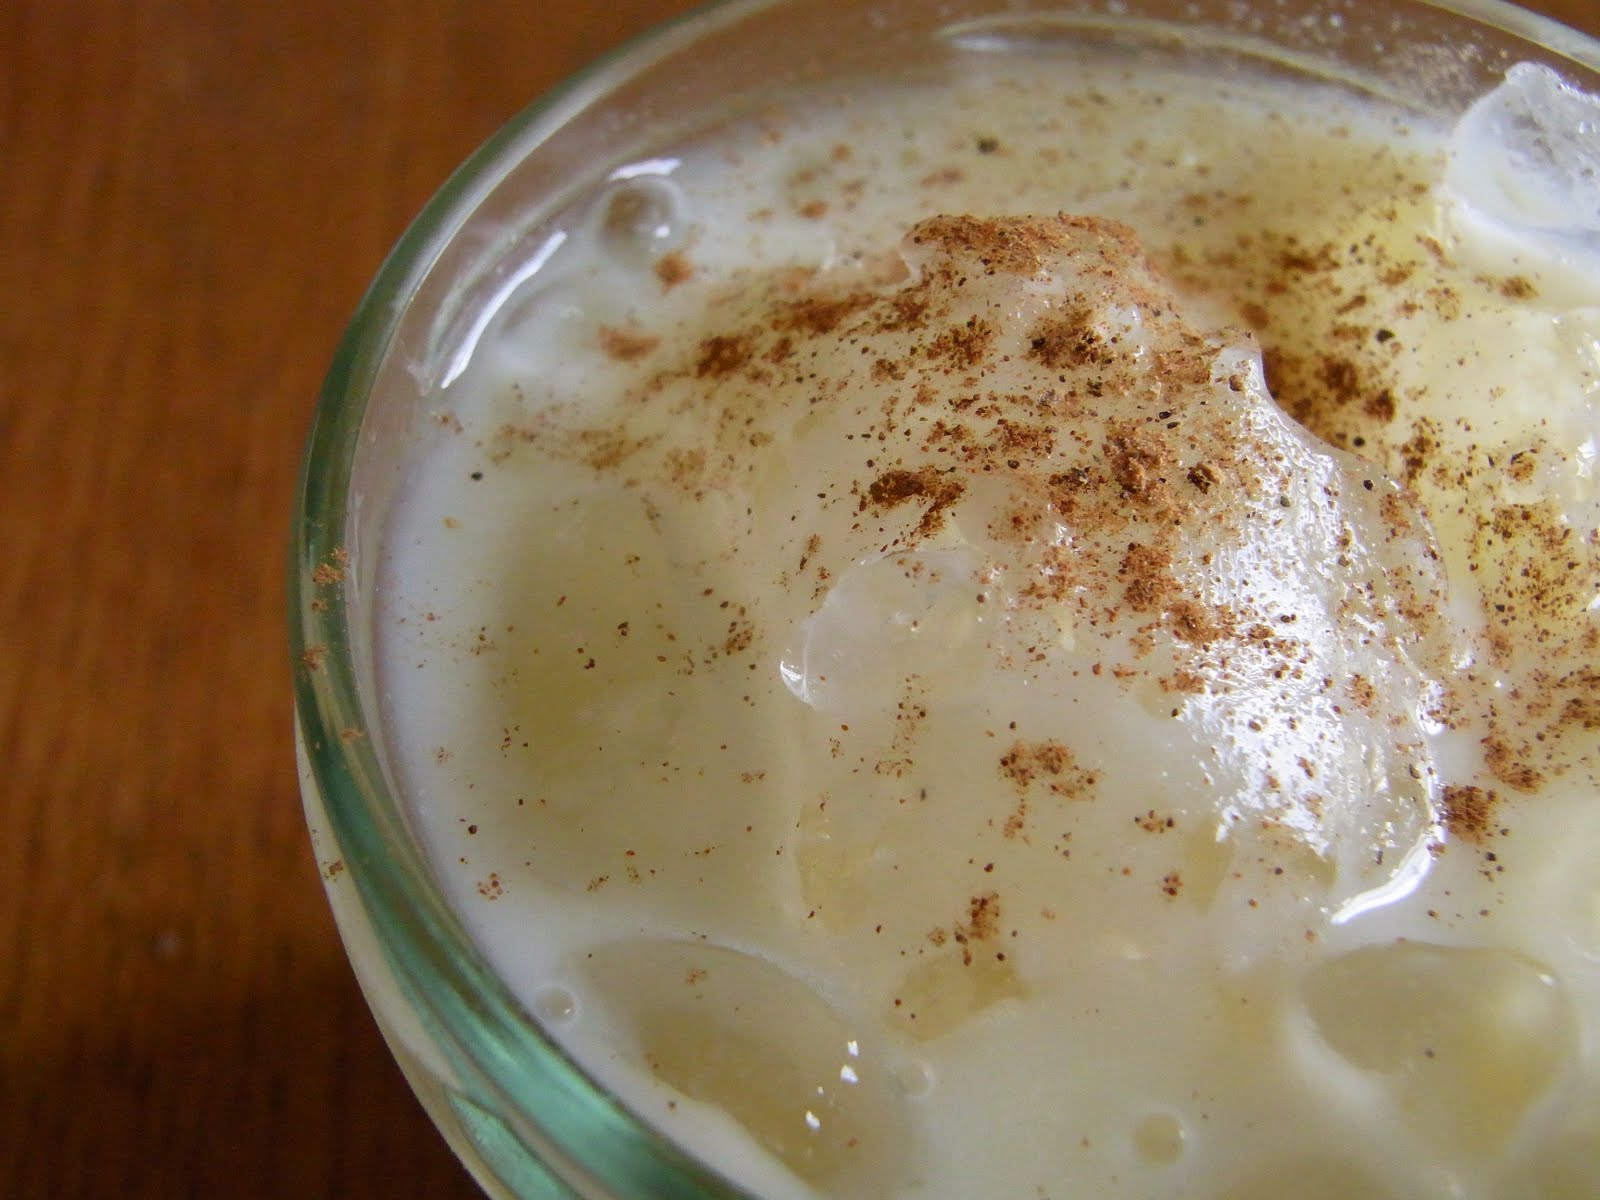
I'm settling into a routine these days, get up early, try to get some writing done, then I treat myself to some nice iced tea/coffee and some fruit, then I try to get some more writing done, then I pretend to be sporty while i wheeze my way through another run, followed by a quick lunch, some more writing, and then it's already time for another glass of frozen amazingness before it's already dinner-time (unless Verena makes me go swimming or something else, oh and this whole thing is obviously interspersed with waaay too much procrastination).
Anyhow, the reason I'm telling you about my decidedly boring life is because the iced coffee breaks have definitely become the highlight of my day. So when David Lebovitz posted his horchata recipe yesterday I obviously had to make some. And swapping the iced coffee for some horchata has kinda turned today into the best day of my week so far (not that I don't like the iced coffee but since horchata tastes even more like rice pudding than rice milk already does it trumps any other drink).
David suggests grinding some white rice in your blender but since I a) don't have a proper blender and am not planning on ruining my coffee grinder and b) tend to have a bag of ground rice sitting around in my cupboard I just went for the already ground rice. Oh, and I reduced the sugar because I felt it was more than sweet enough with half a cup.
Horchata
1/2 cup Ground Rice
3 cups Warm Water
1 Cinnamon Stick (ca. 5cm)
1/2 cup Sugar
2 cups Milk (I used unsweetened soy)
In a bowl combine the rice and the water. Add the cinnamon stick, then cover and leave it alone for at least 8 hours.
When you come back to the mix, fish out the cinnamon stick and strain the mixture through a sieve lined with cheesecloth.
All you need to do now is add the milk and sugar, pour some over some ice and then sit back and relax for a bit.
Subscribe to:
Posts (Atom)