Saturday 7 December 2013

Roasted Root Vegetables with Quince


My mum and I made some super easy roasted veg the other day. In a way they were just your standard roast vegetables, but my mum added a few slices of quince to the mix. Best idea ever. The tartness of the quince goes super well with the caramel undertones of the root vegetables. A perfect combination in my book.
In case you are interested in this non-recipe, here are the things we used for two:

1/2 Sweet Potato
2 Purple Carrots
2 Normal Carrots
1 Beetroot
1/2 Quince

Preheat your oven to 220˚C.
Cut everything in wedges, then toss in olive oil, salt, and pepper.
Bake/roast until the wedges have the level of crispness you like. Personally I like sweet potatoes that are very close to burning but that is a personal preference.
By the way, mayonnaise goes incredibly well with these :)

Sunday 24 November 2013

Roasted Pumpkin Seeds


Today was my grandma's 90th birthday and the whole family got together to celebrate. Instead of going to a restaurant we celebrated at my parents' house and had a local chef do the catering.
What can I tell you...the food was amazing.
We had made pumpkin soup as a starter - I'm not going to tell  you that much about the soup because my mum and I agree that we've had way better soup. We managed to save it in the end but I think we should have gone for a different type of pumpkin.
Anyhow, the reason I'm telling you about the soup is that we topped the soup with some roasted pumpkin seeds.
And those were rather amazing.
What we did was roast them in a dry pan and just before taking them out, we sprinkled some salt and sugar on top. The sugar ends up caramelising, making the salt stick to the seeds. Together the sugar brings out the saltiness and the salt brings out the sweetness. I think the end result is super nice and saves even a distinctly mediocre soup.
I can only imagine what it would do with a great soup.
In case you want to make pumpkin seeds for your next pumpkin soup (or for snacking), here is what we did:

Roasted Pumpkin Seeds
60g Pumpkin Seeds (the kind without the hard shell)
1/2 tsp Sugar
1/2 tsp Salt

Heat a heavy bottomed frying pan and add the seeds. Keep the seeds moving so they don't burn. I like flipping them in the pan, but that doesn't work in all pans. That or I'm too stupid to work all pans. I blame the pans. When the pumpkin seeds are fragrant sprinkle the sugar and salt over the seeds, making sure they are all covered evenly. Transfer the pumpkin seeds onto a piece of baking parchment and let them cool down. Don't try them before they are properly cooled. They get super hot when you roast them.

I hope your weekend was a awesome as mine. Now that I have a proper kitchen again, you'll get more recipes from me from now on :)

Sunday 3 November 2013

Moving and Banana Muffins

I'm leaving Berlin in three weeks. This is partly why I have been so quiet lately - I've had way too much to do.
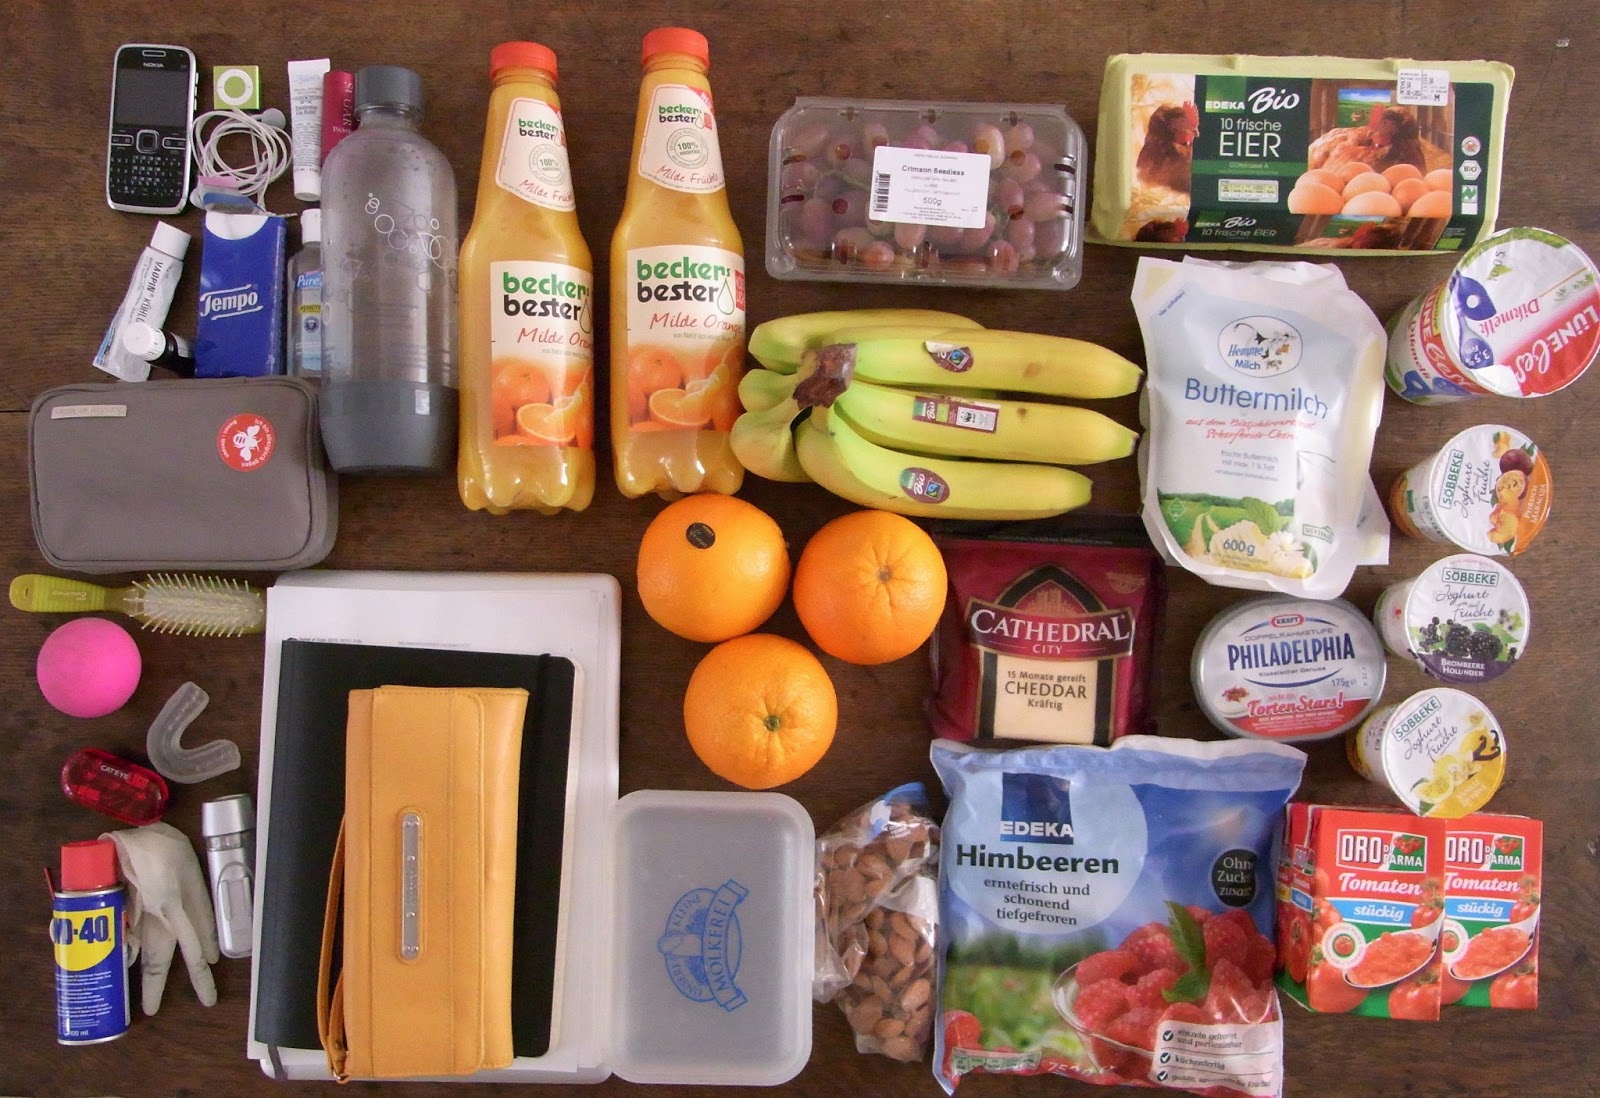
This is the current situation in my living-room.


Up to this morning it looked so much worse but my parents helped me pack lots of stuff this weekend. And I sold my washing machine. After carrying a the beast down four flights of stairs I am convinced I'll never do crossfit - seriously...why would I want to lift crazy-heavy stuff or my own crazy heavy body for fun (and yes, before today I was totally toying with the idea of giving it a go)?!?!?
Anyhow...on the up side - three weeks to go till the rest of my stuff descends upon my parents' house and three weeks to go till I don't have to wear the stupid ankle brace from stupid land anymore. Wanna bet I'll fall down the same set of stairs with yet another box the second it comes off? 
Before I packed up the muffin tins (they're getting a tour of East Germany right now) I made banana muffins. The original recipe was from Felix Olschewski's Urgeschmack Dessertbuch which you should have a look at irrespective of whether you have allergies, are following a Paleo diet or eat pretty much everything. Also, if you don't speak German, buy it anyway and use Google translate. The first half of the book is about ingredients and he discusses their pros and cons in a way I really liked (in two sentences he pretty much convinced me to use honey rather than agave syrup). 
Anyhow, a few changes and 20 minutes (18 of which were baking time) after deciding to make muffins I was staring at these beauties

There are a few caveats though:
If you are looking for super airy muffin-top heavy muffins, make something different, they're quite dense and I doubt you'd manage to get them to overflow properly even if you filled them to the brim.
If you don't like coconut -  don't make them because they do taste of coconut.
If you are baking for a nut-free event - there are some almonds in there.
I'm sure there are lots of other things I could warn you about, the most important one is probably:

These are some of the nicest muffins I've made in a while!

 They are super moist from the banana, they don't have that baking soda taste to them most other muffins have (because the eggs and banana are used as raising agents), and last but not least, since I really like coconuts and bananas they are pretty much my personal version of the ideal food.

All right, you can preheat your oven now :)

Banana Muffins (adapted from Oschlewski)
4 Eggs
2 medium Bananas
50g Chopped Almonds
125g Desiccated Coconut 
40g Coconut Oil (melted)
Vanilla Extract (optional)
Pinch of Salt
1/2 tsp Cinnamon

Preheat your oven to 180˚C.
Mash the bananas with a fork, then whisk the mush with the eggs until the mixture is frothy.
Add all the other ingredients and stir until things are just combined. I don't actually know whether that makes a difference for this recipe because I was worried I had combined them for too long and they didn't turn all solid and leathery or however you want to describe the weird state lots of other muffins go into if you over-mix the wet and dry ingredients.
Fill 12 lined muffin tins with the batter and bake for 18 minutes or until they start to brown.
Wait until they are cooled before you eat them. Trust me. It's worth waiting.


Thursday 17 October 2013

'Everything' Free Porridge


Last time I told you about the grain free porridge I've been making. It's actually grain free and nut free. More importantly, though, it tastes really nice and makes for a really nice start of the day.
I prefer it cooked because that way the chia seeds thicken faster and it starts having a similar texture to millet porridge. But if you're in a rush, it's still really nice eaten cold.
That said, since I'm already venturing into allergy-land with this recipe, if you're doing Whole 30, you won't want to make this (chia seeds), if you are allergic to compositae, then I'm very sorry because that really sucks but more importantly, keep in mind that when you're replacing the sunflower seeds - they add a buttery touch to the mix so you might want to look for something that will do that as well.
Now to the fun part :)
This porridge is super nice with frozen raspberries added just before serving, but the other day I had no fruit left but some roasted butternut squash was staring at me from the fridge. That was a really lovely combination. You should try it.

'Everything' Free Porridge
1 cup Pumpkin Seeds (raw, not roasted and smothered with stuff)
1 cup Chia Seeds
1/2 cup Sunflower Seeds
1/2 cup Shredded Coconut
1/2 cup Ground Flaxseed
1/2 tsp Salt
1/2 tsp Vanilla Extract (optional)

Stick everything into a food processor or blender and whizz until you the texture resembles porridge oats. I am completely convinced this is part of why this tastes so nice - I mean if it looks like porridge it will obviously taste as good as porridge...
Done :)
When you're ready us make your porridge, use about one third to half a cup of the mix and cook with some water and/or coconut milk.
If you wait for a few minutes, the chia seeds will begin to thicken, the flavour doesn't change though. So if you can't wait, you could also just eat it cold.

Saturday 12 October 2013

How ice-cream made my day


You were supposed to get a recipe for grain-free 'porridge' but the time since my last post tells you something about my motivation. It's actually super nice but it's kinda boring. That has been a general theme with the food I have been eating. I enjoy what I eat but whenever I ask myself whether somebody else might want to know how to make the same thing I never feel that's the case. I guess red velvet cupcakes are sexier than grain-free zucchini muffins. Please tell me if you disagree but I am currently operating under the assumption that there are enough allergy/paleo blogs around so I don't need to start writing about that stuff.
Anyhow, enough complaining for today. I made ice-cream the other night and it blew my mind. Perhaps that's because it was the firs time I have used anything other than fruit to sweeten my food in a month or so. It was glorious. And I sat around in that haze like a 5 year old who has just stuffed their face with way too much cake and gummy-bears at a birthday party (before the hyperness starts...).
I'm aware the photo doesn't look very exciting. I'm sure the chocolate version of this, which is my next project, will be more photogenic :)
That said, coconut and bananas - winner!

Coconut-Banana Ice-Cream
400ml Full Fat Coconut Milk (the stuff that doesn't come from the dairy alternative section of your supermarket)
2 very ripe Bananas
1 tsp Vanilla Extract
1 tbsp Honey (if you want the ice-cream to be super sweet you might want to use more)
1/4 tsp Salt (so the freezing-point is lower)

Whisk all ingredients together.
Done.
Not really, but nearly.
Pour the mixture into a freezer-proof container (e.g. an old 500ml ice-cream tub - hence the quantities) and freeze for an hour or two before scraping down the crystals that have formed on the sides of the container with a fork. Over the next few hours keep coming back to break up the crystals that are forming so you end up with one giant popsicle. Personally, I prefer it slightly thawed because then the banana flavour takes centre-stage but that might just be me :)
This ice-cream goes really well with a cup of coffee after dinner. 
Have a fab evening! I'm gonna eat some more ice-cream.

Sunday 22 September 2013

Baked Coconut Chicken Pieces


Have you missed me? I definitely missed you but I didn't really have anything to write about. At least on the food front and I wanted to spare you a German-election rant (since when is it ok to base your campaign on 'vote for us cos we are the party of your current chancellor' or 'if you want the current chancellor to be re-elected, then vote for us' (yes, that was actually a different party who pulled that one...) and don't even get me started on the things some of the other parties decided to talk about before the election)...or bore you to death be telling you all about my new haircut (which I love).

So, food - I've been cutting out everything that makes me sick again and while I feel ten times better, I am also keenly aware that most of the stuff I eat these days is not what any of us would consider exciting. At least that was until I had the idea of coating pieces of chicken breast with shredded coconut. Think the texture of buttermilk chicken inside and a crispy coconut layer on the outside. It's like going on a holiday for dinner...well, not really but it's made a huge difference to me actually wanting to eat dinner rather than forcing myself to eat another plate of boring food.
Oh, and it's dead easy to make.
If you are making potato/sweet potato/beetroot wedges to go with the chicken, you can put those in the oven before you start making the chicken, that way they will be done around the same time.
Also, when I talk about coconut milk I talk about the stuff that has coconut and water in it (the kind that normally comes in a tin and if you're lucky in a tetra-pac, not the stuff you buy in the dairy section of the supermarket that is full of sugar and other weird stuff). I buy mine at an Asian market because they sell a brand that has no E numbers or thickeners in it.

Baked Coconut Chicken Pieces
1 small Chicken Breast per portion
Coconut Milk (enough to coat the chicken breast pieces 2 tbsp tend to be enough for 1 chicken breast)
Unsweetened Shredded Coconut (desiccated works just as well)

Preheat your oven to 220˚C.
Cut the chicken breast into chunks the size of a matchbox (I literally can't come up with another description...I've been thinking about this one for 5 minutes...I just cut them in a way that feels natural with the meat I'm working with but that is approximately the size I tend to end up with), put them in a small bowl and cover them with the coconut milk. You don't need crazy amounts of coconut milk here. Put the shredded coconut onto a plate. Here you'll need enough to cover the chicken pieces which varies for me depending on how much coconut milk ended up on the chicken. Start off with three tablespoons and use more if you need to. Transfer the chicken pieces onto the plate and coat them with the coconut. I tend to coat them individually because that way if I run out of shredded coconut I can just pour more onto the plate. Also, I have less of the leftover coconut milk end up on the plate.
Lay the chicken pieces out on a non-stick baking tray or a brownie tin if you're only making one portion and bake for 10-15 minutes, until the chicken is cooked through. Check with the biggest pieces to make sure they're not still raw on the inside.
These chicken pieces go incredibly well with sweet potato wedges and some guacamole but I'm sure you can come up with better combinations yourself :)

Sunday 11 August 2013

Lemony Sweet Potato Wedges


In line with my lack of cooking lately this is more of a non-recipe. It's one you should try, though. Like really :)
Have you ever noticed how when you make sweet potato pie or cheesecake and you add lemon zest it really makes the sweet potato flavour pop? I ended up wondering whether that would work as well when making wedges. Short answer - it does. Really well.
The long answer is that you don't loose the sweetness of the sweet potatoes but I find these work better with savoury stuff than their overly cinnamony siblings.

Lemony Sweet Potato Wedges (perfect for one)
1 Sweet Potato
Zest of 1/2 Lemon
1 tsp Salt
1/2-1 tbsp Olive Oil

Preheat your oven to 220˚C.
Peel the sweet potato and cut it into wedges.
Rub the salt and lemon zest together using your fingers. Combine with the olive oil. What I do is start off with half the oil and safe the rest for later.
Toss the wedges in the lemon-mix. If you feel they are not properly coated add a bit more oil but keep in mind that you don't want the oil dripping off the wedges either.
Bake for 20 or so minutes (until the the edges are crispy).
Now, the wedges are lovely on their own with some humus, but they work particularly well with some ragu or some other stew you found hiding in your freezer.
I hope you have a fantastic week!


Sunday 28 July 2013

Strawberries, Honey & Vanilla


Can you still get good strawberries where you are?
Strawberry season is nearing its end and I am enjoying every second of it. So much that I actually got up at 8 this morning to get one of those super cheap 2kg baskets this stall near my house has been selling (if you don't make it there in time they have sold out and you're stuck with the 1kg ones that are nearly the same price).
Since getting back from a super quick trip to London earlier this week I might have made more strawberry milk, strawberry ice-pops, strawberry infused iced-tea, and the strawberries in the picture above. I got the idea for this on one of my flights back where I had a strawberry and pineapple salad with a 'honey and vanilla marinade'. It was such a lovely combination.
As much as I love a really elaborate meal (if someone else has to stand in the kitchen for it) I was just blown away by the  simplicity of this combination. This is obviously really nice on its own but some ice-cream doesn't hurt either. How else are you supposed to deal with this heat?!? :)
This is obviously more of a non-recipe. These are the quantities I went for so feel free to experiment. Also, pineapple obviously works really well with this...

Strawberries, Honey & Vanilla
2 tsp Honey for every
1/2 Vanilla Pod and
1lb Strawberries

Hull and quarter the strawberries.
Scrape the vanilla seeds into the honey and stir until the two are combined. Mix with the strawberries and allow the strawberries to macerate for 10 minutes or so.
Now get out that tub of ice-cream :)

Tuesday 23 July 2013

Almond Banana Bread


Life has been crazy for me (the good kind) so whenever I have actually been at home I have been living out of my freezer (also - Mum, Dad - I'm running out of fancy Italian Pasta...I need to come and visit you soon so I can 'borrow' more from your store cupboard...).
There are exciting things happening in my freezer. There are pasties filled with ragu, there's amazing frozen strawberries for smoothies, there's loads of different kinds of bread and soup...oh, and most importantly, there are coconut and cookie ice-creams. I could probably feed myself for a week relying only on my freezer but the one thing I have been incredibly thankful for whenever I open its door has been this almond meal banana bread that I made a few weeks ago and luckily had the foresight to freeze.
This is a simple unsweetened banana bread which once started it's life as Elana Amsterdam's Paleo Banana Bread. It's still paleo, gluten-free and dairy free but that's not the reason why I like this bread. I am somewhat in love with this bread because it works as a normal bread with cheese or with a bowl of soup (lending an intriguing sweetness to the mix) but if you toast it (which I highly recommend you do, especially if you're defrosting frozen slices) the banana-flavour becomes a lot more pronounced and it is incredibly nice for breakfast with lots of fresh fruit or with my mum's strawberry jam :)

Almond Banana Bread (after Amsterdam)
6 Ripe Bananas, mashed
6 Eggs
2 tbsp Vanilla Extract
100ml Vegetable Oil (I use rapeseed)
400g Almond Flour
1 tsp Salt
2 tsp Bicarb

Preheat your oven to 175˚C.
Mix together the bananas, eggs, vanilla and oil using a food processor or your trusty hand-held blender.
Then add the almond flour, salt and bicarb - if you were using a hand held blender, switch to a spatula.
Grease a large bread tin and scoop the batter into the tin.
Bake for 65-70 minutes or until a cake tester comes out clean. If the top of the banana bread browns too quickly you can cover the top with tin foil.
Allow to cool before removing from the pan - if you take it out too soon it will most likely break into two or more pieces.
Anyhow...you know what works well with banana bread...
Have a fantastic rest of your week! I will be enjoying the heat in London for the next few days.

Thursday 27 June 2013

Pecan 'Shortbread' Cookies


Whoa! I bet you didn't expect another post so soon. I didn't, but I did some baking so I thought I might as well tell you about it.

This past weekend my club hosted the Berlin Open Lacrosse Tournament and since I love it when I have an excuse to bake cookies (it feels slightly ridiculous baking four cookies just for myself, I would rather bake two dozen for a group of people), I made cookies on Saturday and Sunday. The first kind were orange essence and almond cookies which I might tell you about at a later point. I'll tell you about the second kind today because I liked them better.

Think super light shortbread studded with pecans.
Think Mexican wedding cookies that haven't been rolled in icing sugar.

And now imagine eating one of those cookies after a semi-late night (cos I'm old) and a 9am game. Those cookies seriously hit the spot.

What can I tell you about those cookies...they come together in a pinch and are as amazing with a cup of tea on a cold afternoon as they are being eaten outdoors with some stale soda water. Oh, and the dough keeps in the fridge for at least 4 days (I used up the remaining dough last night so I don't know whether it would have kept even longer).
Let's make some cookies, shall we?

Pecan 'Shortbread' Cookies
225g Butter, cold, cut into small pieces.
225g All-Purpose Flour
25g Starch (I used potato starch, cornflour or rice flour will work just as well)
30g Icing Sugar
1/2 tsp Vanilla Extract
1/2 tsp Salt
50g Pecans, toasted and broken into small pieces

75g Granulated Sugar (for rolling the cookies in, don't worry, you won't use all of it)

Cut the butter into the remaining six ingredients. Think shortcrust pastry. Work fast. You can also use the paddle attachment of a food processor. Either way, don't work the dough longer than until it is only just starting to come together. Do you remember the last time someone served you a really gross pie? Do you wanna be that person with the crap cookies? So don't overmix the dough :)

Cover the bowl with cling film and refrigerate for at least two hours or overnight. I prepared the dough in the evening and made the cookies in the morning. You have just enough time while they bake to grab some breakfast.

Preheat the oven to 175˚C and line preferably two baking sheets with parchment. I only have one and that worked just fine but it just means there is more waiting time involved when you have to work with two batches...

Form heaped tablespoons of dough into balls and roll them in the granulated sugar.
Arrange the unbaked cookies on the baking sheet, leaving about 4cm between the cookies. Oh, and you also have an option - the cookies barely spread - if you don't want them to be small mounds of cookie awesomeness, now is the time to flatten them slightly.
The cookies will need between 15 and 20 minutes in the oven. If you are using two baking sheets, rotate them after 10 minutes.

They are finished when the cookies feel firm and the edges are golden brown.
Allow the cookies to cool slightly before transferring them to a wire rack. If you move them too soon they might fall apart. Though, that gives you more reason to eat them while they are cooling down. With a glass of milk, or some coffee...

I hope you have a fantastic rest of your week and an even greater weekend!
I know mine will be - my friends Judith and Mimi have invited me over for pork barbecue...I'm trying to convince them that they want to do us all a favour and go for some vinegar-based-barbecue-sauce awesomeness...but even if they don't I'm sure it's still gonna be awesome!

That brings me to a question I have been meaning to ask you guys for a while - what's your favourite barbeque sauce? Are you amazed by all things from North Carolina or are you (shock, horror) more a fan of the tomato and molasses further west? What's your favourite kind?

Thursday 20 June 2013

Strawberry Milk


Growing up we didn't make milkshakes, we made fruit-milk. Banana, strawberry, raspberry, I think we even tried cherry once. Banana tended to win because my sister and I didn't have to try and convince our mum that some sugar would really help this not-quite-sweet-enough strawberry milk. Also, overripe bananas seemed to be sitting around way more often than somewhat overripe strawberries.
Somehow my parents never told us that there was this other mythical drink - The Milkshake. I'm sure I must have seen it on menues but I didn't have a milkshake until I was just about to graduate from college.
The first time I remember drinking a milkshake was pretty much exactly 5 years ago waiting for a train at Union Station in DC. The only way I can describe that time in DC is sweltering. Nobody hat prepared me for the heat. I had expected hot but not swamp-hot. I remember writing a postcard to my aunt telling her about how I had started to really appreciate coffee-shops for their airconditioning.
So after 4 days of living off iced coffee and coffee cake (another thing I discovered on that trip), trying to cram as much US history in as possible, I was standing at the station waiting for my train to Philadelphia (for more heat and even better history) and the humidity was starting to get to me.
And then I saw this sign at the Ben & Jerry's Stall. I could have a milkshake made from milk and any kind of Ben & Jerry's ice cream I wanted :)
I'm gonna leave it at this - an addiction was born that got even worse when I had my first malt shake a few years later at Ruby's at Chrystal Cove Beach.
Anyway, yesterday I went back to basics and made strawberry milk. It's hot in Berlin at the moment. It's especially hot in my office. So, when I got home, I made a big glass of strawberry milk. It was as good as I remembered, if not better because I added vanilla essence. It also made me realise - as good as milk shakes are, strawberry milk is better when it's really hot and all you want to do is cool down.
I'm giving you the recipe below for the quantities not for the single instruction :)

Strawberry Milk
100g Strawberries, hulled
200ml Milk
1tsp Vanilla Essence
Some Ice-Cubes (optional)

Blend everything together until smooth :)

Let's see, strawberry milk goes incredibly well with hot summer days, popcorn (made the perfect dinner yesterday), vanilla ice cream, non-chocolate cookies, and lazy evenings :)

I hope you have a fantastic weekend! I will be watching lacrosse, playing lacrosse and enjoying the weather at a tournament my club is hosting. Good times!

Wednesday 8 May 2013

Game Day Compost Cookies


I first had these cookies at Momofuku Milk Bar a year ago or so. They were quite amazing but I had been on a sugary-stuff bender and ate one of them after already having eaten a piece of crack-pie with some cereal milk the night before and after having come back for some cereal milk ice-cream and one of those super chocolatey cookies earlier that day. The compost cookie was my mid-afternoon snack and it was good but I was not really blown away. Regardless, I had been meaning to make my own from the cookbook for a while now. I mean you have to give every cookie a second chance. Last week I finally got around to making some and after people in my lab loved them (including me - if you don't eat lots of sugar beforehand they are actually quite amazing :) ) I decided to make some for Saturday because we had a match. It was sunny, it was warm enough for me to contemplate playing without a base-layer and we sat around having a fantastic time eating cookies. We had a fantastic time playing later on but there were no cookies involved so that part is less important for now. 
Because the comments were so amazing/hilarious I thought I should share them with you.

'What is in those cookies?' 

'Why would you put potato chips into cookies?!?' 

'Did Katharina make those cookies? Only Katharina would put mini pretzels and potato chips into a cookie!' (well, no, Christina Tosi obviously thought about that one first, but over here people are a lot less adventurous where cookie flavours are concerned).

And my favourite of all times: 
'I ate too many cookies! I think if I run too fast I'll end up throwing up cookies all over the field' 
'As long as you puke in the direction of the other team that should be fine'

You see, it was a good Saturday :)


Compost Cookies (adapted from Tosi)

Before we start, I know that is the longest ingredient list in quite a while. If you can't be bothered to make cornflake crunch you could also leave out the cornflakes. You could also use butterscotch chips or peanut butter ones…or mini marshmallows. That's what is so fantastic about these cookies. I can't think of many combinations that I wouldn't want to try. The coffee adds depth of flavour and a really interesting texture. Also, the combination of sweet and salty with some maltiness from the cornflake crunch turns these cookies (as some of the quotes might have already given away) into something else. 

225g Butter (at room temperature)
200g Granulated Sugar
200g Light Brown Sugar
1 Egg
½ tsp Vanilla Extract
225g Flour
½ tsp Baking Powder
¼ tsp Bicarb
4g Salt
150g Chocolate Chips
100g Almonds (toasted in your oven until they are fragrant, then broken up into pieces)
40g Rolled Oats
5g Ground Coffee (yes, you are not dreaming, trust me on this one. DON'T USE INSTANT!!!) 
40g Cornflakes or Cornflake Crunch (see this recipe or better: buy the cookbook because it's awesome!)
50g Potato Chips (the simple salted kind, kettle chips work better because they are more sturdy)
50g Mini Pretzels

Cream the butter and the sugars (give them some time to become all fluffy), then add the egg and the vanilla extract and beat until the mixture has nearly doubled in size. This will take some time. Give it 5 and things will look good, apparently if you give it 7 or 8 minutes things will be amazing but I'm always too lazy to do that.
Add the flour, baking powder, bicarb and salt. And mix until just combined.
Stir in the chocolate chips, almonds, rolled oats, and ground coffee.
If you are using a food processor for this be careful to not overmix things and be very careful to definitely not overmix things when you add the cornflake crunch, potato chips and mini pretzels.
If you are using a spoon or spatula by now, I would crush the potato chips and pretzels just a tiny bit. I don't know about you, but I don't like having a cookie that has more potato chip than cookie dough to it and they didn't break down at all when I mixed them in - I had to specifically break down some of them with the spatula which was a bit of a pain.
Scoop out 2 tbsp size portions, slightly flatten them and either set them on a sheet pan or stick them in a tupperware box. Cover and refrigerate for an hour. They last for up to a week in the fridge. That way you can have fresh cookies whenever you feel like it! How cool is that?!?
Apparently this step is crucial. I haven't tried baking them sooner but what's the point in trying to find out whether that's true if you can just clean your kitchen or watch some TV while you are waiting...
Preheat your oven to 190˚C.
Stick the cookie portions onto a lined baking sheet. Leave at least 2.5cm between them, I would probably go for something closer to 5. 
Bake until the tops are nice and golden and your kitchen smells amazing. This should happen after 15-17 minutes but check before. I took mine out after 17 minutes in the end but I didn't feel like my oven was actually giving me the temperature it said it was giving me. 

Now, go and make some cookies and then tell me all about it!
I hope you have a fantastic rest of your week!

Friday 19 April 2013

What's in your bag?


This post was motivated by several things...the immense love I am feeling towards my backpack and a few of you who keep asking me about two things: a) how much can I fit into said backpack or b) what kind of food I buy on a regular basis.
So I thought I might as well combine the two :)

For my birthday I bought a new backpack. 
After about 8 years of carrying my worldly belongings around in bags, when I moved to Berlin (and subsequently broke my laptop while cycling...don't ask...) I started using backpacks again. I started out with three - a pretty one that I had bought because it worked really well with my laptop (but once you put my ginormous wallet and the laptop charger in was pretty much full, no chance of fitting a water bottle in), a cycling backpack (yes, it was comfortable but you couldn't even fit my laptop in properly, don't even think about going shopping with this one), and a larger one that had enough pockets for everything and even had a strap you could carry your yoga-mat with and a compartment to keep wet swimming stuff separate from all the dry stuff in the main compartment. In a way I really liked the big one because it actually fit a water bottle as well as the laptop. I was even able to go shopping on my way home and fit at least some of the food in there as well. You might wonder why I didn't like this bag in the end. It pretty much came down to one main problem. Once you had the bag on your back and you were cycling somewhere it was really uncomfortable and felt really heavy on the back. By the time you arrived anywhere you had to stretch for half an hour to get the feeling back into your lower back. Oh, and it wasn't really waterproof (I have my laptop and other electronics in there on a regular basis...not something I want to worry about when I'm cycling across town and should be focusing on stuff like traffic).
After looking around for ages, reading every stupid cycling website on the internet, and trying on backpacks in more shops than I care to admit I decided to get a rolltop from San Francisco Freight Baggage. In case you have to even ask - no, they are not paying me for this post. 
Before I say anything else - this was the most expensive bag I have ever bought. I don't own handbags or shoes that expensive. Heck, all my coats were cheaper than this bag. Perhaps I shouldn't say this because my mum reads this stuff as well. 
That said, was it worth it? 
Definitely!
The cool thing about Freight Baggage is that you can either just order a bag at their online shop or you can get one custom-made for the same price. That way you get to choose the colours and whether you want stuff like a laptop divider or reflective strips and whatnot.
I don't think I've ever emailed back and forth with a lovelier person than Brianna at Freight Baggage. She answered all my gazillion questions and helped me choose what I think is the most amazing colour combination ever.
Are you itching to see the bag yet?
Here is a photo I took right after I got back from customs to pick up the parcel. Isn't it pretty?!


According to Verena it is the size of a small house.
I think it's just right!
In cas you are wondering - that is the medium size. The large is huuuge (plus, I am not planning to become a professional bike courier any time soon).
The most important thing which I should have led with is the following: once you put the bag on your back it seems to weigh nothing. Even if it is so full that you can barely close it. Even if you didn't eat all weekend because you were sick and you are exhausted after just walking from the car to the train tracks. Also, it's like Mary Poppin's bag...
...which brings me back to the picture at the beginning of this post. If you click on the version below you can even read some more of my dribble :)


This was everything in my bag when I got home after work today. Everything. Even the mouthguard that I thought I had taken out after lacrosse practice on Wednesday. Even the allergy kit that lives in the bag that you probably couldn't care less about. Even the empty plastic box that was full of cookies for the lab. You get the point...
I'll try and post these pictures every once in a while to keep both you and me entertained. Perhaps I'll even write more about what's actually on the photo...

What do you always have in you bag? Do you have a favourite bag or backpack?

Saturday 13 April 2013

Granola Cookies


Lately I have been on a slight cookie bender. I think the people in my lab find this quite exciting. What happens most of the time is that I throw random things together and hope for the best. Generally this works really well (at least according to Torsten and Gina who I share an office with). Sometimes we learn things the hard way. Like that replacing all the granulated sugar in your cookie recipe with rapadura sugar is a stupid idea. Or that leftover peppermint bark pieces added to chocolate chip cookies is like my least favourite flavour of all times. Oh well.
Anyhow…a few weeks ago I made the granola cookies Todd and Diane wrote about on White on Rice Couple. And then I made them again. And again. And whenever someone in the lab hears the telltale rattling of my super awesome royal-wedding cookie tin they ask whether I have made the granola cookies again. 
So, what else can I tell you about these cookies. I think they are best still slightly warm. Depending on how long you bake them they are either still chewy or really nice and crispy. Because you soak the dried fruit in booze before you make them I have never managed to bake them so they were actually 'dry' (and I went for something resembling a member of the Jersey Shore cast in one batch because I completely forgot that I was actually baking cookies). The original recipe calls for rum or kaluha. I don't like kaluha for anything other than white russians and I didn't have any rum in the house so the first time I used bourbon and it was really really nice. A few batches later I moved onto southern comfort and I think that is what I'll keep using - the spices work really well with the dried fruit and give the cookies a bit of a kick.
Oh, and instead of apricots I'm using dates (cos dried apricots are evil and vile and gross…and I'm that grown-up…) and raisins but I have been thinking about using dried cherries for a while. I think they would be really nice. 
Are you convinced yet?
Make some cookies! :)

Granola Cookies (adapted from Porter & Chu)
70g dried, pitted Dates
70g Raisins
Enough Bourbon, Southern Comfort, Rum, or whatever else you like to cover the fruit
60g Walnuts
60g Almonds
155g Flour
1tsp Bicarb
1/2 tsp Salt
180g steel-cut Oats
170g Butter, at room temperature
175g Sugar
2 Eggs
1 tsp Vanilla Extract
125g dark Chocolate Chips
125g white Chocolate Chips

Preheat your oven to 175˚C.
Cut the dates into 1cm pieces, put them into a small bowl with the raisins and cover them with booze.
Toast the nuts until they are starting to brown and your kitchen smells amazing. 
In a medium sized bowl mix the flour, bicarb, salt and oats and set aside.
Don't forget about the oven - take the nuts out of the oven and allow them to cool before you either chop them coarsely or simply crush them a bit using your fingers (you can probably guess which approach I favour).
Take out a larger mixing bowl or your fancy kitchen aid mixer bowl and beat the butter for a minute or so until it starts to fluff up a bit, add the sugar and keep beating for another two minutes or so. Add the eggs and vanilla extract and give things another 4 minutes or so. What all of this does is incorporate more air into the mixture and bond the sugar and butter together (at least that's what I'm told). Irrespective of how this whole thing works, what it does is give your cookies a certain lightness while also giving you crispy edges and an amazingly chewy centre. So ignore the fact that you are probably dying from boredom, listen to one of those new super long Justin Timberlake songs and you will barely notice all that waiting :)
Ideally the butter-mixture should have nearly doubled in size and will look a lot paler than before.
Switch to a spatula or wooden spoon so you don't overmix in the next few steps. 
Stir in the flour mixture and mix until just combined. Then add the chocolate chips, nuts, and boozy fruit (without the remaining liquid - save that to make a drink or dip the cookies into it later or whatnot). 
Scoop two tablespoons of dough (what I do is use my tablespoon measure and scoop up enough dough so it forms a dome on top of the filled spoon that is the same size) per cookie onto a cookie sheet, leaving about 3cm between them. I can normally fit 18 cookies onto my full-size baking sheet if that helps with the spacing between the cookies at all.
Bake the cookies for 15 minutes or until the cookies are starting to brown. 
Don't even think about letting the cookies cool completely, give them a few minutes before you transfer some of them onto a wire-rack, then eat the others while they are still warm on the inside.
I hope you have a fantastic rest of your weekend!
You could make some cookies :)


Saturday 23 March 2013

Wild Rice Pudding


Is there anything better than a bowl of warm, sticky rice pudding when it's cold outside? Or cold rice pudding when it's way too warm?
Unlike lots of other places Berlin seems to be in the middle of the next ice-age. Whenever you think the cold is over, you wake up in the morning and there's another five centimetres of snow. I don't remember it ever snowing as late as my birthday. Right now I don't expect the snow to be gone by the time I get to blow out even more candles than before.
Anyhow, I made this rice pudding one evening after I got back from the gym all freezing because I had forgotten an extra pair of sweatpants for my way back. It's like a warm hug in a bowl. And since you'll be waiting for an hour for the rice to cook you might as well make more so you'll get to eat rice pudding for a few days :)

Wild Rice Pudding
150 g Wild Rice
1 l Milk
3 tbsp Agave Nectar
1 tsp Cinnamon
1/2 tsp Cardamom
1/4 tsp Nutmeg
1/2 tsp Salt
1 tbsp Vanilla Extract

Wash the wild rice. Combine all ingredients in a saucepan and bring to a boil. Simmer for 45-60 minutes stirring occasionally.
I like this rice pudding best when it's still sticky but it's still not as solid as baked rice pudding.
Oh, and while fresh fruit would be amazing, the part of me that cares about seasonal produce made me use local tinned peaches for the photo and it worked like a charm. If you close your eyes it will taste almost like summer is already back :)

Sunday 10 March 2013

Cinnamon Roll Success


A few weeks ago my friend Verena came and spent a few days with me in Berlin. When I asked what she wanted me to make for her all she said was 'Cinnamon Rolls'.
You see, a few years ago, Verena spent some time in Vancouver and had cinnamon rolls at Grounds for Coffee. And there has been something of an obsession happening since then. I made several attempts recreating these amazing cinnamon rolls (so I've been told) but it is kind of hard aiming for something that you have never tasted and where you don't quite have a feeling for what you're actually aiming for (my mental image of what these wondrous cinnamon rolls at Grounds for Coffee are like is based on a description made up almost entirely of superlatives).
Let me tell you straight away, my first few attempts didn't work out that well. Either they were too dense, or too doughy, or too dry,or something goes wrong with the icing. In short, as much as I love cinnamon rolls, there is no food-group I've had more disasters with.
When I finally got around to reading Baked Elements (I know, it's not that new anymore) I was intrigued by their pumpkin cinnamon rolls. Everything I've cooked from their books has turned out really well and pumpkin puree seemed like the perfect ingredient to solve my too-dry/too-dense problems.
So when Verena mentioned the cinnamon rolls the recipe got its chance. And they were even better than I had expected.
Oh, and if you can't get hold of pumpkin puree make your own by roasting some hubbard or butternut quash in your oven with the skin still on. Scrape the soft flesh off the skin and puree until you have a homogenous consistency. If the puree is still quite liquid, let the puree sit in a colander line with some cheesecloth for a while.

Pumpkin Cinnamon Rolls (adapted from Lewis & Poliafito: Baked Elements)
375g Flour (use something with a higher protein content)
100g Rapadura Sugar
1 tbsp Instant Dry Yeast
1 tsp Salt
1 tsp Cinnamon
1/4 tsp ground Ginger
1/2 tsp ground Cardamom
75g Butter (softened)
175 ml Milk (warmed but NOT hot)
1 Egg
175g Pumpkin Puree

200g Rapadura Sugar
1tsp Cinnamon
1/4 tsp ground Cloves
1/4 tsp Nutmeg
1/4 tsp Salt
2 x 30g Butter

60g softened Cream Cheese
3 tbsp Lemon Juice
150g Icing Sugar

Butter a 26cm springform tin and line the bottom with baking paper. Butter the paper as well, then tust the entire thing with some flour.
Mix the flour, sugar, yeast, salt, and spices in a bowl. Add the butter, milk, and egg and mix until they are well incorporated. If you have a standing mixer this should take two or three minutes, if you are using your hands this might take a bit longer. Add the pumpkin puree and mix for another three minutes. If you, like me, don't own a standing mixer ignore the fact that it will take you forever to get the dough off your fingers once you are done and keep kneading for about 5 minutes. I tend to think about the workout my arms are getting. That thought makes things a bit less boring :)
I'm completely loosing my train of thought today....form the dough into a ball, stick it into a bowl if it's not already in one and cover the bowl with some cling film. Let the dough rest for 30 minutes or so and contemplate the fact that every recipe seems to include the instruction to place dough in a greased bowl. I really don't get that - if you're already working in a bowl you'll either have to get out a second bowl you'll have to wash or if you only own one big bowl you have to wash the stupid bowl, get oil all over it and then wen you're done you'll have to slave away forever making sure there's no fat left in there when you wash it again or if you use it to whip egg-whites the next time you'll be wondering why nothing is happening. That seems like such a waste of time to me. I mean it's not like you won't get the dough out of the bowl if you don't grease it...
Anyhow, after contemplating that for a bit, snap out of it and make the super complicated filling :)
Mix the sugar, salt and spices with 30g of the butter. The original recipe asked for melted butter but I obviously didn't read that part. Using softened butter worked just fine.
After 30 minutes, clear a 40x60cm space on your kitchen counter so you can roll out the dough. Dust your work surface with flour and roll out the dough into a 25x50cm rectangle.
You should have 30g butter left. Melt it and brush the dough with half of it.
Sprinkle the filling over the the dough and spread it out so you have a somewhat even layer. Then, roll up the long side of the dough until you are left with a 50cm long cinnamon roll log.
Cut the log into 5cm pieces and arrange those in the springform tin. If you put one piece in the middle of the tin and then arrange the remaining pieces around it each piece gets about the same amount of space.
Brush the top of the cinnamon roll pieces with the remaining melted butter, cover the tin with some cling film and go and pick up your best friend from the train station. Or watch some TV for 45 minutes. Or clean your living room.
Preheat your oven to 175˚C.
Once the cinnamon rolls have doubled in size, bake them for 25 to 30 minutes until the tops are slightly golden and your entire apartment smells of cinnamon and pumpkin.
Whisk the cream cheese and lemon juice until you can't see any more lumps. Add the icing sugar and keep whisking until you have a smooth mixture.
Let the rolls cool slightly so you don't burn your fingers.
If you are sensible, take the rolls out of the springform before adding the icing. Don't listen to your friend who tells you the pictures will be super pretty if you add the icing beforehand (you will end up with hands covered in icing as you are trying to tear the rolls apart later...).
Hmm...coffee and cinnamon rolls!
I hope you have a fab week!

Sunday 24 February 2013

Sunday Salon: What We Talk About When We Talk About Running

Today's post is a continuation of a conversation Verena and I have been having on and off for the better part of the last three years. Why does everybody tell you that running is such a cheap sport and that all you need is a pair of running shoes? And if that is true, why do we have so much running stuff? Do we really not need most of it?
Verena and I started running around the same time and started running together two years or so later. We spent the the end of my time in St Andrews running, going to spinning classes, discussing our current running shoes, the running shoes we were going to buy once the next shoe in our rotation was going to break, good and bad sports bras, the fact that Verena thinks most of my sports clothes are too tight or too short and trying to find good deals on sports clothes in general.
I think it's also fair to mention that Katharina thinks my persistence in running in cotton t-shirts is ridiculous
We've been running all alone in different cities for the better part of 18 months now but we still spend our time talking about running shoes and workout gear.

Katharina:I started running while writing up my undergraduate project, trying to deal with the now ridiculously seeming stress I was putting myself under. I used a pair of old trainers that I think I had bought three years earlier and that had come nowhere near that 500k mark. At that point I was mostly running in yoga clothes, listening to Robert Ullrey's Couch to 5k podkast (http://www.c25k.com/). Two months and an undergraduate thesis later I first treated myself to a pair of lululemon pants, had my gait analysed and got myself a new pair of running shoes.

Verena:
I am still in denial about being a 'runner'. I have little to nothing in common with spandex clad near-olympians sprinting through the park at 6am on a Saturday morning. Or with the lean beef jerky types training for their umpteenth triathlon/iron man/ultra marathon.
I secretly wish I had the stamina to train for a triathlon and get a good time...
I sometimes still wear the same shirt that I had when starting to run (incidentally an old one of Katharina's - thanks!), and breathe like an asthmatic bulldog running after the ice cream van. But I have persisted for a few years now, and maybe it's time to admit that I actually like it. I started to run with the popular Couch to 5k running plan (hiphop version - I will always associate Eminen with my early runs), starting at 6am because I was so ashamed that someone would see me. I quickly discovered I had splayed feet and needed 'real' running trainers. Since then I have gone through quite a few pairs (and in the process became an expert at making use of warranty statements on shoe boxes). To my own shame I have to admit that I recently acquired a pair of running tights (and fell on my face on the initiation run, breaking them in the process). I have recently joined the increasing number of weirdos enjoying running in toe shoes. I have only overtaken one person whilst running, and it felt fantastic. I then turned round and saw that the person was well over 60 and had a wooden leg.

We got the idea for this post because I ran (haha - good one) into someone who was proclaiming that running is not only a great sport, but it is also one of the cheapest ones out there - you only need two legs (or one, or none). After hearing this, I just started a calculation in my head of how much money I have spent on running shoes alone. And how much you can spend if you really want to.

Almost every beginner's guide to running that I looked at on the interweb tells you that it is totally ok to run in t-shirts, shorts, sweatpants, ball gowns, etc. - the only thing you really need is a good pair of shoes.
Unfortunately choosing a 'good pair of shoes' is a bit like signing up to a cult: there are motion control shoes, running flats, stability shoes, neutral shoes, shoes against suspination, and (maybe the current trend) minimalist shoes. I felt as beginner that I was pretty much at the mercy of the guy in the shop trying to sell me shoes - and I still feel that I don't really have much of a clue of which shoe is "best". 
I guess there are about 10-15 established manufacturers of running shoes. Their products are put through tests and assessment by e.g. runner's world every year. And these are are mostly what you would find in a shop doing a gait analysis. At the same time, these models are all in a higher price range.

I currently have 3 pairs in my running-shoe rotation. One pair with quite a lot of support for long runs (though those have been getting shorter and shorter). One pair with little support that is more of a forefoot one that I really like for short, fast-paced runs. One off-road pair that I wear when it's raining or when there's some snow on the ground. If I had to choose one pair I would probably chicken out and go for the support one because I know they will get me through short runs in the dark, long runs when I'm tired, and everything else you could throw at me (even some ice as I found out this winter). Currently, those are a pair of Brooks GTS (which are normally around $100 unless they are on sale).But, once you are wearing running shoes you like and you are running for more than 500 metres or so all the other stuff becomes important as well. There is nothing worse than a sports bra that doesn't fit. Or trousers that keep falling down or keep riding up. Anything that chafes. Oh, and contrary to Verena's opinion, I think the only time it might be ok to go running in cotton is if it's a t-shirt and you are going to the gym.

I think it's all got a bit to do with personal preference. I like running in football shorts (of a certain brand, and one particular model). They're great. Have pockets. Don't chafe, ride up, fall down. For this kind of thing, I don't see how 'specialist' equipment could make my running experience better. Most running tights don't even have space for my housekeys, let alone a tissue.

So tell me about the outfit you're currently running in. If you added up how much you spent on everything, would you die from a heart attack?
©Verena Kersken
-Fivefinger Komodo Sports shoes(bought for 99eur in the sale)
-Injinji toe socks (on ebay for 10eur)
-Football shorts (if they're not on sale they cost about 25eur)
-Nike sports bra (25eur on some website)
-Helly Hansen thermal (under €20)
-T-shirt (skull design, €1.50 from the 1 Euro shop)
-Hoodie (I guess those can easily be obtained for about €20)
-Nike gloves (€5 from TkMaxx)
-A buff (I would guess €12 -15)

I am quite surprised how easily this adds up...what about you?
I just realised that I buy most of my stuff while travelling....anyhow, here is my roundup:
-Saucony Kinvara shoes (bought for $99 not pictured because I forgot to put them in the picture...)
-Thorlos  mini crew socks ($15)
-Lululemon Runder Under Pants ($92, impulse buy at the lulu store, lovelovelove them!)
-Lulu sports bra ($58)
-IronMan Thermal ($12 or so at TJMaxx)
-UnderArmour top (€19 at TKMaxx)
-Rain jacket (not a clue, that one was a present from my parents, I have a second one I got for €59 at TKMaxx)
-NB gloves ($12 on sale at TJMaxx...I bought the expensive ones because they match my bike helmet...no judging!)
-Fleece headband to keep my ears toasty (€5 or so about 10 years ago...that was a good investment :) )

At least both of us are missing out on the really bells and whistle stuff: heart rate monitor, GPS, compression socks...
I think the really shameful section is the footwear.

My tights were about as much as my shoes....I find that actually quite scary....but they're very pretty, have reflective stripes and they are reversible...so I guess I got two for the price of one...

See, but with the tights, you don't change them every couple of months. With shoes - you should. I am not even sure, whether that is actually the case, but that's what they tell you.

I think what it's really all coming down to is an honest answer to a couple of questions:
-Is this piece/level of equipment necessary?
-Is it making my run better (either is it making me feel better, or if you're into that, making me faster/last longer)?
-What level of quality is there - and what is best for me?
-Where can I get honest information about things?


I think I noticed in the last few weeks of how easy I fall into the trap of reading up about things, getting more and more interested in them, wanting to try them out, and spending money on them - without changing the amount I run or the speed. Eventually I will end up with the equipment of a professional athlete, but will still run the duckpond round I have always run. Maybe it's also an image thing - I mean, I wouldn't mind having some of the umph of the dude or lady on the poster in the running shop.

I think you are completely right about the whole reading about things and then wanting to try them thing.
The thing is, even if I (consciously) know that having a fancy heart rate monitor is not going to make me run more or faster or whatnot, I am still secretly convinced that the second I end up buying said fancy heart rate monitor I will magically transform into that triathlete you were talking about earlier.
But overall, even if you try not to buy things you don't actually need, it still adds up.


I just think it's a bit of a scam... I mean you re told you don't need anything - BUT good shoes (which will cost you), and then of course all the cheap stuff is crap, so spend some money.
Then, maybe the biggest piece of irony... you read 'Born to Run', read about these little indigenous people who run superfast and far in a loincloth...and go out to buy minimalist shoes for the same price as walking boots.
And proper clothes because you would be freezing in this weather :)
I think that's rather subjective. I am wearing shorts, still (or rather, again)
Well, you might not be the only one on the short-front.

While we were thinking about our own running clothes, we did some super empirical research (i.e. we asked a few of our friends to take pictures of their running gear and asked them to tell us a bit more). If you are as nosey as we are - here is what we heard back :)


Alex:

©Alex Chase
-Headphones - Philips SHQ4007 (around £40)
-two eGear Guardian lights, one red and one white (about £15 each) 
-aLOKSAK dry bag to keep my iPhone in (4 for £10) 
-Under Armour Draft Catalyst shorts (£28)
-Coreshorts (£35)
-SmartWool Mini Crew socks (£17)
-Nike Vomero 5s (£74)
-not in that picture is the LP knee brace (£17) that I occasionally wear
-Under Armour Compression t-shirt (£26)
-Howies merino NBL Classic (£55)
-old Gap t-shirt (£9)
-my next purchase is a Brooks Essential Run Jacket II for £60-odd...

So if I had to replace all of my running gear tomorrow it would cost over £300, but then I'm not a good example for keeping things cheap. I think I'm just too much of an [Katharina did some censoring here :)] when it comes to having nice things haha... Nobody *needs* £40 headphones, but mine do sound amazing; and there are cheaper shoes out there, but mine are designed for people who under-pronate; and a pair of shorts could cost less than a tenner, but mine are made from recycled plastic bottles... It's probably a placebo effect (or just in my head), but I do feel that if I have stuff I'm happy with, I'll run better.

I started running last January, and made it through to June going 3 times a week until my knee gave out. I kind of quit for the rest of 2012, and I restarted again this January (with a new stretching/yoga program: fingers crossed...). I'm not sure it would be fair to call myself a "serious runner" yet, but I am very committed. 
Things I won't leave the house without: headphones and my iPhone running RunKeeper: I like to keep track of where I've been, but I really need that app telling me how far I've gone and how fast I'm going every few minutes for motivation/to make sure I'm pacing myself.


Bettina:

©Bettina Trueb
- hat, 30€ (?)
- thermal long sleeve (gift)
- running hoodie, can't remember how much it cost!
- running tights, don't remember but they were on sale and a very good bargain!
- 3/4 tights for extra warmth, stolen from mum
- gloves, 20€ (?)
- socks, no idea
- shoes, 80€ (end of season sale, down from 120€)


Sally:

©Sally Newman-Carter
-trainers £70
-socks £10
-running capris £20
-t-shirt £12
-running bra £25 (but totally worth it!)
-jumper/jacket £15
-sweatband £3

I dont mind spending this on it all - the only thing that really wears out and I have to replace are the trainers, the rest of it has lasted me years. The only thing is I run 5 times a week and can't wash it all quickly enough so I do need duplicates of everything + seasonal variations of course.
I certainly did not used to consider myself a runner, but I think the marathon [I ran a few year ago] changed me - I definitely am now! How many miles per week depends on what stage of training for a particular race I'm at, it can range from 15-30.
The one thing I never run without is my phone - not only for security should I get injured or something, but more importantly(?!!) the runkeeper app! I use it to track every run to keep a record of my pace, improvements, distance etc. absolute essential!


As you can see - running isn't cheap. However the reason may be that getting into running is highly corelated with an interest in running stuff (which of course needs to be tried). I think we all have something we had for a number of years, and it just turned out to be the best piece of equipment... but there seems to be room for more at every corner.

I guess what it boils down to for me is the following: 
Whatever sport you do, there is no point in doing it if you will end up hurting yourself. For running, that starts with what shoes you wear and ends with wearing clothes appropriate for your run. Wearing sweatpants and buying yourself a yoga book is probably going to be cheaper. Though, if I'm perfectly honest, I have spent just as much money on a yoga mat as I spend on a pair of cheaper running shoes. It's the best mat I've ever had. And it gets me doing something in the morning before I head to work. 
But back to the running gear - we wouldn't know what kind of shoes we like if we hadn't tried them at some point. I discovered that I do actually quite enjoy landing on my forefoot by accident - I was in the store buying some trusty Brooks GTS and didn't want to leave because it was raining cats and dogs outside. After chatting with the salesperson for a while he told me about how he had shifted from midfoot-running to forefoot and let me try out the model he liked. I walked out with a second pair of shoes that day and haven't looked back. Yet, if you had asked me whether I would ever buy a pair of forefoot running shoes when I walked into the store I would have told you 'no way'.

I guess that's true. (You should all try fivefingers - just saying... also they should probably give me a free pair for saying this... ).
But, as Alex said, it is more fun to run in 'nice stuff' - whether that stuff is new, exciting or just works. In the end you will end up spending money on a bunch of clothes that you will wear twice and then keep in the closet. You will spend money on dressing appropriately for every weather. You will replace your shoes regularly because you will wear them out. You will end up with umpteen pairs of running socks. At the same time, you will hang on to your 5 year old hoody because it just feels the best.
Trends in running will keep on coming - and I am sure I will fall victim to a few. But maybe I will end up with the perfect leg wear, which will finally convince me to sign up for a race. I am still unsure of how to tell apart fads from useful developments - or which sources and people to trust on equipment advice (not those who spend a fortune on a yoga mat). I am still convinced that no one who starts to run will end up only spending €100. But that's ok. I mean, considering the time you spend doing it - money well spent.

So the bottom line should be: you don't need a lot of stuff for running - if you have comfortable sports clothes that will work, then you're set. The only thing you should probably spend some more money on are running shoes, but if you don't want the newest model and don't care about their colour you could even get those fairly cheap.

...so it took us an endless debate to arrive at the conclusion put forward by every running site out there. Well done.

But we have pretty pictures :)
Related Posts Plugin for WordPress, Blogger...