Hi there, it's been a while. I moved back home to get some work done, watched my friend Anna marry the loveliest guy imaginable, and then my friend Juliane and I made a video of me making spinach and pomegranate salad and had a blast.
Some of you encouraged me to make some more videos so this week my camera and I shot a video ourselves. Actually...of me and this new thermos flask of mine :)
Anyhow, if you want to cook along with me, I have added the recipe for the hot chocolate I made below. Let me know whether you want me to keep making these videos and if so whether you have something you want me to cook in a video. If you want to make me really happy, you can also subscribe to my YouTube channel or like the video. Or you can send me an email and tell me what you think...you know, real old school.
All right, do you want to make some hot chocolate?
For 750 ml you'll need:
250 ml Coconut Milk
500 ml Water
2 tbsp Unsweetened Cocoa Powder
4 tbsp Sugar (e.g. rapadura)
1/2 tsp ground Vanilla Pods or 1 tsp Vanilla extract
Whisk the cocoa powder into the coconut milk, add the water and heat over a medium flame. Whisk in the sugar and ground vanilla pods. Bring the mixture to a boil. I don't have a proper reason for this but this old recipe book I inherited from my great grandma says you're supposed to bring hot chocolate to a boil. Who knows whether you have to actually do that or whether that's a milk thing. Though, if you're going to fill it into a flask then you might as well heat the hot chocolate properly.
Anyhow, I hope you have a fantastic week. I have no idea what I'll be cooking next week, so stay tuned :)
Showing posts with label vegan. Show all posts
Showing posts with label vegan. Show all posts
Monday, 17 February 2014


Saturday, 7 December 2013
Roasted Root Vegetables with Quince

My mum and I made some super easy roasted veg the other day. In a way they were just your standard roast vegetables, but my mum added a few slices of quince to the mix. Best idea ever. The tartness of the quince goes super well with the caramel undertones of the root vegetables. A perfect combination in my book.
In case you are interested in this non-recipe, here are the things we used for two:
1/2 Sweet Potato
2 Purple Carrots
2 Normal Carrots
1 Beetroot
1/2 Quince
Preheat your oven to 220˚C.
Cut everything in wedges, then toss in olive oil, salt, and pepper.
Bake/roast until the wedges have the level of crispness you like. Personally I like sweet potatoes that are very close to burning but that is a personal preference.
By the way, mayonnaise goes incredibly well with these :)
Sunday, 24 November 2013
Roasted Pumpkin Seeds

Today was my grandma's 90th birthday and the whole family got together to celebrate. Instead of going to a restaurant we celebrated at my parents' house and had a local chef do the catering.
What can I tell you...the food was amazing.
We had made pumpkin soup as a starter - I'm not going to tell you that much about the soup because my mum and I agree that we've had way better soup. We managed to save it in the end but I think we should have gone for a different type of pumpkin.
Anyhow, the reason I'm telling you about the soup is that we topped the soup with some roasted pumpkin seeds.
And those were rather amazing.
What we did was roast them in a dry pan and just before taking them out, we sprinkled some salt and sugar on top. The sugar ends up caramelising, making the salt stick to the seeds. Together the sugar brings out the saltiness and the salt brings out the sweetness. I think the end result is super nice and saves even a distinctly mediocre soup.
I can only imagine what it would do with a great soup.
In case you want to make pumpkin seeds for your next pumpkin soup (or for snacking), here is what we did:
Roasted Pumpkin Seeds
60g Pumpkin Seeds (the kind without the hard shell)
1/2 tsp Sugar
1/2 tsp Salt
Heat a heavy bottomed frying pan and add the seeds. Keep the seeds moving so they don't burn. I like flipping them in the pan, but that doesn't work in all pans. That or I'm too stupid to work all pans. I blame the pans. When the pumpkin seeds are fragrant sprinkle the sugar and salt over the seeds, making sure they are all covered evenly. Transfer the pumpkin seeds onto a piece of baking parchment and let them cool down. Don't try them before they are properly cooled. They get super hot when you roast them.
I hope your weekend was a awesome as mine. Now that I have a proper kitchen again, you'll get more recipes from me from now on :)
Saturday, 12 October 2013
How ice-cream made my day

You were supposed to get a recipe for grain-free 'porridge' but the time since my last post tells you something about my motivation. It's actually super nice but it's kinda boring. That has been a general theme with the food I have been eating. I enjoy what I eat but whenever I ask myself whether somebody else might want to know how to make the same thing I never feel that's the case. I guess red velvet cupcakes are sexier than grain-free zucchini muffins. Please tell me if you disagree but I am currently operating under the assumption that there are enough allergy/paleo blogs around so I don't need to start writing about that stuff.
Anyhow, enough complaining for today. I made ice-cream the other night and it blew my mind. Perhaps that's because it was the firs time I have used anything other than fruit to sweeten my food in a month or so. It was glorious. And I sat around in that haze like a 5 year old who has just stuffed their face with way too much cake and gummy-bears at a birthday party (before the hyperness starts...).
I'm aware the photo doesn't look very exciting. I'm sure the chocolate version of this, which is my next project, will be more photogenic :)
That said, coconut and bananas - winner!
Coconut-Banana Ice-Cream
400ml Full Fat Coconut Milk (the stuff that doesn't come from the dairy alternative section of your supermarket)
2 very ripe Bananas
1 tsp Vanilla Extract
1 tbsp Honey (if you want the ice-cream to be super sweet you might want to use more)
1/4 tsp Salt (so the freezing-point is lower)
Whisk all ingredients together.
Done.
Not really, but nearly.
Pour the mixture into a freezer-proof container (e.g. an old 500ml ice-cream tub - hence the quantities) and freeze for an hour or two before scraping down the crystals that have formed on the sides of the container with a fork. Over the next few hours keep coming back to break up the crystals that are forming so you end up with one giant popsicle. Personally, I prefer it slightly thawed because then the banana flavour takes centre-stage but that might just be me :)
This ice-cream goes really well with a cup of coffee after dinner.
Have a fab evening! I'm gonna eat some more ice-cream.
Sunday, 11 August 2013
Lemony Sweet Potato Wedges

In line with my lack of cooking lately this is more of a non-recipe. It's one you should try, though. Like really :)
Have you ever noticed how when you make sweet potato pie or cheesecake and you add lemon zest it really makes the sweet potato flavour pop? I ended up wondering whether that would work as well when making wedges. Short answer - it does. Really well.
The long answer is that you don't loose the sweetness of the sweet potatoes but I find these work better with savoury stuff than their overly cinnamony siblings.
Lemony Sweet Potato Wedges (perfect for one)
1 Sweet Potato
Zest of 1/2 Lemon
1 tsp Salt
1/2-1 tbsp Olive Oil
Preheat your oven to 220˚C.
Peel the sweet potato and cut it into wedges.
Rub the salt and lemon zest together using your fingers. Combine with the olive oil. What I do is start off with half the oil and safe the rest for later.
Toss the wedges in the lemon-mix. If you feel they are not properly coated add a bit more oil but keep in mind that you don't want the oil dripping off the wedges either.
Bake for 20 or so minutes (until the the edges are crispy).
Now, the wedges are lovely on their own with some humus, but they work particularly well with some ragu or some other stew you found hiding in your freezer.
I hope you have a fantastic week!
Wednesday, 31 October 2012
Velvety Beetroot Chocolate Brownies

If the thought of beetroot in baked goods leaves you somewhat bewildered, let me tell you one thing - whoever first used beetroot in brownies was a genius! They are velvety, super chocolatey, sweet but not excessively so and they are also quite pretty. I think they even beat the double chocolate ones and the vegan ones. And I would say they are about equally awesome as the aubergine chocolate cake. And they are adapted from a recipe from the same cookbook (Harry Eastwood's Red Velvet Chocolate Heartache). A couple of years ago a few of us in St Andrews were somewhat obsessed with this book. All the cakes in it are made with vegetables (mostly root vegetables) and the all have an amazing texture and taste even better. Most of them actually taste way better than their non-vegetable cousins.
Beets, carrots and courgettes lend these cakes structure and airiness and a sweetness that you don't really get when you are using normal sugar. For those of you who like using agave syrup for baking. I feel like the effect is similar to the one you get when you replace sugar with dark agave in a cake.
Anyhow....I made these brownies after a long day at work. When I came home I found a couple of beets looking at me wanting to be eaten but I had no motivation whatsoever to roast them so I chopped them up, stuck them in the microwave and made some brownies. And after brownie number two I felt like it had been a good day after all :)
Velvety Beetroot Chocolate Brownies (adapted from Harry Eastwood)
400g Raw Beetroot (weigh them after peeled, topped and tailed them)
100g Almond Meal
3 Eggs
220g Sugar
1/4 tsp Salt
150g Cooking Chocolate (the dark kind)
70g Cocoa Powder
2 tbsp Potato Flour or other kind of starch (rice or corn will work just as well)
2 tsp Baking Powder
1 tsp Vanilla Extract
Preheat your oven to 160˚C. Line a large gratin dish (approx. 27x20cm) with baking parchment.
Cut the beetroot into 2 cm pieces, place it in a microwaveable bowl with a tablespoon of water, cover with some cling film or a plate and microwave for 7 minutes (the original recipe says 10, my microwave is from the stone age (a.k.a. really slow) and whenever I have made these brownies and left them in there for 10 minutes I have ended up with mush, after 10 they are cooked through already).
While you are waiting for the beetroot, break the chocolate into pieces and set aside.
In a large bowl, whisk the eggs, sugar, and salt until their volume has tripled. If you are using an electric whisk, this should take about 3-5 minutes, if you are using a balloon whisk and are using your own muscle power, I am a) totally impressed with you and b) have no clue how long things are going to take so whisk away until the volume has tripled or your arms fall off :)
Drain the water the beetroot has been cooking in, then puree until smooth. A hand held immersion blender works wonders here. Once you have beetroot puree staring at you, mix in the chocolate, recover the mixture and set it aside so the chocolate can melt.
Fold the almonds, starch, cocoa powder, baking powder and vanilla extract into the eggs. Make sure you have a homogeneous mixture.
Follow this by folding in the beetroot-chocolate purée until combined.
Pour the batter into the gratin dish and smooth out the top.
Bake for 30-35 minutes.
Allow the brownie to cool before you cut it into pieces because it breaks quite easily while it is still hot.
Milk obviously works really well here, but so does wine :)
I hope you have a fabulous rest of your week and that your Halloween costume was less ridiculous than mine (the 80s were somewhat alive). I will be back with another (yes, another) chocolatey recipe :)
Saturday, 2 June 2012
Fruit Tapioca
Today's post is for all my fellow tapioca-lovers, but especially for my friend Katharina who has been visiting me for the last few days.

Last year, when I spent a few days in New York City with my lovely friend Katharina (who suffered through me being the worlds laziest person where homework was concerned in high school (i.e. Katharina did the homework and I copied it either on the train, before class, or sometimes even during class)) we realised that she had never had anything with tapioca (like bubble tea). Since then whenever we talk about that week we talk about tapioca....and pork buns...and all the other amazing food we had.
When I read Janet's post about fruit tapioca a while back I really wanted to make but never got around to it.
So when Katharina told me she was coming to Berlin I decided that I should use her as an excuse to make a huuuge bowl full of fruit tapioca.
And it was good :)
Soo good.
Note: Adjust the amount of agave syrup you use depending on how sweet the juice and fruit are.
Also, in case you use the word juice in a different way I - when I talk about juice I mean the 100% from a fruit kind, not the kind with sugar and water (I would call that fruit nectar), and definitely not the sugar-free syrup you mix with water (I would call that squash) - I've had some misunderstandings on that front lately.
Fruit Tapioca
150g Tapioca Pearls (I like the medium ones but the small ones will do just fine)
250ml Water
750ml Fruit Juice (I used grape juice)
300g Fruit (I used mixed berries)
Some Agave Syrup
Take out a big, heavy bottomed pot.
Soak the tapioca in the water for about an hour (if you use the small kind half an hour will do), then add the juice and the fruit and bring things to a boil over a medium heat.
Simmer for 5-10 minutes until the tapioca is tender. Don't forget to keep stirring - have you ever had to scrape burnt tapioca off the bottom of a pot? I had to learn the hard way a while back - it wasn't fun.
If you feel the fruit and juice you used is a bit tart, add some agave syrup to taste.
Find a pretty bowl, allow the tapioca to cool and then find it a home in your fridge.
Oh, and in case you're wondering - this goes incredibly well with some vanilla ice-cream!

When I read Janet's post about fruit tapioca a while back I really wanted to make but never got around to it.
So when Katharina told me she was coming to Berlin I decided that I should use her as an excuse to make a huuuge bowl full of fruit tapioca.
And it was good :)
Soo good.
Note: Adjust the amount of agave syrup you use depending on how sweet the juice and fruit are.
Also, in case you use the word juice in a different way I - when I talk about juice I mean the 100% from a fruit kind, not the kind with sugar and water (I would call that fruit nectar), and definitely not the sugar-free syrup you mix with water (I would call that squash) - I've had some misunderstandings on that front lately.
Fruit Tapioca
150g Tapioca Pearls (I like the medium ones but the small ones will do just fine)
250ml Water
750ml Fruit Juice (I used grape juice)
300g Fruit (I used mixed berries)
Some Agave Syrup
Take out a big, heavy bottomed pot.
Soak the tapioca in the water for about an hour (if you use the small kind half an hour will do), then add the juice and the fruit and bring things to a boil over a medium heat.
Simmer for 5-10 minutes until the tapioca is tender. Don't forget to keep stirring - have you ever had to scrape burnt tapioca off the bottom of a pot? I had to learn the hard way a while back - it wasn't fun.
If you feel the fruit and juice you used is a bit tart, add some agave syrup to taste.
Find a pretty bowl, allow the tapioca to cool and then find it a home in your fridge.
Oh, and in case you're wondering - this goes incredibly well with some vanilla ice-cream!
Tuesday, 29 May 2012
Quinoa Salad

I spent mine sitting in my aunt's garden, enjoying the sun and the fact that I finally managed to find the time to read the new Kane Chronicles book (is it just me or is there a crossover with the heroes of the olympus series in the works?) oh, and then there was the food. I pretty much spent the entire weekend baking and cooking and eating.
We made this salad (which is adapted from Yotam Ottolenghi's recipe) to go with some grilled amazingness off the barbecue and some almond meal rolls and it worked beautifully.
What should I tell you about this salad? It's relatively quick, it's summery, it's gluten-free. Oh, and it tastes fantastic.
Go on, you know you want to make some quinoa salad for dinner :)
Quinoa Salad
150g Quinoa
2 Fennel Bulbs
300g Broad Beans (fresh or frozen, the tinned kind is gross)
A handful Green Beans
70 ml Olive Oil
1 tbsp Sugar
3 tbsp Apple Cider Vinegar
2 tbsp chopped Mint
2 tbsp chopped Cilantro
2 tbsp chopped Dill
2-3 Limes
Salt & Pepper
Slice the fennel into slices that are about as thick as a 2 Euro coin. Then sauté the slices with about 50 ml of the oil over a medium heat for 15 minutes.
While the fennel is sautéing away, boil some water, add some salt and cook the quinoa in it.
Give it about 10 minutes but check towards the end - you want the quinoa to be al dente rather than resembling school cafeteria pasta.
When the quinoa is done, drain it into a sieve and rinse it with cold water so it stops cooking and cools down.
Don't forget about the fennel.
Once the fennel is soft, add the sugar, vinegar and a generous pinch of salt. Stir things for a couple of minutes before you take the mix off the heat and set it aside in a bowl.
Bring two pots of water to a boil and add some salt to each.
Cook the cook the green beans for 4 or 5 minutes, drain them and either rinse them in cold water or (even better) submerge them in ice-water so they cool quickly and keep their beautiful colour.
Cook the broad beans for a minute or so, drain them and rinse in cold water. Broad beans have this leathery thick skin, you'll want to peel that skin off to reveal their true beauty.
Mix the quinoa, fennel, and beans. Then add the cumin and herbs and remaining olive oil. Season with salt and pepper.
Squeeze the limes and add enough of the juice to the salad so you can feel the limey tang but not so much that you can barely taste anything else. If you like you can scoop the pulp and add it to the salad.
All right, I hope you have a fabulous rest of your week. I know I will. My friend Katharina from high school is coming to visit. Oh, the excitement! :)
2 Fennel Bulbs
300g Broad Beans (fresh or frozen, the tinned kind is gross)
A handful Green Beans
70 ml Olive Oil
1 tbsp Sugar
3 tbsp Apple Cider Vinegar
2 tbsp chopped Mint
2 tbsp chopped Cilantro
2 tbsp chopped Dill
2-3 Limes
Salt & Pepper
Slice the fennel into slices that are about as thick as a 2 Euro coin. Then sauté the slices with about 50 ml of the oil over a medium heat for 15 minutes.
While the fennel is sautéing away, boil some water, add some salt and cook the quinoa in it.
Give it about 10 minutes but check towards the end - you want the quinoa to be al dente rather than resembling school cafeteria pasta.
When the quinoa is done, drain it into a sieve and rinse it with cold water so it stops cooking and cools down.
Don't forget about the fennel.
Once the fennel is soft, add the sugar, vinegar and a generous pinch of salt. Stir things for a couple of minutes before you take the mix off the heat and set it aside in a bowl.
Bring two pots of water to a boil and add some salt to each.
Cook the cook the green beans for 4 or 5 minutes, drain them and either rinse them in cold water or (even better) submerge them in ice-water so they cool quickly and keep their beautiful colour.
Cook the broad beans for a minute or so, drain them and rinse in cold water. Broad beans have this leathery thick skin, you'll want to peel that skin off to reveal their true beauty.
Mix the quinoa, fennel, and beans. Then add the cumin and herbs and remaining olive oil. Season with salt and pepper.
Squeeze the limes and add enough of the juice to the salad so you can feel the limey tang but not so much that you can barely taste anything else. If you like you can scoop the pulp and add it to the salad.
All right, I hope you have a fabulous rest of your week. I know I will. My friend Katharina from high school is coming to visit. Oh, the excitement! :)
Wednesday, 23 May 2012
Vegan Peanut & Cocoa 'Milk'
You were supposed to get a cupcake recipe today, but it's hot in Berlin...and I don't want to think about baking anything today so instead I thought I could write about this new obsession of mine.
Anything that involves ice or ice-cream :)
Today's recipe is mainly motivated by the fact that Alpro/Provamel finally started selling almond milk in Germany which means I have been using almond milk for everything lately and that I was craving chocolate and didn't have any in my depressingly understocked kitchen.
So, without further ado - let's make a super tasty drink that requires nothing but store cupboard staples (ok, that one is only true if you have an equally weird store cupboard as mine).
Vegan Peanut & Cocoa 'Milk'
(for 1 large glass)
2 tsp Cocoa Powder
4 tbsp Boiling Water (this is an approximation)
Almond Milk (enough to fill 2/3 of your glass)
2 tsp PB2 (or if you don't have any just use normal peanut butter or peanut flour)
1/4 small Avocado
1/2 small Banana
Agave Syrup
Lots and lots of Ice Cubes
In a blender mix the cocoa powder with the boiling water so it turns into a thin paste. Add the almond milk, then add the PB2, avocado, and banana. Blend until you have a more or less smooth mix. If you feel like it's not sweet enough, add some agave syrup or if you'd rather use some stevia, that works as well.
Fill your glass with as many ice cubes as you want (yes, those are pacman ice cubes in my glass...), then add the mix from the blender and if there's still some space at the top you could add some more almond milk...
Now, hopefully you'll have the same random collection of things in your store cupboard :)
I hope you have a fantastic evening!
Anything that involves ice or ice-cream :)
Today's recipe is mainly motivated by the fact that Alpro/Provamel finally started selling almond milk in Germany which means I have been using almond milk for everything lately and that I was craving chocolate and didn't have any in my depressingly understocked kitchen.
So, without further ado - let's make a super tasty drink that requires nothing but store cupboard staples (ok, that one is only true if you have an equally weird store cupboard as mine).
Vegan Peanut & Cocoa 'Milk'
(for 1 large glass)
2 tsp Cocoa Powder
4 tbsp Boiling Water (this is an approximation)
Almond Milk (enough to fill 2/3 of your glass)
2 tsp PB2 (or if you don't have any just use normal peanut butter or peanut flour)
1/4 small Avocado
1/2 small Banana
Agave Syrup
Lots and lots of Ice Cubes
In a blender mix the cocoa powder with the boiling water so it turns into a thin paste. Add the almond milk, then add the PB2, avocado, and banana. Blend until you have a more or less smooth mix. If you feel like it's not sweet enough, add some agave syrup or if you'd rather use some stevia, that works as well.
Fill your glass with as many ice cubes as you want (yes, those are pacman ice cubes in my glass...), then add the mix from the blender and if there's still some space at the top you could add some more almond milk...
Now, hopefully you'll have the same random collection of things in your store cupboard :)
I hope you have a fantastic evening!
Wednesday, 29 June 2011
Horchata
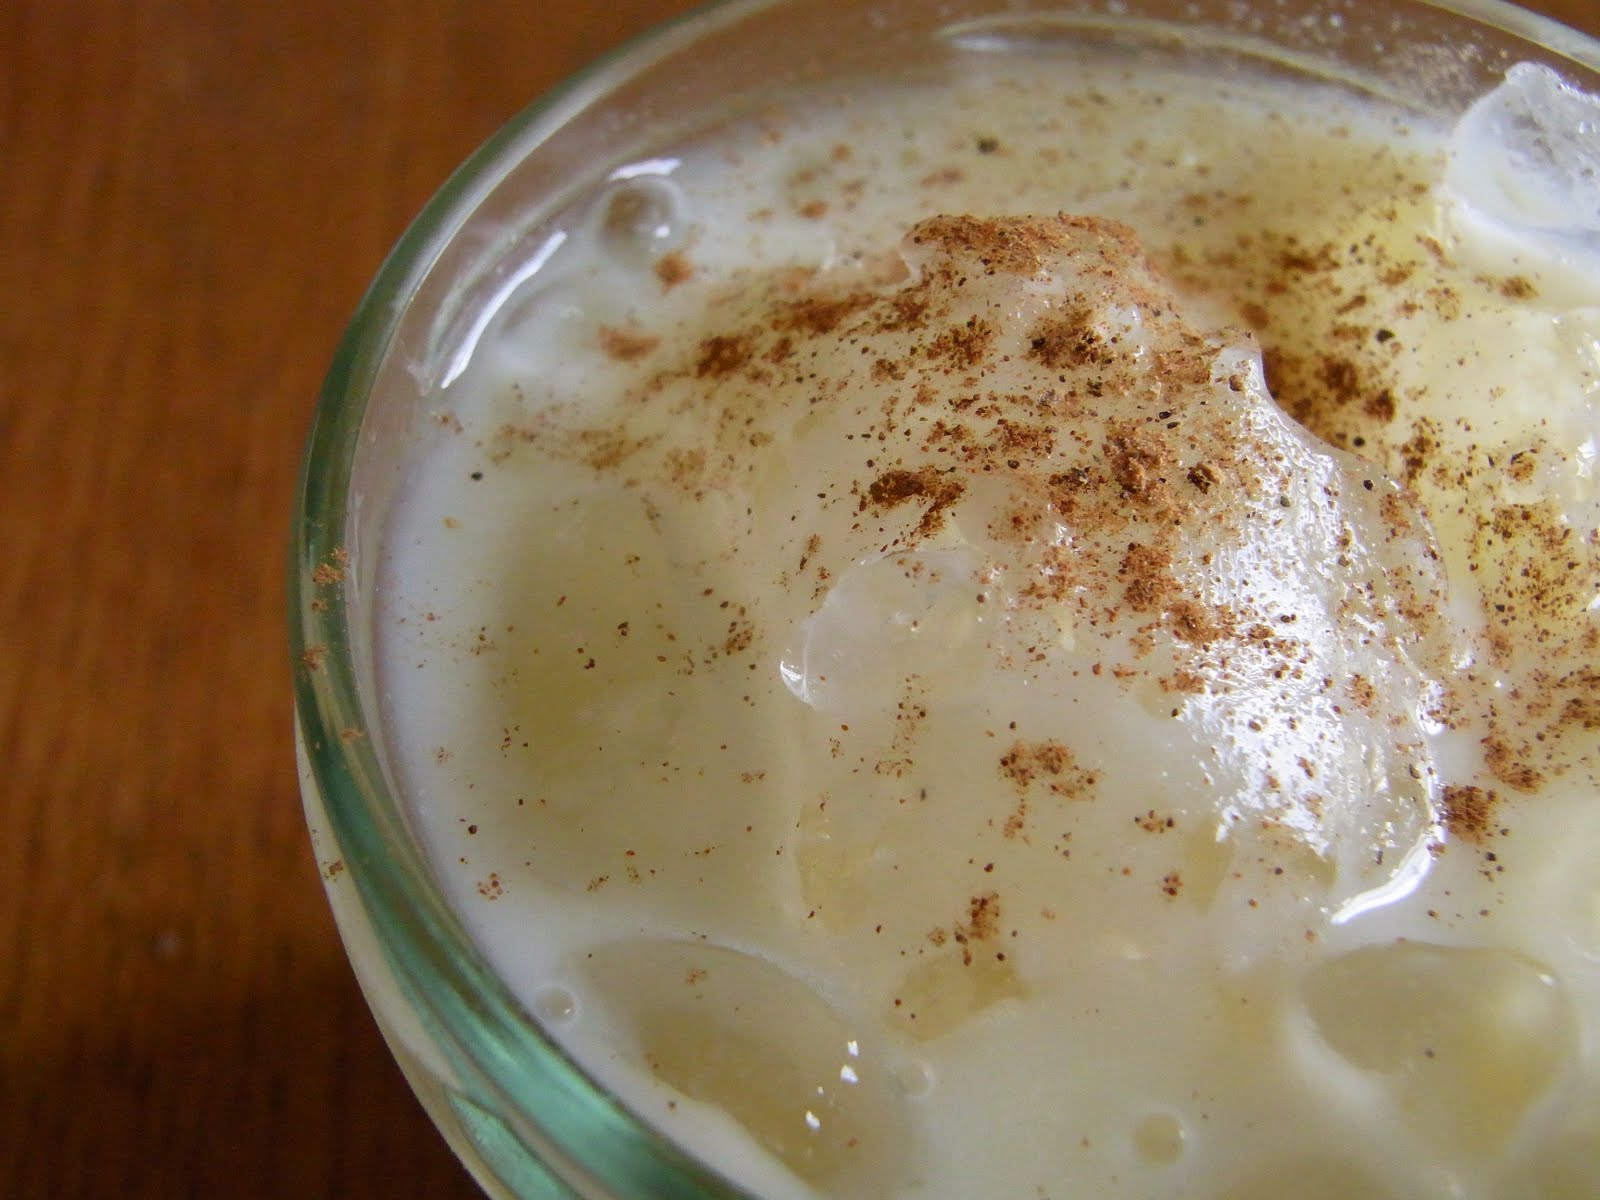
I'm settling into a routine these days, get up early, try to get some writing done, then I treat myself to some nice iced tea/coffee and some fruit, then I try to get some more writing done, then I pretend to be sporty while i wheeze my way through another run, followed by a quick lunch, some more writing, and then it's already time for another glass of frozen amazingness before it's already dinner-time (unless Verena makes me go swimming or something else, oh and this whole thing is obviously interspersed with waaay too much procrastination).
Anyhow, the reason I'm telling you about my decidedly boring life is because the iced coffee breaks have definitely become the highlight of my day. So when David Lebovitz posted his horchata recipe yesterday I obviously had to make some. And swapping the iced coffee for some horchata has kinda turned today into the best day of my week so far (not that I don't like the iced coffee but since horchata tastes even more like rice pudding than rice milk already does it trumps any other drink).
David suggests grinding some white rice in your blender but since I a) don't have a proper blender and am not planning on ruining my coffee grinder and b) tend to have a bag of ground rice sitting around in my cupboard I just went for the already ground rice. Oh, and I reduced the sugar because I felt it was more than sweet enough with half a cup.
Horchata
1/2 cup Ground Rice
3 cups Warm Water
1 Cinnamon Stick (ca. 5cm)
1/2 cup Sugar
2 cups Milk (I used unsweetened soy)
In a bowl combine the rice and the water. Add the cinnamon stick, then cover and leave it alone for at least 8 hours.
When you come back to the mix, fish out the cinnamon stick and strain the mixture through a sieve lined with cheesecloth.
All you need to do now is add the milk and sugar, pour some over some ice and then sit back and relax for a bit.
Sunday, 19 June 2011
Banana Soft Serve

Anyhow, since I told you a while back I wasn't going to give you any summery recipes until it was summer here you get an extra summery recipe today.
Anyone remember the vegan banana soft serve everyone was making a couple of years back? Jenna's post a few weeks back reminded me of how amazing and addictive that stuff was so I made some last week (while wearing warm woolly socks) and I was catapulted right back to the gloriously hot summer of '09.
Do you remember where you spent your summer that year? I spent mine summer school hopping, enjoying the sun, finally riding my bike again and reading papers sitting next to a lake.
So...if you are looking for a lovely snack that comes together in less than 5 minutes and will make you smile for the rest of the afternoon, make some banana soft serve (again)!
Banana Soft Serve
2 Bananas per person (frozen, cut into pieces - either freeze them with the skin on and then cut the skin off before chopping them or peel them and freeze them already cut into pieces in a ziploc bag)
Stick the bananas into a food processor (the kind with a blade) and blitz the whole thing for 2 or 3 minutes until it's all creamy.
Done :)
Thursday, 2 June 2011
Black-Eyed Bean and Roasted Pepper Soup

Anyhow, the reason I'm complaining is twofold a) I think complaining about the weather here makes it so much easier for me to write because leaving the cold asap is a really good motivator for me (and if I finish writing up quickly enough I'll get to go on a holiday with my friend Sandra so I'm writing like a crazy person right now) and b) I know you might not want to cook what I write about these days because it'll be too warm for where you are right now but I won't start making ice-cream or anything else like that until I stop making a hot water-bottle every evening :)
So after all of that, today's recipe is one for a lovely soup I made a while back when the wind decided to uproot the tree in front of our house and when the only thing you really wanted was curl up under a blanket and drink some tea.
Black-Eyed Bean and Roasted Pepper Soup
1 cup Black-Eyed Beans, dried
2 Red Peppers
1/2 Onion, diced
2 Garlic Cloves, minced
Vegetable Stock
1/2 tsp Salt
1/2 tsp Pepper
A pinch of Cayenne Pepper
1 tbsp Tomato Puree
3 tbsp Parmesan, grated
The night before you are planning to make the soup soak the beans in cold water.
On the day, drain the water, and cook the beans in some fresh water until they are tender. This depends a bit on the the size and age of your beans so just keep checking, mine took just over an hour.
While the beans are cooking, preheat the grill in your oven.
Wash the peppers, pat them dry, half them and deseed them. Then put them into a baking dish skin-up and stick them under the grill for about 20 minutes. You'll want to check them every once in a while to make sure they're not super black on one side and still completely raw on the other side (i.e. you might have to rotate them) but some charring is perfectly acceptable. When they're starting to be done the skin will start lifting off in some places and they'll start looking softer.
Take them out of the oven and let them cool.
Once the beans are cooked through, drain them and put them to the side.
If you haven't done so, dice the onion.
Take the cooled peppers and peel off the skin (most of it will just rub off, but if you're having problems with some bits, a knife should do the job :) ) and dice them.
Heat some olive oil in a pot, then sauté the onions, once they're all lovely and translucent, add the garlic and wait until your kitchen smells like you're trying to get rid of some vampires (I know, I've been watching too much Buffy), then add the beans and pepper.
Add enough stock to cover everything and give the beans and the peppers some time to get to know each other, about 10 minutes should be enough.
Puree everything until you have a very smooth soup, then season with salt, pepper and some cayenne pepper if you feel like a bit of a kick.
Stir in the tomato puree (this is mainly for the colour but it also works wonders flavour-wise).
Just before you're ready to serve the soup, add the parmesan.
Enjoy your soup with some fresh bread and some tea if you're still not warm enough :)
Saturday, 19 March 2011
Leeks with a Vinaigrette

After all the deserts lately I was craving something at least slightly healthy so when I walked past some gorgeous looking leeks that were smiling at me in their light green, yellow, and white goodness I couldn't resist.
These are all lovely when you eat them warm but they are just as good if you cover them with the vinaigrette and leave them in the fridge. If you have them warm, make some salmon to go with them. It's one of my favourite combinations of flavours at the moment.
Leeks with a Vinaigrette
2 Leeks per person (or more if you want leftovers)
Salt
3 tbsp Vinegar
2 tsp Dijon Mustard
3 tbsp Oil (I like the flavour of olive oil but other people swear that plain vegetable gives you a nicer texture)
Some Water
Cook the leeks in a pan of salt water (no, the dark green stuff isn't nice, cut it off :) and you might want to wash of the sand...just saying...).
While the leeks are cooking away, make the vinaigrette. Traditionally you would go for a 3:1 ratio of oil and vinegar but I really don't like the taste so go for whatever ratio you like, the 1:1 one above is the one I like the best. If you are using quite a lot of vinegar you might want to add some water to tone down the acidity but again, go for whatever you like :) whatever you go for, mix the vinegar and mustard first, that way the emulsion will get thicker and will stay that way for longer. If you want to add some salt, add that before the oil as well, then whisk in the oil.
Once the leeks are done, which should take between 10 and 15 minutes, drain them and sit them onto a pretty plate.
Now you can either stare at them in adoration or you could just inhale them (guess which option I have been going for).
Thursday, 10 March 2011
Pear Infused Coconut Granita

So, before we continue in our quest to make the coolest desert you'll ever make let me tell you one thing about this granita - I don't think I've ever seen a litre of ice-cream or granita or anything disappear that fast from my freezer :) there were a lot of very happy faces (which made me very happy) and it turns out that it goes incredibly well with say the fruit salad I made a while ago (as an afternoon treat if you're having a bad day) or with the chocolate vodka (for example after fajitas while the people at your kitchen table talk about all the things you could possibly deep-fry...I love you guys!) or by itself while you're making Cape Malay Curry :) in a nutshell - it's the perfect desert!
Anyhow, let's make some coconut granita!
We're starting off where we left off with the poached pears. After you have removed the pears from the coconut mix, allow the liquid to cool. I highly recommend trying some while you're waiting. It gets a bit addictive but it's soooo nice!
Once it's all cooled down, transfer the mix into a freezer-proof container and stick it into your freezer. Unlike other granitas this one is very lazy. No checking every hour or so.
Leave the mix in the freezer overnight and then come back to it in the morning. I was worried I was going to come back to a solid block of ice but it turns out that I was wrong. Instead I had just about made it to a semi-fredo state.
Once you're there, break up larger lumps of ice with a fork (or if you feel like it, put it into a bowl and whisk it for a bit) then put everything back into the freezer and then wait until it's properly frozen (ok...it's just as good if it's not properly frozen....but you know how much better it will taste if you make yourself wait...).
This tastes best in the company of some amazingly lovely people :)
Tuesday, 8 March 2011
Coconut Poached Pears

This is recipe 1 of a series. So over the next 3 posts I'll talk about making 3 glorious deserts that will be the easiest to make in one go (like this weekend) but I love each part on its own as well so they get separate posts. So bear with me :)
I made these a while back when Katie had a tangine party. I wanted to bring a desert that would work with the gorgeous flavours of the tangines (apricot, almond, and chicken and a lemon, chickpea and vegetable one) without being overwhelming. I was looking for clean flavours and at the same time I was looking for something exotic...at which point I ended up sticking my head in the sand for a day...and then I decided to go ploughing through my cookbooks. And in Vicky Bhogal's Flavour I found something that matched all my prerequesites :)
Before you start worrying, this recipe couldn't be any easier - if you watch the pot that is :) I managed to get the coconut milk to boil over no, not just once...but twice in about 5 minutes because I was running around the house doing other things. So, I think the safest bet is - get a magazine and sit down next to the pot...and watch it like a hawk :)
Coconut Poached Pears (adapted from Vicky Bhogal's recipe)
1 Pear for every person you're having over
800 ml Coconut Milk for every 4 pears
200 g Sugar for every 4 pears
Peel the pears (but leave the stalks attached) and cut a tiny slice off at the bottom - that way they'll stand up better later on.
Heat the coconut milk in a saucepan that's big enough to hold the liquid and the pears but not too big (you want the coconut milk to cover the pears later on) and dissolve the sugar in it.
Once the liquid is simmering away, place the pears in the saucepan and cover (and watch). You'll probably find that the lowest setting your hob has will be more than enough.
Simmer until the pears are tender (about 10-15 minutes), then take the pears out using a slotted spoon and allow them to cool (they like your fridge after that).
Serve them with some Coffee Granita.
Allow the coconut milk to cool, then make some Pear Infused Coconut Granita :)
Sunday, 28 November 2010
Orange, Poached Quince, and Fennel Salad

Guess what - I have managed to sneak quince into yet another recipe :)
I made this salad for Thursday's meal and it was born out of the idea of making a wintery salad (and oranges and fennel are one of my all-time favourite wintery combinations) and having something with quince. I guess I don't have to start praising quince again, but they're still in season and go incredibly well with venison or lamb (though they worked just fine with chicken on Friday).
Anyhow, we all know they're all magical and awesome so I'll get to the recipe, shall I :)
The quantities are what I would use for about 4 people.
Orange, Poached Quince, and Fennel Salad
1 Quince
2 Fennel Bulbs
2 Oranges
1 cup Orange Juice
1 cup Water
2 tbsp Honey
7 Mint Leaves or so
Apple Cider Vinegar
Olive Oil
Salt, Pepper, potentially some Dijon Mustard
Peel the quince, then cut it into quarters to remove the core.
Cut the quarters into 3 wedges each and put everything into a pot with the orange juice, water, honey and mint leaves (the liquid should cover the quince, if that's not the case in your pot, add some more orange juice or water).
Bring the liquid to a boil over a medium high heat, then turn it down so it simmers when you put the lid on. Now you have to patient because the quince will take FOREVER! You'll want to stir them every once in a while but apart from that you'll have an hour and a bit or so to get some work done or read an exciting book.
Wash the fennel bulbs, half them and then slice them fairly thinly (I normally aim for something under 5mm, not always successfully but that is the goal). Set aside in a salad bowl.
Cut of the orange peel and then cut out the segments. Put the segments into the bowl with the fennel.
Once you've cut out all the segments squeeze the juice in the bit you're left with (what is that actually called?) into a bowl and use it with the vinegar and olive oil to make a dressing. If you feel like the dressing could do with a bit of a kick then add a very small amount of mustard.
Season with some salt and pepper if needed.
By now the quince should be ready. You'll know they're ready when they are tender and, when you try them, there is no tannic taste to them anymore if they still taste fairly bitter give them more time.
Once the quince are done, drain the cooking liquid (though that might also make a nice mixer with soda water) and add them to the fennel and orange segments.
Mix everything with the dressing, sit back and relax and enjoy your salad :)
Saturday, 27 November 2010
Sautéed Spinach with Pomegranate Seeds

I made this for the Thanksgiving meal at Alex's place on Thursday. The only guideline I had been given was 'something green, vegetarian, and awesome' so no pressure whatsoever :)
I decided to make some sautéed spinach because you can't go wrong with spinach and I've been having this craving for food that reminds me of my favourite Syrian restaurant (which is unfortunately very closed these days, which makes me very sad) so I thought adding some pomegranate seeds (I know it's a tiny bit early for them but I couldn't wait any longer) would do the trick.
It worked really well with the venison Rich and Alex made (which was so nice I nearly had to cry, ok I haven't really had much nice food in a while) but it would also be nice with a curry I think.
Sautéed Spinach with Pomegranate Seeds
500g Spinach
2 Pomegranates
3 Garlic Cloves
Olive Oil
Salt & Pepper
Wash the spinach and deseed the pomegranates. Thinly slice the garlic.
Heat some olive oil in a heavy bottomed pot over a medium high heat.
Add the garlic and wait until it fills your kitchen with its delicious scent.
Add the spinach in several batches (wait for the previous one to wilt down a bit. Once the spinach has shrunken down to manageable proportions give it another 1 or 2 minutes.
Turn off the heat, season lightly (you really don't need much here, you don't want the salt or pepper to overpower the pomegranates) and mix in the pomegranate seeds.
Enjoy with way too much lovely food :)
Tuesday, 5 October 2010
Sweet & Spicy Apple Sauce

I'm in the mood for some procrastination today so you get a new recipe sooner than originally planned :)
It's a nice and sunny autumn day in St Andrews but I've been cold all day so I've decided it's time for a comfort food recipe.
I made this with my mum when she was visiting with the apples that grow in our garden. It's one of those amazingly old trees that give you the nicest apples on this planet. Fine, they aren't that pretty and most of them are slightly bruised, but they do taste amazing. I don't even have a clue what the variety is called, but they're nice and tart (but still quite sweet) without being mealy. I might even venture as far as saying they're some of my favourite apples.
Anyhow, this post also marks a slight change for this blog. I have decided that I need to eat more protein. So since yesterday I've been cooking meat (I know, you're just as surprised as me, and you don't want to be in my kitchen when I cook it, I never would have guessed I knew so many swear-words that could describe my attitude towards raw meat) and listening to what David Kirsch tells me to eat. Let's see how this goes...so far I'm convinced I've eaten more protein in the last two days than I did in the entire week before (or something like that).
So anyhow, probably the last slightly indulgent recipe for a while. Join me while I dream of apple sauce :)
Sweet & Spicy Apple Sauce
1kg Apples (don't go for the crazy sweet ones though)
400ml Water
Juice of 1 Orange
2 tbs Cinnamon
Some Nutmeg
2 tbsp Sugar
Peel and core the apples, then cut them into small chunks and stick them into a heavy bottomed saucepan.
Heat until the juice mix starts boiling, then turn the temperature down to a medium heat and keep stirring from time to time.
Now you get to lean back and read a magazine :) while you check up on the apples every once and again. You'll want them to start falling apart (without burning at the bottom, hence the stirring).
Now you have two options - you can either join me in the eternal bliss of laziness and just remove the pot from the heat and spoon the mixture into some jam jars (which you have stuck into boiling hot water for about 10 minutes and then fished out without burning your hands) and embrace the potential lumps you might find or, you put it through a food moulis (did I spell that right?) before spooning it into the jars. Whatever you do unless your jars are still lovely and hot, put a metal spoon into the jar because apparently they stop the glass from bursting.
Screw the jars closed while the apple sauce is still hot and turn them upside down while they cool (I'm not the expert here but I think that's what helps seal the jars?).
Enjoy with some semolina pudding or some rice pudding and tell me how amazing it was, I'll be dreaming about it for the next couple of weeks :)
Monday, 27 September 2010
Orange Kanten


But you have to admit, Kanten sounds like 10 times more exciting.
I had the idea for this recipe a couple of years ago around lent. Verena had gone on her usual 'no sweets' whereas I was on my usual 'let's go vegan for 40 days' and we were trying to have dinner together. So the search led me down the sugar-free things route because if it doesn't have any added sugar it's obviously ok, right ;)
The original version was pretty much just blood orange juice and Agar flakes but I've since experimented and while the colour is not as pretty I actually prefer the taste of the Tropicana Ruby Breakfast mix (yes, I am a total slave to my brands where orange juice is concerned, don't judge me) with a hint of agave syrup.
Orange Kanten
1l Orange juice
5 tbsp Agar flakes
2 tbsp Agave syrup
Mix the Agar flakes and 2 cups of the orange juice in a pot, heat until it starts to boil and keep it bubbling for about 5 minutes while stirring it regularly (no running off to read that trashy novel just now!) until the agar flakes have dissolved.
Take off the heat, stir in the agar syrup and the rest of the orange juice. I don't heat up all the orange juice in the hope that whatever vitamins are in the non-concentrate awesomeness won't all die, I'm not quite sure how much that actually helps though (but I can always hope).
Pour everything into a pretty bowl or glasses, chill for at least 4 hours and then serve after a fabulous meal (or for breakfast) :)
Sunday, 8 August 2010
Japanese Salad

After a weekend of rather disappointing food in Hamburg (I got to see my grandma so that made up for the food) I feel the need to write about something that leaves you feeling healthy and energetic.
This will probably also be the last semi-healthy recipe for a while because I'm at home with my parents again and after reading Melissa Clark's article about egg free ice-cream in the NY Times earlier this week I shall be experimenting with their fancy-schmancy ice-cream machine.
Anyhow, back to today's recipe, the Japanese salad.
Anna and I were feeling rather virtuous (ok, I was since I was still wondering how all you lovely people in Berlin stay so skinny eating soo much stuff and decided I needed to eat something slightly more healthy for a change).
Japanese Salad
3 tbsp Rice wine vinegar
1 tbsp Soy sauce
2 tsp Sugar (start with one and see how you like it)
1 tsp Toasted sesame oil
1 tbsp Olive oil
Get creative with the veg, we used some mixed relatively strong salad leaves, some watercress, an avocado, some green asparagus, a carrot and some edamame.
Wash the leaves, steam the asparagus and the edamame, julienne the carrot and chop the avocado into whichever size pieces look good to you (go me for being descriptive!)
Mix all the dressing ingredients together.
Serve in a pretty bowl and have some lemon delicious rice pudding for desert - you can't go to bed feeling that virtuous :)
Subscribe to:
Posts (Atom)
