Thursday, 27 June 2013
Pecan 'Shortbread' Cookies
Whoa! I bet you didn't expect another post so soon. I didn't, but I did some baking so I thought I might as well tell you about it.
This past weekend my club hosted the Berlin Open Lacrosse Tournament and since I love it when I have an excuse to bake cookies (it feels slightly ridiculous baking four cookies just for myself, I would rather bake two dozen for a group of people), I made cookies on Saturday and Sunday. The first kind were orange essence and almond cookies which I might tell you about at a later point. I'll tell you about the second kind today because I liked them better.
Think super light shortbread studded with pecans.
Think Mexican wedding cookies that haven't been rolled in icing sugar.
And now imagine eating one of those cookies after a semi-late night (cos I'm old) and a 9am game. Those cookies seriously hit the spot.
What can I tell you about those cookies...they come together in a pinch and are as amazing with a cup of tea on a cold afternoon as they are being eaten outdoors with some stale soda water. Oh, and the dough keeps in the fridge for at least 4 days (I used up the remaining dough last night so I don't know whether it would have kept even longer).
Let's make some cookies, shall we?
Pecan 'Shortbread' Cookies
225g Butter, cold, cut into small pieces.
225g All-Purpose Flour
25g Starch (I used potato starch, cornflour or rice flour will work just as well)
30g Icing Sugar
1/2 tsp Vanilla Extract
1/2 tsp Salt
50g Pecans, toasted and broken into small pieces
75g Granulated Sugar (for rolling the cookies in, don't worry, you won't use all of it)
Cut the butter into the remaining six ingredients. Think shortcrust pastry. Work fast. You can also use the paddle attachment of a food processor. Either way, don't work the dough longer than until it is only just starting to come together. Do you remember the last time someone served you a really gross pie? Do you wanna be that person with the crap cookies? So don't overmix the dough :)
Cover the bowl with cling film and refrigerate for at least two hours or overnight. I prepared the dough in the evening and made the cookies in the morning. You have just enough time while they bake to grab some breakfast.
Preheat the oven to 175˚C and line preferably two baking sheets with parchment. I only have one and that worked just fine but it just means there is more waiting time involved when you have to work with two batches...
Form heaped tablespoons of dough into balls and roll them in the granulated sugar.
Arrange the unbaked cookies on the baking sheet, leaving about 4cm between the cookies. Oh, and you also have an option - the cookies barely spread - if you don't want them to be small mounds of cookie awesomeness, now is the time to flatten them slightly.
The cookies will need between 15 and 20 minutes in the oven. If you are using two baking sheets, rotate them after 10 minutes.
They are finished when the cookies feel firm and the edges are golden brown.
Allow the cookies to cool slightly before transferring them to a wire rack. If you move them too soon they might fall apart. Though, that gives you more reason to eat them while they are cooling down. With a glass of milk, or some coffee...
I hope you have a fantastic rest of your week and an even greater weekend!
I know mine will be - my friends Judith and Mimi have invited me over for pork barbecue...I'm trying to convince them that they want to do us all a favour and go for some vinegar-based-barbecue-sauce awesomeness...but even if they don't I'm sure it's still gonna be awesome!
That brings me to a question I have been meaning to ask you guys for a while - what's your favourite barbeque sauce? Are you amazed by all things from North Carolina or are you (shock, horror) more a fan of the tomato and molasses further west? What's your favourite kind?
Thursday, 20 June 2013
Strawberry Milk
Growing up we didn't make milkshakes, we made fruit-milk. Banana, strawberry, raspberry, I think we even tried cherry once. Banana tended to win because my sister and I didn't have to try and convince our mum that some sugar would really help this not-quite-sweet-enough strawberry milk. Also, overripe bananas seemed to be sitting around way more often than somewhat overripe strawberries.
Somehow my parents never told us that there was this other mythical drink - The Milkshake. I'm sure I must have seen it on menues but I didn't have a milkshake until I was just about to graduate from college.
The first time I remember drinking a milkshake was pretty much exactly 5 years ago waiting for a train at Union Station in DC. The only way I can describe that time in DC is sweltering. Nobody hat prepared me for the heat. I had expected hot but not swamp-hot. I remember writing a postcard to my aunt telling her about how I had started to really appreciate coffee-shops for their airconditioning.
So after 4 days of living off iced coffee and coffee cake (another thing I discovered on that trip), trying to cram as much US history in as possible, I was standing at the station waiting for my train to Philadelphia (for more heat and even better history) and the humidity was starting to get to me.
And then I saw this sign at the Ben & Jerry's Stall. I could have a milkshake made from milk and any kind of Ben & Jerry's ice cream I wanted :)
I'm gonna leave it at this - an addiction was born that got even worse when I had my first malt shake a few years later at Ruby's at Chrystal Cove Beach.
Anyway, yesterday I went back to basics and made strawberry milk. It's hot in Berlin at the moment. It's especially hot in my office. So, when I got home, I made a big glass of strawberry milk. It was as good as I remembered, if not better because I added vanilla essence. It also made me realise - as good as milk shakes are, strawberry milk is better when it's really hot and all you want to do is cool down.
I'm giving you the recipe below for the quantities not for the single instruction :)
Strawberry Milk
100g Strawberries, hulled
200ml Milk
1tsp Vanilla Essence
Some Ice-Cubes (optional)
Blend everything together until smooth :)
Let's see, strawberry milk goes incredibly well with hot summer days, popcorn (made the perfect dinner yesterday), vanilla ice cream, non-chocolate cookies, and lazy evenings :)
I hope you have a fantastic weekend! I will be watching lacrosse, playing lacrosse and enjoying the weather at a tournament my club is hosting. Good times!
Labels:
drinks,
milk,
strawberries
Wednesday, 8 May 2013
Game Day Compost Cookies
I first had these cookies at Momofuku Milk Bar a year ago or so. They were quite amazing but I had been on a sugary-stuff bender and ate one of them after already having eaten a piece of crack-pie with some cereal milk the night before and after having come back for some cereal milk ice-cream and one of those super chocolatey cookies earlier that day. The compost cookie was my mid-afternoon snack and it was good but I was not really blown away. Regardless, I had been meaning to make my own from the cookbook for a while now. I mean you have to give every cookie a second chance. Last week I finally got around to making some and after people in my lab loved them (including me - if you don't eat lots of sugar beforehand they are actually quite amazing :) ) I decided to make some for Saturday because we had a match. It was sunny, it was warm enough for me to contemplate playing without a base-layer and we sat around having a fantastic time eating cookies. We had a fantastic time playing later on but there were no cookies involved so that part is less important for now.
Because the comments were so amazing/hilarious I thought I should share them with you.
'What is in those cookies?'
'Why would you put potato chips into cookies?!?'
'Did Katharina make those cookies? Only Katharina would put mini pretzels and potato chips into a cookie!' (well, no, Christina Tosi obviously thought about that one first, but over here people are a lot less adventurous where cookie flavours are concerned).
And my favourite of all times:
'I ate too many cookies! I think if I run too fast I'll end up throwing up cookies all over the field'
'As long as you puke in the direction of the other team that should be fine'
You see, it was a good Saturday :)
Compost Cookies (adapted from Tosi)
Before we start, I know that is the longest ingredient list in quite a while. If you can't be bothered to make cornflake crunch you could also leave out the cornflakes. You could also use butterscotch chips or peanut butter ones…or mini marshmallows. That's what is so fantastic about these cookies. I can't think of many combinations that I wouldn't want to try. The coffee adds depth of flavour and a really interesting texture. Also, the combination of sweet and salty with some maltiness from the cornflake crunch turns these cookies (as some of the quotes might have already given away) into something else.
225g Butter (at room temperature)
200g Granulated Sugar
200g Light Brown Sugar
1 Egg
½ tsp Vanilla Extract
225g Flour
½ tsp Baking Powder
¼ tsp Bicarb
4g Salt
150g Chocolate Chips
100g Almonds (toasted in your oven until they are fragrant, then broken up into pieces)
40g Rolled Oats
5g Ground Coffee (yes, you are not dreaming, trust me on this one. DON'T USE INSTANT!!!)
40g Cornflakes or Cornflake Crunch (see this recipe or better: buy the cookbook because it's awesome!)
50g Potato Chips (the simple salted kind, kettle chips work better because they are more sturdy)
50g Mini Pretzels
Compost Cookies (adapted from Tosi)
Before we start, I know that is the longest ingredient list in quite a while. If you can't be bothered to make cornflake crunch you could also leave out the cornflakes. You could also use butterscotch chips or peanut butter ones…or mini marshmallows. That's what is so fantastic about these cookies. I can't think of many combinations that I wouldn't want to try. The coffee adds depth of flavour and a really interesting texture. Also, the combination of sweet and salty with some maltiness from the cornflake crunch turns these cookies (as some of the quotes might have already given away) into something else.
225g Butter (at room temperature)
200g Granulated Sugar
200g Light Brown Sugar
1 Egg
½ tsp Vanilla Extract
225g Flour
½ tsp Baking Powder
¼ tsp Bicarb
4g Salt
150g Chocolate Chips
100g Almonds (toasted in your oven until they are fragrant, then broken up into pieces)
40g Rolled Oats
5g Ground Coffee (yes, you are not dreaming, trust me on this one. DON'T USE INSTANT!!!)
40g Cornflakes or Cornflake Crunch (see this recipe or better: buy the cookbook because it's awesome!)
50g Potato Chips (the simple salted kind, kettle chips work better because they are more sturdy)
50g Mini Pretzels
Cream the butter and the sugars (give them some time to become all fluffy), then add the egg and the vanilla extract and beat until the mixture has nearly doubled in size. This will take some time. Give it 5 and things will look good, apparently if you give it 7 or 8 minutes things will be amazing but I'm always too lazy to do that.
Add the flour, baking powder, bicarb and salt. And mix until just combined.
Stir in the chocolate chips, almonds, rolled oats, and ground coffee.
If you are using a food processor for this be careful to not overmix things and be very careful to definitely not overmix things when you add the cornflake crunch, potato chips and mini pretzels.
If you are using a spoon or spatula by now, I would crush the potato chips and pretzels just a tiny bit. I don't know about you, but I don't like having a cookie that has more potato chip than cookie dough to it and they didn't break down at all when I mixed them in - I had to specifically break down some of them with the spatula which was a bit of a pain.
Scoop out 2 tbsp size portions, slightly flatten them and either set them on a sheet pan or stick them in a tupperware box. Cover and refrigerate for an hour. They last for up to a week in the fridge. That way you can have fresh cookies whenever you feel like it! How cool is that?!?
Apparently this step is crucial. I haven't tried baking them sooner but what's the point in trying to find out whether that's true if you can just clean your kitchen or watch some TV while you are waiting...
Preheat your oven to 190˚C.
Stick the cookie portions onto a lined baking sheet. Leave at least 2.5cm between them, I would probably go for something closer to 5.
Bake until the tops are nice and golden and your kitchen smells amazing. This should happen after 15-17 minutes but check before. I took mine out after 17 minutes in the end but I didn't feel like my oven was actually giving me the temperature it said it was giving me.
Now, go and make some cookies and then tell me all about it!
I hope you have a fantastic rest of your week!
Add the flour, baking powder, bicarb and salt. And mix until just combined.
Stir in the chocolate chips, almonds, rolled oats, and ground coffee.
If you are using a food processor for this be careful to not overmix things and be very careful to definitely not overmix things when you add the cornflake crunch, potato chips and mini pretzels.
If you are using a spoon or spatula by now, I would crush the potato chips and pretzels just a tiny bit. I don't know about you, but I don't like having a cookie that has more potato chip than cookie dough to it and they didn't break down at all when I mixed them in - I had to specifically break down some of them with the spatula which was a bit of a pain.
Scoop out 2 tbsp size portions, slightly flatten them and either set them on a sheet pan or stick them in a tupperware box. Cover and refrigerate for an hour. They last for up to a week in the fridge. That way you can have fresh cookies whenever you feel like it! How cool is that?!?
Apparently this step is crucial. I haven't tried baking them sooner but what's the point in trying to find out whether that's true if you can just clean your kitchen or watch some TV while you are waiting...
Preheat your oven to 190˚C.
Stick the cookie portions onto a lined baking sheet. Leave at least 2.5cm between them, I would probably go for something closer to 5.
Bake until the tops are nice and golden and your kitchen smells amazing. This should happen after 15-17 minutes but check before. I took mine out after 17 minutes in the end but I didn't feel like my oven was actually giving me the temperature it said it was giving me.
Now, go and make some cookies and then tell me all about it!
I hope you have a fantastic rest of your week!
Labels:
cookies
Friday, 19 April 2013
What's in your bag?
So I thought I might as well combine the two :)
For my birthday I bought a new backpack.
After about 8 years of carrying my worldly belongings around in bags, when I moved to Berlin (and subsequently broke my laptop while cycling...don't ask...) I started using backpacks again. I started out with three - a pretty one that I had bought because it worked really well with my laptop (but once you put my ginormous wallet and the laptop charger in was pretty much full, no chance of fitting a water bottle in), a cycling backpack (yes, it was comfortable but you couldn't even fit my laptop in properly, don't even think about going shopping with this one), and a larger one that had enough pockets for everything and even had a strap you could carry your yoga-mat with and a compartment to keep wet swimming stuff separate from all the dry stuff in the main compartment. In a way I really liked the big one because it actually fit a water bottle as well as the laptop. I was even able to go shopping on my way home and fit at least some of the food in there as well. You might wonder why I didn't like this bag in the end. It pretty much came down to one main problem. Once you had the bag on your back and you were cycling somewhere it was really uncomfortable and felt really heavy on the back. By the time you arrived anywhere you had to stretch for half an hour to get the feeling back into your lower back. Oh, and it wasn't really waterproof (I have my laptop and other electronics in there on a regular basis...not something I want to worry about when I'm cycling across town and should be focusing on stuff like traffic).
After looking around for ages, reading every stupid cycling website on the internet, and trying on backpacks in more shops than I care to admit I decided to get a rolltop from San Francisco Freight Baggage. In case you have to even ask - no, they are not paying me for this post.
Before I say anything else - this was the most expensive bag I have ever bought. I don't own handbags or shoes that expensive. Heck, all my coats were cheaper than this bag. Perhaps I shouldn't say this because my mum reads this stuff as well.
That said, was it worth it?
Definitely!
The cool thing about Freight Baggage is that you can either just order a bag at their online shop or you can get one custom-made for the same price. That way you get to choose the colours and whether you want stuff like a laptop divider or reflective strips and whatnot.
I don't think I've ever emailed back and forth with a lovelier person than Brianna at Freight Baggage. She answered all my gazillion questions and helped me choose what I think is the most amazing colour combination ever.
Are you itching to see the bag yet?
Here is a photo I took right after I got back from customs to pick up the parcel. Isn't it pretty?!
According to Verena it is the size of a small house.
I think it's just right!
In cas you are wondering - that is the medium size. The large is huuuge (plus, I am not planning to become a professional bike courier any time soon).
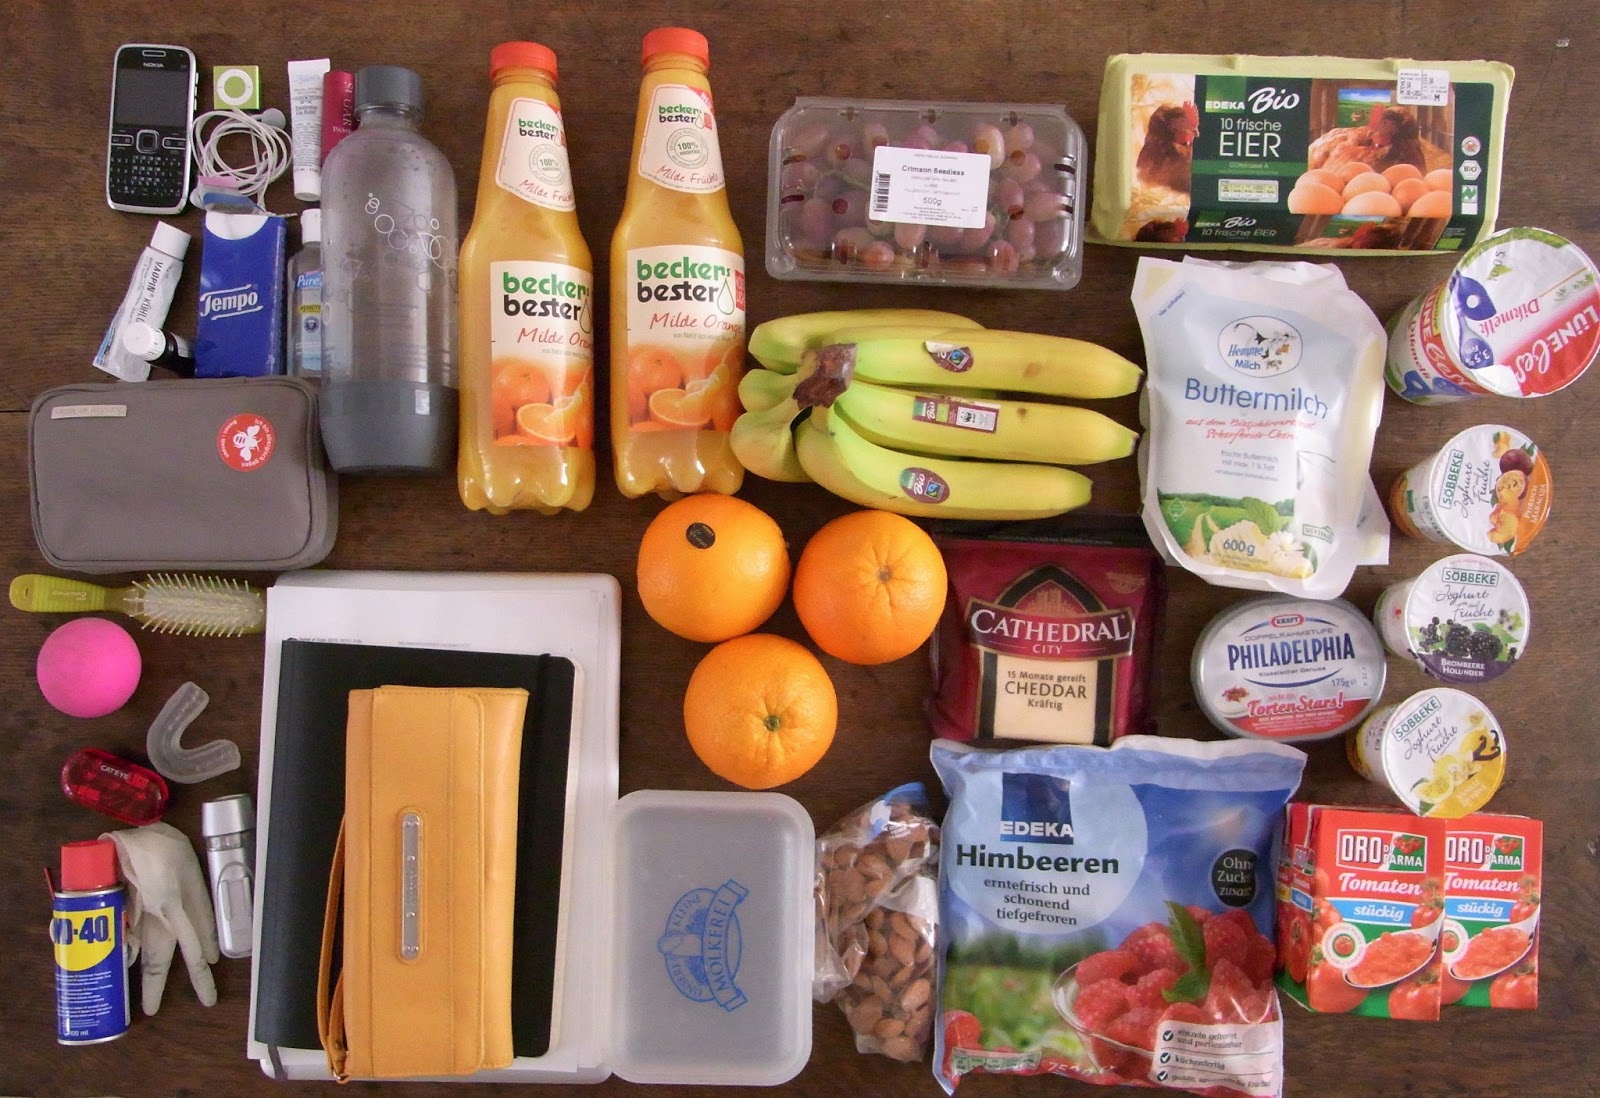
The most important thing which I should have led with is the following: once you put the bag on your back it seems to weigh nothing. Even if it is so full that you can barely close it. Even if you didn't eat all weekend because you were sick and you are exhausted after just walking from the car to the train tracks. Also, it's like Mary Poppin's bag...
...which brings me back to the picture at the beginning of this post. If you click on the version below you can even read some more of my dribble :)
This was everything in my bag when I got home after work today. Everything. Even the mouthguard that I thought I had taken out after lacrosse practice on Wednesday. Even the allergy kit that lives in the bag that you probably couldn't care less about. Even the empty plastic box that was full of cookies for the lab. You get the point...
I'll try and post these pictures every once in a while to keep both you and me entertained. Perhaps I'll even write more about what's actually on the photo...
What do you always have in you bag? Do you have a favourite bag or backpack?
Labels:
freight baggage,
just photos,
shopping
Saturday, 13 April 2013
Granola Cookies
Lately I have been on a slight cookie bender. I think the people in my lab find this quite exciting. What happens most of the time is that I throw random things together and hope for the best. Generally this works really well (at least according to Torsten and Gina who I share an office with). Sometimes we learn things the hard way. Like that replacing all the granulated sugar in your cookie recipe with rapadura sugar is a stupid idea. Or that leftover peppermint bark pieces added to chocolate chip cookies is like my least favourite flavour of all times. Oh well.
Anyhow…a few weeks ago I made the granola cookies Todd and Diane wrote about on White on Rice Couple. And then I made them again. And again. And whenever someone in the lab hears the telltale rattling of my super awesome royal-wedding cookie tin they ask whether I have made the granola cookies again.
So, what else can I tell you about these cookies. I think they are best still slightly warm. Depending on how long you bake them they are either still chewy or really nice and crispy. Because you soak the dried fruit in booze before you make them I have never managed to bake them so they were actually 'dry' (and I went for something resembling a member of the Jersey Shore cast in one batch because I completely forgot that I was actually baking cookies). The original recipe calls for rum or kaluha. I don't like kaluha for anything other than white russians and I didn't have any rum in the house so the first time I used bourbon and it was really really nice. A few batches later I moved onto southern comfort and I think that is what I'll keep using - the spices work really well with the dried fruit and give the cookies a bit of a kick.
Oh, and instead of apricots I'm using dates (cos dried apricots are evil and vile and gross…and I'm that grown-up…) and raisins but I have been thinking about using dried cherries for a while. I think they would be really nice.
Are you convinced yet?
Make some cookies! :)
Granola Cookies (adapted from Porter & Chu)
70g dried, pitted Dates
70g Raisins
Enough Bourbon, Southern Comfort, Rum, or whatever else you like to cover the fruit
60g Walnuts
60g Almonds
155g Flour
1tsp Bicarb
1/2 tsp Salt
180g steel-cut Oats
170g Butter, at room temperature
175g Sugar
2 Eggs
1 tsp Vanilla Extract
125g dark Chocolate Chips
125g white Chocolate Chips
Preheat your oven to 175˚C.
Cut the dates into 1cm pieces, put them into a small bowl with the raisins and cover them with booze.
Toast the nuts until they are starting to brown and your kitchen smells amazing.
In a medium sized bowl mix the flour, bicarb, salt and oats and set aside.
Don't forget about the oven - take the nuts out of the oven and allow them to cool before you either chop them coarsely or simply crush them a bit using your fingers (you can probably guess which approach I favour).
Take out a larger mixing bowl or your fancy kitchen aid mixer bowl and beat the butter for a minute or so until it starts to fluff up a bit, add the sugar and keep beating for another two minutes or so. Add the eggs and vanilla extract and give things another 4 minutes or so. What all of this does is incorporate more air into the mixture and bond the sugar and butter together (at least that's what I'm told). Irrespective of how this whole thing works, what it does is give your cookies a certain lightness while also giving you crispy edges and an amazingly chewy centre. So ignore the fact that you are probably dying from boredom, listen to one of those new super long Justin Timberlake songs and you will barely notice all that waiting :)
Ideally the butter-mixture should have nearly doubled in size and will look a lot paler than before.
Switch to a spatula or wooden spoon so you don't overmix in the next few steps.
Stir in the flour mixture and mix until just combined. Then add the chocolate chips, nuts, and boozy fruit (without the remaining liquid - save that to make a drink or dip the cookies into it later or whatnot).
Scoop two tablespoons of dough (what I do is use my tablespoon measure and scoop up enough dough so it forms a dome on top of the filled spoon that is the same size) per cookie onto a cookie sheet, leaving about 3cm between them. I can normally fit 18 cookies onto my full-size baking sheet if that helps with the spacing between the cookies at all.
Bake the cookies for 15 minutes or until the cookies are starting to brown.
Don't even think about letting the cookies cool completely, give them a few minutes before you transfer some of them onto a wire-rack, then eat the others while they are still warm on the inside.
I hope you have a fantastic rest of your weekend!
You could make some cookies :)
Saturday, 23 March 2013
Wild Rice Pudding
Is there anything better than a bowl of warm, sticky rice pudding when it's cold outside? Or cold rice pudding when it's way too warm?
Unlike lots of other places Berlin seems to be in the middle of the next ice-age. Whenever you think the cold is over, you wake up in the morning and there's another five centimetres of snow. I don't remember it ever snowing as late as my birthday. Right now I don't expect the snow to be gone by the time I get to blow out even more candles than before.
Anyhow, I made this rice pudding one evening after I got back from the gym all freezing because I had forgotten an extra pair of sweatpants for my way back. It's like a warm hug in a bowl. And since you'll be waiting for an hour for the rice to cook you might as well make more so you'll get to eat rice pudding for a few days :)
Wild Rice Pudding
150 g Wild Rice
1 l Milk
3 tbsp Agave Nectar
1 tsp Cinnamon
1/2 tsp Cardamom
1/4 tsp Nutmeg
1/2 tsp Salt
1 tbsp Vanilla Extract
Wash the wild rice. Combine all ingredients in a saucepan and bring to a boil. Simmer for 45-60 minutes stirring occasionally.
I like this rice pudding best when it's still sticky but it's still not as solid as baked rice pudding.
Oh, and while fresh fruit would be amazing, the part of me that cares about seasonal produce made me use local tinned peaches for the photo and it worked like a charm. If you close your eyes it will taste almost like summer is already back :)
Labels:
breakfast,
dessert,
gluten-free,
rice,
vegetarian
Sunday, 10 March 2013
Cinnamon Roll Success
A few weeks ago my friend Verena came and spent a few days with me in Berlin. When I asked what she wanted me to make for her all she said was 'Cinnamon Rolls'.
You see, a few years ago, Verena spent some time in Vancouver and had cinnamon rolls at Grounds for Coffee. And there has been something of an obsession happening since then. I made several attempts recreating these amazing cinnamon rolls (so I've been told) but it is kind of hard aiming for something that you have never tasted and where you don't quite have a feeling for what you're actually aiming for (my mental image of what these wondrous cinnamon rolls at Grounds for Coffee are like is based on a description made up almost entirely of superlatives).
Let me tell you straight away, my first few attempts didn't work out that well. Either they were too dense, or too doughy, or too dry,or something goes wrong with the icing. In short, as much as I love cinnamon rolls, there is no food-group I've had more disasters with.
When I finally got around to reading Baked Elements (I know, it's not that new anymore) I was intrigued by their pumpkin cinnamon rolls. Everything I've cooked from their books has turned out really well and pumpkin puree seemed like the perfect ingredient to solve my too-dry/too-dense problems.
So when Verena mentioned the cinnamon rolls the recipe got its chance. And they were even better than I had expected.
Oh, and if you can't get hold of pumpkin puree make your own by roasting some hubbard or butternut quash in your oven with the skin still on. Scrape the soft flesh off the skin and puree until you have a homogenous consistency. If the puree is still quite liquid, let the puree sit in a colander line with some cheesecloth for a while.
Pumpkin Cinnamon Rolls (adapted from Lewis & Poliafito: Baked Elements)
375g Flour (use something with a higher protein content)
100g Rapadura Sugar
1 tbsp Instant Dry Yeast
1 tsp Salt
1 tsp Cinnamon
1/4 tsp ground Ginger
1/2 tsp ground Cardamom
75g Butter (softened)
175 ml Milk (warmed but NOT hot)
1 Egg
175g Pumpkin Puree
200g Rapadura Sugar
1tsp Cinnamon
1/4 tsp ground Cloves
1/4 tsp Nutmeg
1/4 tsp Salt
2 x 30g Butter
60g softened Cream Cheese
3 tbsp Lemon Juice
150g Icing Sugar
Butter a 26cm springform tin and line the bottom with baking paper. Butter the paper as well, then tust the entire thing with some flour.
Mix the flour, sugar, yeast, salt, and spices in a bowl. Add the butter, milk, and egg and mix until they are well incorporated. If you have a standing mixer this should take two or three minutes, if you are using your hands this might take a bit longer. Add the pumpkin puree and mix for another three minutes. If you, like me, don't own a standing mixer ignore the fact that it will take you forever to get the dough off your fingers once you are done and keep kneading for about 5 minutes. I tend to think about the workout my arms are getting. That thought makes things a bit less boring :)
I'm completely loosing my train of thought today....form the dough into a ball, stick it into a bowl if it's not already in one and cover the bowl with some cling film. Let the dough rest for 30 minutes or so and contemplate the fact that every recipe seems to include the instruction to place dough in a greased bowl. I really don't get that - if you're already working in a bowl you'll either have to get out a second bowl you'll have to wash or if you only own one big bowl you have to wash the stupid bowl, get oil all over it and then wen you're done you'll have to slave away forever making sure there's no fat left in there when you wash it again or if you use it to whip egg-whites the next time you'll be wondering why nothing is happening. That seems like such a waste of time to me. I mean it's not like you won't get the dough out of the bowl if you don't grease it...
Anyhow, after contemplating that for a bit, snap out of it and make the super complicated filling :)
Mix the sugar, salt and spices with 30g of the butter. The original recipe asked for melted butter but I obviously didn't read that part. Using softened butter worked just fine.
After 30 minutes, clear a 40x60cm space on your kitchen counter so you can roll out the dough. Dust your work surface with flour and roll out the dough into a 25x50cm rectangle.
You should have 30g butter left. Melt it and brush the dough with half of it.
Sprinkle the filling over the the dough and spread it out so you have a somewhat even layer. Then, roll up the long side of the dough until you are left with a 50cm long cinnamon roll log.
Cut the log into 5cm pieces and arrange those in the springform tin. If you put one piece in the middle of the tin and then arrange the remaining pieces around it each piece gets about the same amount of space.
Brush the top of the cinnamon roll pieces with the remaining melted butter, cover the tin with some cling film and go and pick up your best friend from the train station. Or watch some TV for 45 minutes. Or clean your living room.
Preheat your oven to 175˚C.
Once the cinnamon rolls have doubled in size, bake them for 25 to 30 minutes until the tops are slightly golden and your entire apartment smells of cinnamon and pumpkin.
Whisk the cream cheese and lemon juice until you can't see any more lumps. Add the icing sugar and keep whisking until you have a smooth mixture.
Let the rolls cool slightly so you don't burn your fingers.
If you are sensible, take the rolls out of the springform before adding the icing. Don't listen to your friend who tells you the pictures will be super pretty if you add the icing beforehand (you will end up with hands covered in icing as you are trying to tear the rolls apart later...).
Hmm...coffee and cinnamon rolls!
I hope you have a fab week!
Oh, and if you can't get hold of pumpkin puree make your own by roasting some hubbard or butternut quash in your oven with the skin still on. Scrape the soft flesh off the skin and puree until you have a homogenous consistency. If the puree is still quite liquid, let the puree sit in a colander line with some cheesecloth for a while.
Pumpkin Cinnamon Rolls (adapted from Lewis & Poliafito: Baked Elements)
375g Flour (use something with a higher protein content)
100g Rapadura Sugar
1 tbsp Instant Dry Yeast
1 tsp Salt
1 tsp Cinnamon
1/4 tsp ground Ginger
1/2 tsp ground Cardamom
75g Butter (softened)
175 ml Milk (warmed but NOT hot)
1 Egg
175g Pumpkin Puree
200g Rapadura Sugar
1tsp Cinnamon
1/4 tsp ground Cloves
1/4 tsp Nutmeg
1/4 tsp Salt
2 x 30g Butter
60g softened Cream Cheese
3 tbsp Lemon Juice
150g Icing Sugar
Butter a 26cm springform tin and line the bottom with baking paper. Butter the paper as well, then tust the entire thing with some flour.
Mix the flour, sugar, yeast, salt, and spices in a bowl. Add the butter, milk, and egg and mix until they are well incorporated. If you have a standing mixer this should take two or three minutes, if you are using your hands this might take a bit longer. Add the pumpkin puree and mix for another three minutes. If you, like me, don't own a standing mixer ignore the fact that it will take you forever to get the dough off your fingers once you are done and keep kneading for about 5 minutes. I tend to think about the workout my arms are getting. That thought makes things a bit less boring :)
I'm completely loosing my train of thought today....form the dough into a ball, stick it into a bowl if it's not already in one and cover the bowl with some cling film. Let the dough rest for 30 minutes or so and contemplate the fact that every recipe seems to include the instruction to place dough in a greased bowl. I really don't get that - if you're already working in a bowl you'll either have to get out a second bowl you'll have to wash or if you only own one big bowl you have to wash the stupid bowl, get oil all over it and then wen you're done you'll have to slave away forever making sure there's no fat left in there when you wash it again or if you use it to whip egg-whites the next time you'll be wondering why nothing is happening. That seems like such a waste of time to me. I mean it's not like you won't get the dough out of the bowl if you don't grease it...
Anyhow, after contemplating that for a bit, snap out of it and make the super complicated filling :)
Mix the sugar, salt and spices with 30g of the butter. The original recipe asked for melted butter but I obviously didn't read that part. Using softened butter worked just fine.
After 30 minutes, clear a 40x60cm space on your kitchen counter so you can roll out the dough. Dust your work surface with flour and roll out the dough into a 25x50cm rectangle.
You should have 30g butter left. Melt it and brush the dough with half of it.
Sprinkle the filling over the the dough and spread it out so you have a somewhat even layer. Then, roll up the long side of the dough until you are left with a 50cm long cinnamon roll log.
Cut the log into 5cm pieces and arrange those in the springform tin. If you put one piece in the middle of the tin and then arrange the remaining pieces around it each piece gets about the same amount of space.
Brush the top of the cinnamon roll pieces with the remaining melted butter, cover the tin with some cling film and go and pick up your best friend from the train station. Or watch some TV for 45 minutes. Or clean your living room.
Preheat your oven to 175˚C.
Once the cinnamon rolls have doubled in size, bake them for 25 to 30 minutes until the tops are slightly golden and your entire apartment smells of cinnamon and pumpkin.
Whisk the cream cheese and lemon juice until you can't see any more lumps. Add the icing sugar and keep whisking until you have a smooth mixture.
Let the rolls cool slightly so you don't burn your fingers.
If you are sensible, take the rolls out of the springform before adding the icing. Don't listen to your friend who tells you the pictures will be super pretty if you add the icing beforehand (you will end up with hands covered in icing as you are trying to tear the rolls apart later...).
Hmm...coffee and cinnamon rolls!
I hope you have a fab week!
Subscribe to:
Posts (Atom)